
Install fireplace marble mantels and hearth extensions in compliance with NFPA 211 and IRC R1001 codes. Maintain at least 12 inches of non-combustible stone clearance above and beside the firebox opening before introducing any combustible wood trim. For firebox openings of 6 sq ft or greater (standard Rumford size), construct a non-combustible hearth extension projecting at least 20 inches in front and 8 inches beyond each side.
At a Glance: Key Takeaways
- NFPA 211 / IRC R1001 Code Compliance: Mandatory fire safety standards regulating mantel clearances and hearth extension projections.
- The 20-Inch Hearth Rule: Openings \(\ge 6\text{ sq ft}\) require at least 20 inches of non-combustible floor projection in front of the firebox.
- Solid White Carrara Marble Slabs: 3/4" to 1-1/4" thick natural stone slabs anchored with concealed brass wire ties and non-staining white thin-set.
- Cantilevered Raised Hearth Platforms: Structural concrete cantilever slabs elevating the firebox 12" to 18" for superior seated sightlines.
- Thermal Break Expansion Gaps: 1/4" flexible silicone expansion joint between marble hearth edge and surrounding hardwood flooring.
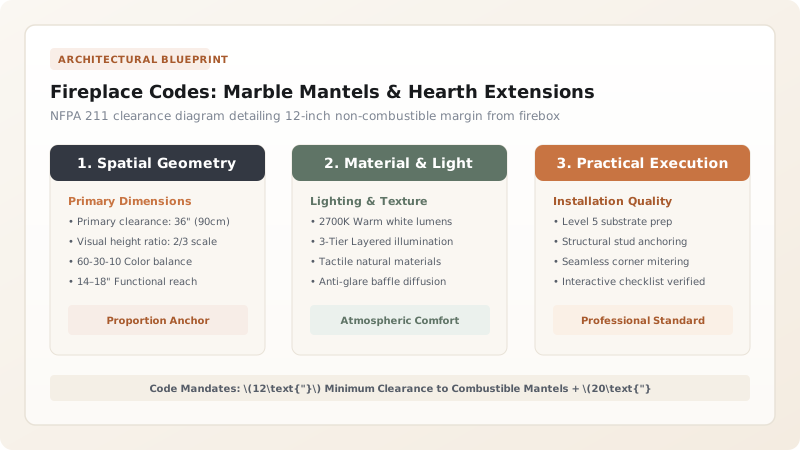
1. Building Safety Codes: NFPA 211 & The 12-Inch Combustible Margin
Building inspectors frequently fail fireplace trim because carpenters install decorative wood mantels too close to the fire opening. Under NFPA 211 and International Residential Code (IRC) Section R1001.11:
- All combustible wood trim must maintain a Minimum Clearance of 6 Inches from the firebox opening.
- For any combustible trim projecting more than 1-1/2 inches (such as a deep carved mantel shelf), the clearance must increase by 1 Inch for every 1/8 Inch of Projection, up to a standard minimum of 12 Inches of Non-Combustible Facing directly above the arch.
A solid Carrara Marble Slab Surround (3/4" to 1-1/4" thick) provides the ideal code-certified thermal barrier while framing the fire in timeless classical luxury. Learn about box beam integration in coffered ceiling box beams.

2. Hearth Engineering: 20-Inch Projections & Hardwood Floor Expansion Joints
Because Rumford fireplaces are taller than conventional units, their opening area almost always exceeds 6 Square Feet. Under IRC R1001.9, this mandates a Hearth Extension projecting at least 20 Inches in Front and 8 Inches Beyond Each Side.
Hardwood flooring must never be butted tight against stone hearth slabs. As wood expands with seasonal humidity, it will crush against the stone, buckling the floor or cracking the marble. Masons leave a 1/4-inch Expansion Gap filled with color-matched 100% silicone sealant. Master Rumford aerodynamics in throat aerodynamics and drafting and review the Rumford fireplace hub.
Hearth Extension Sizing Codes
Use this reference table to calculate exact physical dimensions, ratios, and specifications before purchasing:
| Firebox Opening Area | Front Hearth Projection Required | Side Hearth Projection Required | Subfloor Construction |
|---|---|---|---|
| Under 6.0 sq ft (Small Unit) | 16 inches minimum | 8 inches minimum | 4" Reinforced concrete slab |
| 6.0 sq ft or Greater (Standard Rumford) | 20 inches minimum | 8 inches minimum | 4" Reinforced concrete with rebar ties |
| Raised Hearth (>12" high) | 20 inches + height step down | 12 inches recommended | Concrete masonry unit (CMU) footing wall |
| Combustible Subfloor Underneath | Prohibited unless protected | Prohibited | Mandates 4" non-combustible hollow block core |
Grey Thin-Set Marble Staining Destruction
Every successful decoration project must account for physical and environmental constraints:
Using Standard Grey Portland Thin-Set Bleeding Dark Stains Through Carrara Marble Slabs
White Carrara marble is a translucent metamorphic stone; setting slabs in standard grey thin-set allows dark grey iron minerals to leach through the crystal structure, permanently staining pristine white marble into mottled greenish-grey mud; always use 100% pure white polymer-modified thin-set mortar specifically formulated for natural white marble.
How to Install a Carrara Marble Fireplace Surround and Hearth
Execute this professional sequence to achieve flawless results without backtracking:
Verify Sub-Hearth Concrete Meets 20" Code Extension
Measure reinforced concrete pad; ensure it extends 20" in front and 8" to each side of opening; level with diamond cup wheel.
Drill Mechanical Anchor Pin Holes in Masonry Wall
Drill 3/8" holes into brick rough-framing to receive 1/4" solid brass L-shaped anchor ties for vertical marble jambs.
Spread 100% White Polymer-Modified Thin-Set on Hearth
Comb pure white marble thin-set with 1/2" square-notched trowel over concrete hearth; back-butter marble slab 100%.
Bed 1-1/4" Carrara Marble Hearth Slab and Check Level
Lower hearth slab into bed; tap with dead-blow rubber mallet; verify dead-level in both axes with 4-foot spirit level.
Mount Vertical Marble Jamb Legs with Plaster Spots and Brass Pins
Secure vertical jamb slabs using brass wire anchors embedded in wall sockets, backed with drywall plaster setting spots.
Set Marble Lintel Header with Concealed Stainless Steel Angle
Rest horizontal marble header on jambs, supported from behind by heavy 1/4" stainless steel angle iron bolted to masonry.
Seal Hardwood Transition Perimeter with Silicone Joint
Leave 1/4" gap to hardwood floor; fill with matching non-sanded flexible silicone sealant to absorb seasonal floor expansion.
Common Mistakes & Countermeasures
Avoid these costly errors that compromise aesthetics, ergonomics, and budget:
Gluing Marble Slabs with Construction Adhesive
Project Execution Checklist
Track your physical progress. Checkboxes persist automatically on this device:
Frequently Asked Questions
Can a wood mantel shelf touch the top of the marble surround?
Yes! The wood mantel can rest directly on top of the marble facing, provided the bottom of the wood is at least 12 inches above the active firebox opening.


