
Trimless drywall plaster-in jamb profiles and concealed edge pulls are the architectural finish components that give high-end pocket doors their seamless, casing-free appearance. Perforated aluminum J-bead extrusions are fastened to pocket split studs and embedded in skim-coat plaster to create razor-sharp 90-degree drywall returns, while concealed spring-loaded magnetic edge pulls or push-to-release touch latches allow the door to sit 100% flush within the pocket wall and eject with a gentle touch.
At a Glance: Key Takeaways
- Perforated Aluminum J-Beads: Knurled zinc/aluminum wings providing permanent mechanical keying for joint compound without edge cracking.
- Sharp 90-Degree Drywall Returns: Eliminating traditional 75mm wooden casing architraves for a pure minimalist contemporary plane.
- Integrated Shadowlines: 6mm architectural reveal recesses providing acoustic buffer space and hiding minor framing imperfections.
- Spring-Loaded Magnetic Pop-Out Pulls: Concealed mortise hardware with flush round or rectangular faceplates snapping out upon finger press.
- Extruded Rubber Slam Buffers: Continuous co-extruded elastomeric sealing beads embedded in the strike jamb for silent door closure.
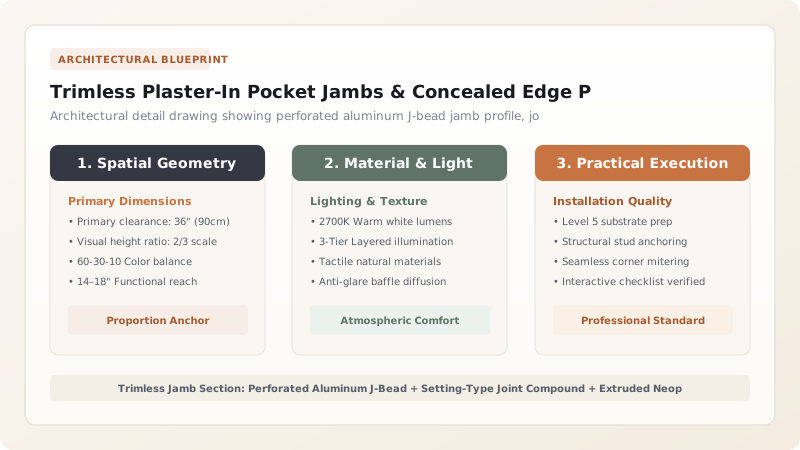
1. Architectural Plastering: Perforated J-Beads & Anti-Crack Skimming
Traditional door installations conceal rough framing gaps using wide timber casings and architraves. In trimless architecture, the drywall returns straight into the door jamb opening, creating an unforgiving exposed edge that must resist door impact vibrations without cracking.
This is achieved using Perforated Aluminum Plaster-In Jamb Profiles (J-Beads / Shadowline Profiles):
- Mechanical Keying Holes: The aluminum wings feature continuous rows of 4mm perforated holes. When setting-type joint compound (hot mud) is pressed over the profile, it keys through the perforations, locking the metal profile to both the aluminum split stud and the drywall core.
- High-Tension Fiberglass Mesh Tape: To prevent hairline stress cracks along the drywall-to-metal boundary under repetitive door slamming, the joint is taped with wide cross-woven fiberglass mesh embedded in elastomeric joint compound.
- Co-Extruded Soft Neoprene Buffer: The interior corner of the jamb extrusion houses a recessed channel fitted with a cellular neoprene gasket. When the door slides shut, it strikes this soft cushion rather than hard plaster, dampening sound and eliminating edge chipping. Review framing integration in our guide to split-stud cage framing.

2. Door Retrieval Hardware: Pop-Out Ring Pulls & Push Latches
When a pocket door opens fully, the leading stile should slide completely flush with the pocket wall opening. However, once flush, traditional side-mounted cup pulls are hidden inside the pocket wall, leaving no way to pull the door out.
Architectural solutions include two specialized hardware mechanisms:
- Concealed Spring-Loaded Pop-Out Ring Pulls: A cylindrical brass or stainless steel cylinder mortised into the leading edge of the door. Pressing the central brass button releases a spring-loaded ring that flips out 30mm, giving users a firm handle to draw the door out of the wall. When finished, pushing the ring clicks it back flush into the stile.
- Magnetic Push-to-Open Latches: Mounted at the rear of the pocket cavity. Opening the door all the way clicks a magnetic spring catch. To retrieve the door, the user simply presses the exposed front edge of the door inward by 5mm; the spring catch trips, ejecting the door \(50\text{ mm}\) out of the pocket automatically. Connect to trolleys in overhead ball-bearing trolleys.
3. Ceiling Integration: Flush Track Channels & Continuous Ceiling Planes
The ultimate expression of trimless pocket architecture is the Full-Height Floor-to-Ceiling Door:
- Track Embedded in Ceiling Plenum: The aluminum box track is mounted flush within the ceiling framing before drywall is hung. Plaster-in beads finish the ceiling drywall directly to the track throat, making the sliding track invisible from the room.
- Zero Header Visual Gap: The door slab extends from the floor to within \(3\text{ mm}\) of the ceiling plane, creating the dramatic visual illusion that an entire wall section slides away to connect rooms. Review master cavity slider planning in our pocket door systems hub.
Pocket Door Edge Retrieval Hardware Comparison
Use this reference table to calculate exact physical dimensions, ratios, and specifications before purchasing:
| Hardware Format | Standard Fixed Edge Finger Cup | Spring-Loaded Pop-Out Ring Pull | Magnetic Rear Push-to-Open Catch |
|---|---|---|---|
| Pocket Concealment | Requires door to project 75mm (stops short) | 100% flush pocket concealment | 100% flush pocket concealment |
| Operating Action | Finger hooked into small recess | Push button pops out brass ring | Push door inward; springs out 50mm |
| Installation Mortise | Simple shallow rectangular mortise | Deep cylindrical 25mm bore hole | Surface mounted at rear of track/pocket |
| Finish Materiality | Stamped steel or cheap plastic | Solid forged brass / 316 stainless | Concealed nylon body with neodymium magnet |
| Minimalist Aesthetic Rating | Poor (visible hardware; door protrudes) | Superior (flush, jewel-like precision) | Ultimate (zero hardware visible on edge) |
Plaster-In Jamb & Hardware Constraints
Every successful decoration project must account for physical and environmental constraints:
Plaster Cracking from Door Impact
Using standard drying-type premixed joint compound on trimless jamb beads leads to cracking within months due to door closing vibration. Contractors must use chemical-hardening setting-type compound (Durabond) reinforced with fiberglass mesh tape.
Magnetic Push Latch Misalignment
If the rear push-to-open latch is mounted even 3mm too far back, the door will hit the rear stop before the latch catches. The rear latch must have micro-threaded adjustment screws to calibrate travel depth.
Inaccurate Door Stile Plumb
Because trimless jambs have no wooden stop moldings to hide uneven gaps, any door slab warpage or hanging out-of-plumb will reveal an unsightly tapered shadowline gap against the drywall strike.
Trimless Plaster-In Jamb & Hardware Installation Protocol
Execute this professional sequence to achieve flawless results without backtracking:
Jamb Extrusion Alignment & Fastening
Align perforated aluminum J-bead profiles to pocket frame edges; plumb with laser transit; fasten with countersunk tek screws at 200mm centers.
Joint Meshing & High-Strength Mudding
Apply self-adhesive fiberglass mesh tape over aluminum wings; bed with high-strength setting-type compound (Durabond 90); allow 2 hours to cure.
Finish Skim & Feathering
Apply two finish coats of lightweight drywall compound, feathering joint out 300mm onto wall face; sand smooth with 220-grit dustless vacuum sander.
Edge Pull Mortise CNC Milling
Using template jig and plunge router, mill precision 25mm diameter cylindrical mortise into door leading edge; seal raw wood with polyurethane primer.
Pop-Out Hardware Flush Setting
Insert solid brass pop-out ring pull assembly; pre-drill screw holes and secure with matching stainless countersunk screws; verify flush alignment.
Acoustic Buffer & Door Stroke Calibration
Press continuous neoprene sealing bead into jamb channel; hang door; adjust soft-close damper so door seals gently against neoprene buffer without bounce.
Common Mistakes & Countermeasures
Avoid these costly errors that compromise aesthetics, ergonomics, and budget:
Using Paper Tape Over Metal Perforated Wings
Mortising Edge Pull Off-Center
Sanding Metal Profiles with Coarse Sandpaper
Project Execution Checklist
Track your physical progress. Checkboxes persist automatically on this device:
Frequently Asked Questions
Can trimless pocket door jambs be painted the same color as the wall?
Yes. In fact, that is their primary aesthetic purpose. The aluminum J-bead profile is primed and painted seamlessly with the surrounding drywall using standard architectural wall paint, creating an unbroken monolithic surface where the wall returns cleanly into the opening.
How do you lock a trimless pocket door for privacy in bathrooms?
Privacy locking is achieved using specialized flush pocket door privacy locks. These feature a small thumbturn on the inside that extends a brass hook bolt into a strike plate recessed in the trimless jamb. On the exterior, a minimalist coin-turn or emergency release slot provides life-safety override access.
Can baseboards still be installed with trimless pocket doors?
Yes. Baseboards can terminate cleanly with a 45-degree return right at the drywall corner of the jamb opening. Alternatively, high-end minimalist projects utilize 'recessed baseboards' (shadowline baseboards) that run flush with the drywall plane, carrying the flush trimless language through the entire room.


