
Traditional Mexican Talavera is a centuries-old majolica earthenware tile handcrafted in Puebla, Mexico, characterized by a hand-kneaded dual-clay bisque (black and white volcanic clays) and a mineral tin-opacified glaze painted with natural cobalt, iron, and copper pigments. Due to dimensional variations inherent in wood-fired bisques, installations require 5mm to 8mm wide sanded grout joints, highly flexible polymer-modified thinset (ANSI A118.4/A118.15 or ISO C2TE), and careful protection against freeze-thaw spalling in temperate climates.
At a Glance: Key Takeaways
- Puebla DO Certification: Authentic Talavera is legally protected under Mexican Denomination of Origin (DO NOM-132-SCFI-1998) from certified Puebla talleres.
- Dual-Clay Bisque: Blending dense black clay (barro negro) and porous white clay (barro blanco) to optimize thermal shock resistance.
- Hand-Drawn Majolica Glazes: Tin-opacified leaded/unleaded frits decorated with natural mineral pigments (cobalt blue, antimony yellow, copper green).
- Wide Grout Joints (5-8mm): Essential to absorb the ±2mm to ±4mm dimensional warpage natural to hand-molded earthenware.
- Freeze-Thaw Vulnerability: High-porosity earthenware requires indoor, shaded, or mild-climate installation with hydrophobic sealing against frost damage.
In-Depth Guides in this Directory
Explore specialized subtopic blueprints, technical dimensions, and execution checklists:
Talavera Bisque Tolerances: Clay Sizing & 6mm Grout Joints
Technical guide to Puebla clay bisque shrinkage, wedging dynamics, hand-formed dimensional tolerances, and wide 6-8mm sanded grout joint layout for Talavera tiles.
Majolica Glaze Protection: Weathering & Freeze-Thaw Limits
Engineering guide to tin-opacified majolica glaze chemistry, crazing dynamics, vapor-permeable sealers, acid sensitivity, and freeze-thaw spalling prevention.
Talavera Stair Risers & Courtyard Fountain Coping
Architectural detailing guide for Talavera ceramic tile stair risers, fountain basin copings, waterproof flashing, bullnose treads, and loggia wainscots.
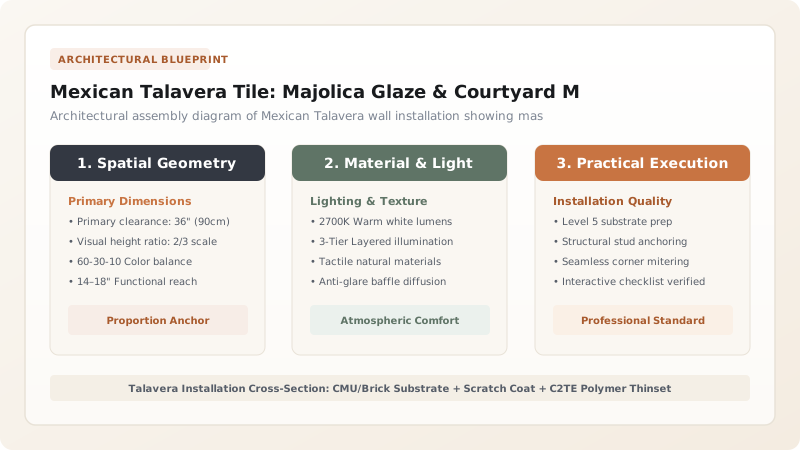
1. The Puebla Majolica Tradition: History & Mineral Glaze Chemistry
Introduced to Mexico by Spanish artisans from Talavera de la Reina in the 16th century, Mexican Talavera merged Moorish Andalusian tile craftsmanship with indigenous Mesoamerican clay mastery in the colonial capital of Puebla de los Ángeles.
Authentic Talavera is defined by its Denomination of Origin (NOM-132-SCFI-1998) and strict artisan chemistry:
- The Dual-Clay Body: Raw clay is harvested from the foothills of the Popocatépetl volcano, blending equal parts barro negro (dark, iron-rich, plastic clay) and barro blanco (light, sandy, structural clay). The mixture is trodden by foot, hand-kneaded, and cured in underground damp cellars for up to six months. Learn bisque tolerances in clay bisque dimensional tolerances.
- Tin-Opacified Enamel: The once-fired bisque (jahuete) is dipped in an opaque white glaze formulated with tin oxide (\(\text{SnO}_2\)) and silica frit. When fired, microscopic tin oxide crystals remain suspended in the glass matrix, scattering light and creating a milky, semi-translucent, lustrous white canvas.
- Hand-Painted Mineral Oxides: Master painters (pinceleros) apply six traditional mineral pigment formulations using mule-hair brushes: Cobalt Blue (\(\text{CoO}\)), Antimony Yellow (\(\text{Sb}_2\text{O}_3\)), Copper Green (\(\text{CuO}\)), Iron Red/Terracotta (\(\text{Fe}_2\text{O}_3\)), Carbon Black (\(\text{MnO}_2\)), and Pale Violet. Detailed glaze chemistry is explored in majolica glaze protection.

2. Substrate Preparation & Flexible Polymer Thinset Mechanics
Handmade earthenware tiles possess a high water absorption rate (\(E_b = 10\%\text{ to }16\%\)) and significant thickness variations (8mm to 14mm). Standard rigid tile mortars will fail under thermal shear:
Where \(\tau\) is interfacial shear stress, \(E_t, E_s\) are moduli of elasticity for tile and substrate, and \(\alpha_t, \alpha_s\) are coefficients of thermal expansion. To ensure long-term bonding:
- Flexible Polymer-Modified Thinset: Specify mortar meeting ANSI A118.15 or ISO 13007 C2TE S1/S2 (highly deformable). The polymer modifiers bridge differential expansion between the porous clay bisque and rigid concrete masonry units (CMU).
- Substrate Pre-Wetting vs. Polymer Back-Buttering: Traditional cement setting required soaking tiles in water for 30 minutes; however, with modern polymer-modified mortars, tiles should not be soaked. Instead, apply a flat skim coat of thinset directly to the back of each tile (back-buttering) using a 10mm x 10mm square-notched trowel on the wall to guarantee > 95% mortar coverage.
- Mortar Bed Leveling: Variations in tile thickness require the setter to adjust thinset bed thickness between 4mm and 8mm dynamically, tapping individual tiles flush with a soft rubber mallet.
3. Architectural Typologies: Courtyard Fountains & Stair Risers
In colonial Spanish-Mexican architecture, Talavera is celebrated as a focal architectural surface:
- Stair Riser Accents: In courtyard stairways, glazed Talavera tiles are installed exclusively on the vertical risers, paired with bullnose terracotta or quarry tiles on the horizontal treads. This shields the delicate majolica glaze from foot abrasion while transforming staircases into vibrant ceramic tapestries. Read layout details in stair risers and fountain copings.
- Submerged Fountain Coping: Water features demand multi-layer tanking: continuous elastomeric waterproof membranes (ANSI A118.10), high-performance anti-efflorescence epoxy or polymer grout, and strict avoidance of submerged freezing zones.
- Grout Joint Width: Never attempt butt-joint or 1-2mm modern rectified joints. Talavera requires a minimum 6mm (1/4") to 8mm (5/16") sanded grout joint. The wide sanded joint accommodates edge irregularities, framing each tile as an individual work of art.
Mexican Talavera Tile Installation Specification Matrix
Use this reference table to calculate exact physical dimensions, ratios, and specifications before purchasing:
| Architectural Zone | Tile Thickness | Adhesive Spec | Grout Type & Width | Waterproofing Requirement | Climate Suitability |
|---|---|---|---|---|---|
| Courtyard Wall Mural / Wainscot | 8 - 10 mm | ANSI A118.4 Polymer Thinset | Sanded Cement Grout (6mm) | Water-resistant primer | Frost-Free / Covered Arches |
| Stair Riser Accents | 10 - 12 mm | ANSI A118.15 Flexible Thinset | High-Performance Sanded (6-8mm) | Elastomeric crack isolation | Mild to Warm Climates |
| Courtyard Fountain Waterline | 10 - 14 mm | C2TE S2 High-Flex Polymer | 100% Solids Epoxy Grout (6mm) | Dual-coat ANSI A118.10 Membrane | Non-Freezing Water Features Only |
| Interior Kitchen Backsplash | 8 - 10 mm | ANSI A118.4 Standard Modified | Sanded / Unsanded Polyblend (5mm) | Moisture-resistant drywall backing | All Climates (Heated Indoors) |
Mexican Talavera Engineering & Site Constraints
Every successful decoration project must account for physical and environmental constraints:
Dimensional Variance
Hand-molded tiles vary up to ±3mm in width and ±2mm in thickness; rigid grid spacers cannot be used. Tile setters must rely on eye-alignment and reference stringlines.
Surface Convexity (Pillowing)
Wood firing produces crowned or dished surfaces; grouting must be tooled concave to reveal the glossy hand-painted glaze edges.
Glaze Crazing
Fine microscopic hairline crazing in the glaze is a natural, authentic feature of majolica earthenware; however, in wet areas, water penetrating cracks requires vapor-permeable sealers.
Zero Abrasion Resistance for Floors
Talavera is classified as PEI Class 1 or 2 (wall only); installing authentic glazed Talavera on heavy foot-traffic floors will abrade the decorative mineral enamel within months.
Master Step-by-Step Mexican Talavera Installation Protocol
Execute this professional sequence to achieve flawless results without backtracking:
Substrate Inspection & Curing
Verify masonry or cement backer unit (CBU) substrate is plumb within 3mm over 2 meters. Allow concrete substrates to cure a minimum of 28 days.
Water Barrier / Tanking Application
For fountain copings or exterior damp walls, apply two coats of fluid-applied elastomeric waterproofing membrane meeting ANSI A118.10.
Tile Dry Layout & Blending
Unpack boxes from multiple production lots. Dry-lay tiles on the floor to mix glaze shade variations and establish balanced spacing before applying mortar.
Setting Mortar Application
Spread ANSI A118.15 polymer-modified thinset with the flat side of the trowel, then comb with an 8mm x 10mm square-notch trowel. Back-butter each tile with a 2mm flat skim coat.
Artisanal Tile Placement
Press tiles into the wet mortar with a twisting motion to collapse ridges. Gauge joints at 6mm using manual rubber wedges rather than rigid cross-spacers, tapping gently with a rubber float.
Grouting with Sanded Matrix
Allow thinset to cure for 24 hours. Pack joints firmly with polymer-modified sanded grout using a 45-degree hard rubber grout float.
Sponge Wash & Glaze Polish
Tool joints with a damp cellulose sponge after 20-30 minutes. Once grout haze forms, buff tile faces with a clean microfiber cloth to reveal bright cobalt glazes.
Common Mistakes & Countermeasures
Avoid these costly errors that compromise aesthetics, ergonomics, and budget:
Attempting tight 1-2mm modern grout joints with Talavera
Installing porous Talavera tiles in outdoor freezing climates
Using unbonded mastic or pre-mixed adhesive in wet or outdoor zones
Project Execution Checklist
Track your physical progress. Checkboxes persist automatically on this device:
Frequently Asked Questions
How do you verify if Talavera tile is genuine Puebla certified?
Authentic certified Talavera bears the official workshop trademark stamp, the artisan's signature or monogram hand-painted on the unglazed bisque back, and the official certification DO number (Denominación de Origen DO4) from the Consejo Regulador de la Talavera.
Can Talavera tiles be cut without chipping the delicate hand-painted glaze?
Yes. Talavera must be cut on an electric continuous-rim diamond blade wet saw. Score the glazed surface lightly on the first pass, then complete the cut slowly. Do not use manual score-and-snap cutters, which shatter the soft earthenware.
Should Talavera tiles be sealed before or after grouting?
The glossy glaze itself is vitreous and impervious to stains, but the unglazed clay edges and micro-crazing can absorb grout pigments. Apply a grout release agent or penetrating penetrating sealer across tile faces prior to applying dark-colored grouts.


