
Traditional Dutch marquetry is a high-luxury decorative woodworking technique dating to the Dutch Golden Age and William-and-Mary era, where hundreds of hand-cut veneer pieces (exotic hardwoods, dyed sycamore, bone, and horn) are assembled into floral vases, birds, and delicate filigree (seaweed or arabesque) patterns, shaded with hot sand, and bonded to carcases using hot animal protein glue.
At a Glance: Key Takeaways
- Chevalet de Marqueterie: Specialized horizontal fretsaw workbench allowing blade kerf compensation and micrometer precision.
- Packet Cutting (Boulle Technique): Stacking 4 to 8 veneer leaves together to cut ground and inlay simultaneously with matching seams.
- Hot-Sand Shading (Ombrage): Dipping veneer pieces into hot volcanic sand (180°C) to create organic three-dimensional shadow gradients.
- Dyed Sycamore Harewood: Sycamore treated with ferrous sulfate (green vitriol) to produce iridescent silvery-gray botanical leaves.
- Animal Protein Scotch Glue: High-tack collagen adhesive (hide/bone glue) applied hot and pressed with heavy brass veneer hammers.
- Toothing Plane Preparation: Scratching substrate timber with serrated toothing irons to provide mechanical tooth for veneer adhesion.
In-Depth Guides in this Directory
Explore specialized subtopic blueprints, technical dimensions, and execution checklists:
Boulle Packet Cutting & Chevalet Kerf Control
Master 17th-century fret-sawing precision: the chevalet de marqueterie workbench, Boulle packet sandwiching, blade kerf angle compensation, and zero-gap joints.
Hot-Sand Shading & Dyed Sycamore Harewood Tints
Master 17th-century marquetry finishing: hot-sand scorching gradients (ombrage at 180°C), ferrous sulfate harewood dyeing, and organic mineral wood tints.
Animal Protein Scotch Glue & Veneer Hammering
Master traditional marquetry laying: hot animal protein hide glue (192-gram bloom at 60°C), substrate toothing planes, and brass veneer hammer squeegeeing.
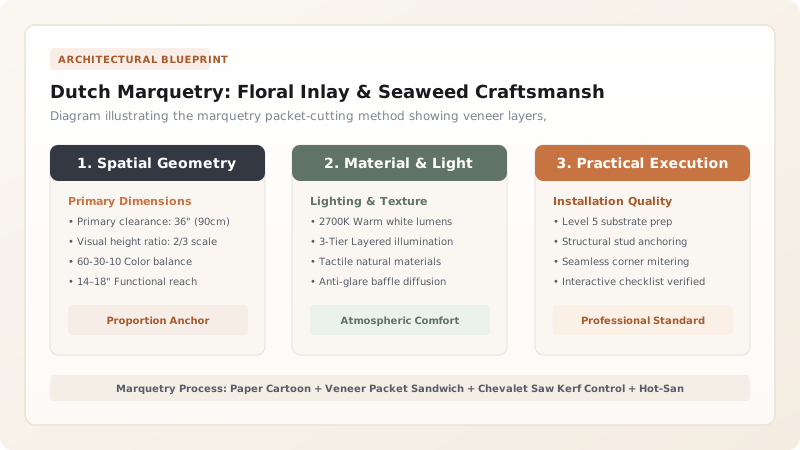
1. Golden Age Artistry: The Chevalet & Packet Cutting
Developed in Amsterdam and The Hague during the 17th century by master ebonistes like Jan van Mekeren and perfected across the English Channel under William and Mary, Dutch Marquetry revolutionized European cabinetmaking.
Before the invention of modern laser cutters, artisans achieved zero-gap inlay joints using the chevalet de marqueterie (marquetry cutter's donkey)—a foot-operated clamping vise combined with a counterbalanced horizontal fretsaw frame.
Veneers (sawn to \(1.5\text{ to }2.0\text{ mm}\) thickness) are stacked into a packet sandwiched between sacrificial birch ply layers. By tilting the saw table at a micro-angle \(\theta\) matching the saw blade kerf width \(k\):
The kerf gap is completely eliminated: the cut inlay piece drops into the background ground with an exact, friction-tight joint. Explore packet cutting mechanics in Boulle packet cutting and chevalet saw kerf control.

2. The Magic of Ombrage: Hot-Sand Shading & Dyed Harewood
A flat wooden flower looks lifeless. Dutch masters brought petals, birds, and acanthus scrolls to life through ombrage (hot-sand shading).
A cast-iron skillet filled with fine silica or volcanic sand is heated over coals to approximately \(180^\circ\text{C}\). Using watchmaker tweezers, the artisan dips the edge of a delicate holly or boxwood leaf into the hot sand for 2 to 5 seconds. The heat toasts the cellular cellulose, creating a smooth, scorched gradient from golden-amber to deep charred brown without burning the wood. Read shading and dye formulas in hot-sand shading scorching and dyed sycamore tints.
3. Substrate Bonding: Scotch Glue & The Veneer Hammer
Modern synthetic PVA and contact adhesives fail in traditional marquetry: they creep under seasonal humidity and are impossible to reverse. Authentic marquetry relies on hot animal protein Scotch glue (liquid collagen heated to \(60^\circ\text{C}\)).
The substrate oak or pine carcase is scored with a toothing plane (a high-angle plane with serrated iron teeth) to create parallel mechanical grooves. Hot glue is flooded over the wood, the assembled marquetry sheet is placed, and the artisan works from the center outward with a heavy brass veneer hammer, squeegeeing out excess glue and creating a powerful atmospheric vacuum. Master hammer veneering in animal protein glue hammer veneering and toothing planes.
Marquetry Timber Selection & Veneer Specifications
Use this reference table to calculate exact physical dimensions, ratios, and specifications before purchasing:
| Veneer Species | Natural Color / Chemical Tint | Botanical / Decorative Role | Grain / Working Quality |
|---|---|---|---|
| European Boxwood (Buxus) | Pale ivory / lemon yellow | Flower petals, jasmine, ivory accents | Ultra-dense, zero grain pores, scorches cleanly |
| Dyed Sycamore (Harewood) | Treated with iron sulfate (silvery grey/green) | Foliage leaves, acanthus foliage, stems | Rippled fiddleback figure; takes chemical dyes deeply |
| Kingwood / Tulipwood | Violet-brown with dark purple stripes | Variegated tulip petals, border bandings | Dense Dalbergia rosewood; natural luster |
| Walnut Oyster Veneer | Concentric radial annual growth rings | Background medallions, door field panels | Cut cross-grain through branches (oyster work) |
| Ebony / Bog Oak | Deep jet black | Background ground panels, seaweed filigree | High contrast backdrop for brilliant floral bouquets |
Craftsmanship & Environmental Constraints
Every successful decoration project must account for physical and environmental constraints:
Veneer Thickness Matching
All species within a single marquetry packet must have identical thickness (within 0.05mm); a thicker leaf will create uneven steps that sand through during finishing.
Gel Time of Hot Hide Glue
Animal glue gels within 60 to 90 seconds once spread; the workspace must be kept warm (22°C–25°C), and the veneer surface can be warmed with a heat lamp during hammering.
Moisture Buckling
Wet hide glue causes thin veneers to swell; panels must be clamped flat between heated zinc cauls under heavy press screws for 24 hours to prevent wrinkling.
Dutch Floral Marquetry Execution Sequence
Execute this professional sequence to achieve flawless results without backtracking:
Botanical Cartoon Drafting
Draft the full-scale floral bouquet on vellum paper, labeling every petal and leaf with wood species and grain direction arrows.
Packet Assembly & Pinning
Stack chosen veneer leaves between 3mm birch ply backing, binding the packet with paper tape and fine brass wire pins.
Chevalet Angle Fret-Sawing
Cut along cartoon outlines using a 2/0 jeweler's saw blade mounted on the chevalet, tilting the table 2 degrees for kerf compensation.
Hot-Sand Shading (Ombrage)
Dip individual petal edges into 180°C silica sand for 3 seconds using tweezers to burn a subtle organic shadow gradient.
Assembly onto Kraft Paper
Piece together the jigsaw of hundreds of shaded veneers face-down onto brown kraft paper with hide glue tape.
Toothing & Hammer Veneering
Tooth the solid carcase, flood with 60°C animal hide glue, press the marquetry sheet with a brass veneer hammer, and clamp flat under cauls.
Common Mistakes & Countermeasures
Avoid these costly errors that compromise aesthetics, ergonomics, and budget:
Using modern fast-setting PVA yellow wood glue for complex marquetry panels
Over-scorching veneer petals in hot sand (> 10 seconds)
Aggressive orbital sanding over finished marquetry panels
Project Execution Checklist
Track your physical progress. Checkboxes persist automatically on this device:
Frequently Asked Questions
What is 'seaweed marquetry' (arabesque marquetry)?
Popularized in late 17th-century England under William and Mary, seaweed marquetry abandoned large realistic floral bouquets in favor of delicate, undulating, microscopic scrolling foliage resembling seaweed frills, typically cut in boxwood or holly set against a dark walnut ground.
What is 'oyster veneering'?
Oyster veneering is the practice of slicing small branches or saplings of walnut, laburnum, or olive diagonally cross-grain. The resulting oval slices display circular annual growth rings resembling oyster shells, arranged in repeating geometric matrices.
How do you finish a traditional Dutch marquetry surface?
Historical masterpieces are finished with hand-rubbed French polish (dewaxed blonde button shellac applied in hundreds of circular passes with a spirit-dampened cloth rubber), topped with carnauba paste wax to protect against moisture.


