Triple-overlap shingle installation (Dreifachdeckung) is the architectural system that shields Bregenzerwald buildings from extreme alpine precipitation. Shingles are fastened to horizontal spruce laths over a ventilated rear air cavity such that only one-third of each shingle's length is exposed to the elements, creating a continuous three-ply solid timber barrier. Fastened with corrosion-proof copper tacks or stainless steel annular ring nails driven 20 mm above the exposure line, joints are systematically staggered by at least 30 mm between successive courses to prevent water ingress.
At a Glance: Key Takeaways
- Cladding Configuration: Triple-layer overlap rainscreen (Dreifachdeckung)
- Weather Exposure Ratio: Strict 1/3 exposure (e.g. 110 mm exposure on 330 mm shingle)
- Rear Ventilation Gap: 25 mm to 40 mm vertical air cavity over windproof membrane
- Fastener Metallurgy: Pure solid copper tacks or Grade 316 (A4) stainless steel ring nails
- Joint Stagger Minimum: 30 mm lateral offset between vertical shingle seams in adjacent tiers
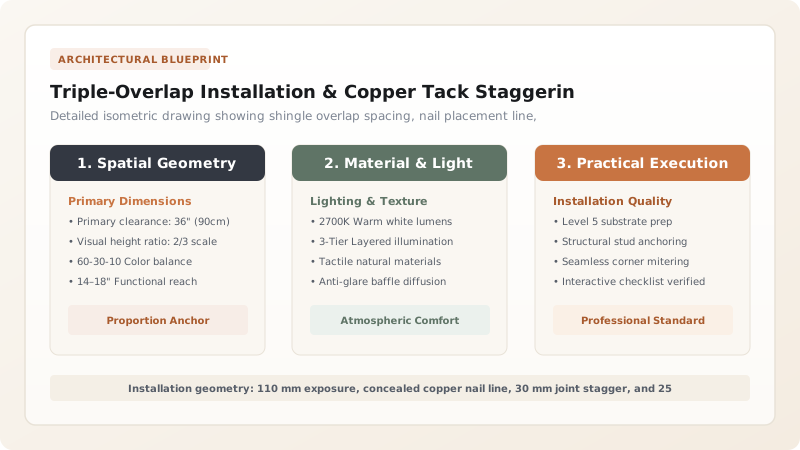
Principles of the Dreifachdeckung: The Three-Ply Timber Shield
In the architectural science of the Vorarlberg alpine region, building envelopes must withstand intense horizontal wind-driven squalls, heavy blizzards, and relentless torrential downpours. A single layer of wood siding—no matter how expertly milled—inevitably develops micro-gaps through which driving rain can penetrate. The vernacular solution perfected over centuries in the Bregenzerwald is the Dreifachdeckung (triple-overlap system).
Under this rigorous mathematical rule, shingles measuring 330 mm in length are installed with a strict weather exposure (Sichtbare Länge) of 110 mm—precisely one-third of the total shingle length. Consequently, at any given coordinate on the exterior wall surface, three full layers of solid heartwood overlap one another. If a driving gale forces rainwater through the joint between two shingles on the outer tier, the water encounters an intact solid wood face on the second tier. If water bypasses that second layer, it meets the third tier before reaching the sub-wall, ensuring 100% weather-tight reliability under severe mountain storms.
The Chemistry & Metallurgy of Copper Fastening
The choice of fastener is as critical to facade longevity as the timber itself. In traditional Bregenzerwald construction, the use of ordinary steel or electro-galvanized nails is strictly forbidden. Coniferous heartwood—particularly silver fir and larch—contains natural organic extractives, including polyphenols and weak acetic acids. When moisture enters, these acids react aggressively with iron and thin zinc coatings, triggering galvanic corrosion that degrades the nail shank within a decade and releases unsightly, permanent black streaks of iron tannate across the wood facade.
Craftsmen fasten shingles exclusively with pure solid copper tacks (Kupfernägel) or austenitic Grade 316 (A4) marine-grade stainless steel ring-shank nails. Copper is completely inert to wood tannins. Over decades of weather exposure, the exposed copper nail heads oxidize, developing a protective cuprous oxide skin and eventually an elegant green verdigris patina that harmonizes visually with the silver-grey weathered wood.
Fastener Placement & Staggering Geometry
Nail placement requires surgical precision. Exactly two nails are driven into each shingle, positioned approximately 20 to 25 mm in from each lateral edge. Crucially, the nails are driven along a horizontal line positioned approximately 20 mm above the exposure line of the course. When the subsequent course of shingles is laid, its thick lower butts completely cover and conceal the fasteners of the course below, shielding the nail holes from direct rain strike and UV degradation.
Equally critical is the horizontal joint stagger. The shingle setter never allows a vertical joint between two shingles in an upper course to align within 30 mm of a joint in the course immediately below it. Ideally, each shingle is centered directly over the joint of the preceding tier. This offset forces water running down vertical seams to drain harmlessly across the broad, solid face of the lower shingle, preventing moisture from channeling directly through to the batten structure.
Rear Ventilation Physics: The Convective Micro-Rainscreen
A high-performance shingle facade does not depend on hermetic seals; it depends on controlled airflow. Behind the horizontal laths carrying the shingles, vertical counter-battens establish a continuous 25 to 40 mm air cavity (Hinterlüftung) separating the timber shingles from the underlying vapor-permeable house wrap and structural wall sheathing.
This rear cavity functions as an unpowered thermodynamic chimney. When morning sunlight strikes the shingled exterior, the wood absorbs radiant warmth, heating the air in the cavity. Because warm air is less dense, it rises rapidly, exhausting through continuous mesh-screened vents beneath the roof eaves. This upward convection draws cool, dry air in through open grilles along the foundation base. The resulting high-velocity airflow instantly siphons away any moisture that diffuses through the shingles or interior wall assembly, ensuring the wooden envelope remains perpetually dry and preventing wood-decay fungi from establishing spore colonies.
Bregenzerwald Shingle Installation Geometric Parameters
Use this reference table to calculate exact physical dimensions, ratios, and specifications before purchasing:
| Building Element | Shingle Length | Weather Exposure | Overlap Layers | Fastener Spec |
|---|---|---|---|---|
| Standard Wall Facade | 330 mm | 110 mm (1/3 length) | 3 continuous layers (Dreifachdeckung) | 35 mm copper tack (2 per shingle) |
| Exposed Alpine Gable Apex | 300 mm | 90 mm (under 1/3) | 3 to 4 layers (reinforced) | 40 mm 316 stainless steel ring nail |
| Covered Veranda / Soffit | 360 mm | 140 mm (~2/5 length) | 2.5 layers (Zweifachdeckung) | 35 mm copper tack |
| Alpine Roof Pitch (>35°) | 400 mm | 120 mm (under 1/3) | 3 layers + bituminized underlay | 45 mm heavy copper slate nail |
| Curved Wall / Corner Wrap | 250 mm (narrow cut) | 80 mm exposure | 3 layers (mitered/woven) | 30 mm annular ring copper tack |
Practical Constraints
Every successful decoration project must account for physical and environmental constraints:
High thermal expansion differentials between copper fasteners and timber laths
Poorly seated nails can loosen under cyclical freeze-thaw temperature shocks Mitigation: Use annular ring-shank copper nails whose ridges bite into spruce fibers, resisting withdrawal
Complex flashing detailing around high-performance recessed window frames
Improper sill flashing causes water infiltration behind the delicate shingle reveal Mitigation: Integrate continuous soldered copper sub-sill flashings with folded upstands beneath the shingle drip line
Execution Blueprint & Craftsmanship Sequence
Execute this professional sequence to achieve flawless results without backtracking:
Substrate & Weather Barrier Prep
Install a vapor-permeable, highly wind-resistant building wrap over exterior timber-frame sheathing, taping all overlaps.
Counter-Batten Air Cavity Grid
Screw vertical 25 x 50 mm spruce counter-battens along wall studs, creating an uninterrupted vertical chimney for air draft.
Horizontal Lath Layout & Spacing
Nail horizontal 24 x 48 mm spruce laths across the counter-battens, spaced at exact 110 mm centers matching exposure lines.
Ventilation Base Insect Grille
Attach perforated copper or stainless steel mesh across the bottom ventilation opening to prevent insect and rodent entry.
Double Starter Course Installation
Fasten two layers of shortened shingles along the bottom edge, offsetting vertical seams by 50 mm to establish the rain shed.
Course Laying & Joint Staggering
Lay the first full shingle course, maintaining 2 mm lateral expansion gaps between shingles and 30 mm seam staggers from the tier below.
Copper Tack Fastening
Drive two copper ring-shank nails per shingle 20 mm above the exposure chalkline, ensuring fasteners will be covered by the next course.
Window Reveal & Corner Miter Detailing
Weave shingles precisely around exterior corners in alternating laps, or miter against solid timber corner jamb trims.
Common Mistakes & Countermeasures
Avoid these costly errors that compromise aesthetics, ergonomics, and budget:
Over-driving nails deep into the wood fibers with pneumatic framing guns
Aligning vertical joints of adjacent shingle courses directly above one another
Omitting the vertical rear ventilation cavity behind the shingle battens
Project Execution Checklist
Track your physical progress. Checkboxes persist automatically on this device:
Frequently Asked Questions
Why are copper nails preferred over galvanized steel for shingle cladding?
Softwoods like silver fir and larch contain natural organic acids (tannic and acetic acids). These mild acids chemically attack the zinc coating on galvanized nails within 5 to 10 years, causing rust that streaks dark black stains down the facade and eventually shears off the nail head. Copper is impervious to wood acids and develops its own protective green verdigris patina.
How much gap should be left between adjacent shingles in a course?
A tiny gap of 2 to 3 mm must be maintained between the lateral edges of adjacent shingles. During prolonged autumn rains, the dry wood expands tangentially; without this expansion gap, shingles would bind against one another and buckle outward away from the wall.
How does the rear ventilation cavity prevent rot inside the wall?
The 25 mm gap behind the shingles acts as a solar-driven chimney. When sun hits the facade, air inside the cavity warms and rises, exhausting through top soffit vents. This upward air draft creates negative pressure that continuously draws fresh air in from the base, rapidly evaporating any rain moisture that enters shingle laps.