
Routing precision brass inlay channels in hardwood requires rigid CNC-machined acrylic or MDF templates, precision brass guide bushings, and solid carbide down-cut spiral router bits. Down-cut spirals compress wood fibers downward, preventing surface tear-out across cross-grain cuts, while multi-pass plunge routing maintains strict 0.005-inch channel width tolerances for tight friction-fit brass bar installation.
At a Glance: Key Takeaways
- Down-Cut Spiral Carbide Bits: Downward shear flute geometry forces wood chips down, leaving pristine, razor-sharp channel shoulders with zero splintering.
- Template Bushing Geometry: Mathematical offset calibration accounts for the exact gap between template edge and the cutter radius for zero-error routing.
- Multi-Pass Depth Increments: Routing in 1/8-inch depth increments prevents bit deflection, cutter chatter, and thermal burning of hardwood tannins.
- Climb-Cutting Grain Strategy: Selective shallow climb-cutting prevents end-grain blowout when crossing parquet borders and chevron corners.
- Micro-Vacuum Slurry Evacuation: High-volume HEPA dust extraction prevents chip pack-out inside the channel, ensuring consistent cutting depth.
1. Bit Mechanics: Down-Cut Spiral vs Up-Cut Spiral Flutes
Standard straight two-flute router bits chop through wood fibers with blunt impact, producing severe tear-out and feathered splintering whenever cutting across wood grain. For flawless architectural inlays, woodworkers rely exclusively on Solid Carbide Down-Cut Spiral End Mills.
A down-cut bit features a left-hand helix with right-hand rotation. As the router rotates at \(20,000 \text{ rpm}\), the cutting edges slice through the hardwood from top to bottom, exerting continuous downward axial force on the delicate surface wood fibers:
This downward vector physically compresses the top wood fibers against the underlying wood core, completely eliminating splintering and fuzzy shoulders. The resulting trench has glass-smooth vertical sidewalls and sharp, knife-like corners that match the square edges of extruded brass bars perfectly. Learn about overall transition detailing in our brass-inlaid transitions hub.
2. Template Mathematics: Guide Bushing Offsets & Precision Jigs
To rout repeatable linear or curved brass channels, artisans build custom templates from 1/2-inch cast acrylic or high-density phenolic tooling board. The plunge router is equipped with a Precision Brass Guide Bushing attached to its sub-base.
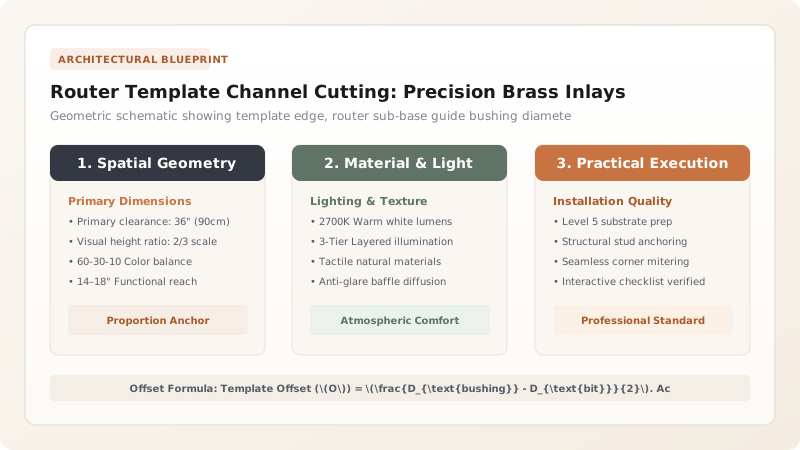
The template opening must be sized larger than the desired finished groove to compensate for the bushing offset (\(O\)):
For example, using a 1/2-inch (\(0.500''\)) outside diameter guide bushing with a 1/4-inch (\(0.250''\)) down-cut spiral bit produces an offset of \(0.125''\) (1/8 inch). The template edge must be located exactly \(0.125''\) back from the desired edge of the brass channel. Templates are secured to the floor using high-tack, low-residue double-sided woodworking tape or vacuum clamping pods to prevent any jitter. Discover epoxy anchoring in our guide to epoxy anchoring brass bars.
3. Feed Direction & Depth Increments: Preventing Bit Deflection
Routing a 1/4-inch wide by 3/8-inch deep brass channel in dense white oak or walnut in a single heavy pass induces severe bit deflection (\(\delta \propto L^3 / D^4\)), resulting in wandering channel widths, motor bogging, and charred wood edges.
Master woodworkers utilize a Three-Pass Plunge Strategy:
- Pass 1 (Roughing): Plunge to 1/8\" depth. Feed against bit rotation (conventional routing) at a steady 10 to 15 ft/min feed rate to clear 80% of waste chips.
- Pass 2 (Intermediate): Plunge to 1/4\" depth, clearing chips under continuous HEPA vacuum extraction.
- Pass 3 (Final Sizing): Plunge to full 3/8\" depth with a light 0.010\" climb-cut pass on the finish wall, producing a mirror-smooth friction fit for the brass bar.
See our guide on monumental pivot entry doors for matching threshold thresholds.
4. Channel Prep & Dry-Fitting: Calipers & Corner Chiseled Details
Because spiral router bits leave rounded terminations at the ends of linear channels (matching the bit radius \(r = D_{\text{bit}} / 2\)), channels terminating into wall baseboards or stone borders must be squared out using a razor-sharp Japanese Oire Nomi Corner Chisel.
Once squared, the channel is thoroughly wire-brushed and vacuumed. The brass flat bar is test-fitted using light finger pressure; the bar should slide into the groove with a snug, friction-held slip-fit without requiring mallet pounding, which would crush the hardwood shoulders. Read our diamond honing guide on flush diamond abrasive grinding.
Router Template Channel Cutting: Precision Brass Inlays in Hardwood Architectural Decision Matrix
Use this reference table to calculate exact physical dimensions, ratios, and specifications before purchasing:
| Architectural Factor | Professional Recommendation | Significance |
|---|---|---|
| Router Bit Geometry | Solid carbide down-cut spiral 2-flute | Down-shear forces eliminate surface tear-out across cross-grain hardwood cuts |
| Template Material | 1/2" Cast acrylic or phenolic resin board | Zero moisture warping; ultra-smooth edge for guide bushing tracking |
| Routing Pass Depth | Maximum 1/8" (3.2mm) per plunge pass | Eliminates bit deflection and prevents tannin scorching on oak/walnut |
| Channel Fit Tolerance | Brass thickness + 0.005" / -0.000" | Allows thixotropic epoxy film spread without forcing or splitting wood |
Execution Blueprint & Craftsmanship Sequence
Execute this professional sequence to achieve flawless results without backtracking:
Phase 1: Template CNC Fabrication
Mill template from 1/2" acrylic accounting for exact guide bushing offset calculation (Benchmark: Template edge polished to 400-grit; zero waviness or burrs on tracking edge)
Phase 2: Template Alignment & Sub-Base Center
Center router guide bushing using centering cone; tape template securely to hardwood floor (Benchmark: Zero template shift under 50 lbs lateral hand push; alignment verified with dial caliper)
Phase 3: First Pass Down-Cut Routing
Set turret depth stop to 1/8" and rout first pass at 20,000 RPM against guide bushing (Benchmark: Wood chips evacuated cleanly; zero splintering along top hardwood shoulder)
Phase 4: Final Pass & Corner Chiseling
Plunge to final 3/8" depth, square channel ends with Japanese corner chisel, and vacuum (Benchmark: Channel width uniform ±0.003" along full length; corners crisp 90-degree cuts)
Phase 5: Brass Bar Dry Fit Inspection
Test-fit brass flat bar along entire groove with light finger pressure (Benchmark: Bar seats fully to channel bottom with zero gap along shoulders and no wood bowing)
Common Mistakes & Countermeasures
Avoid these costly errors that compromise aesthetics, ergonomics, and budget:
Using Up-Cut Spiral Bits for Inlay Routing
Neglecting Router Sub-Base Concentricity
Routing at Too Slow a Feed Rate
Relying on Single Heavy Plunge Passes
Project Execution Checklist
Track your physical progress. Checkboxes persist automatically on this device:
Frequently Asked Questions
Can I rout brass inlay channels in pre-finished engineered hardwood flooring?
Yes, provided the wear layer is at least 3mm thick. Use a razor-sharp down-cut spiral bit and apply blue low-tack painter's tape over the cutting line prior to routing to protect the delicate factory UV-cured aluminum oxide finish from scratching.
How do you secure templates to finished wood floors without damaging the finish?
Use professional double-sided residue-free woodworking turner's tape (or Shurtape DF 545) applied over blue delicate-surface painter's tape. Alternatively, utilize pneumatic vacuum suction pods linked to an electric vacuum generator, which leave zero adhesive residue.
What router bit diameter is best for routing a 1/4-inch brass flat bar?
Use an exact 1/4-inch (0.250") down-cut solid carbide spiral bit. High-quality precision architectural brass flat bars are extruded to tight tolerances (+0.000"/-0.002"), allowing a seamless slide-fit directly into the router kerf without needing multiple offset template passes.


