
Brass-inlaid transitions integrate solid architectural brass (Alloy C360/C385) flat bars or L-angles between contrasting flooring materials such as terrazzo, hardwood, and marble. Achieved via CNC-routed hardwood channels, structural thixotropic epoxy anchoring, and continuous multi-stage diamond honing, these assemblies eliminate trip hazards while providing engineered expansion joints that absorb differential seasonal movement.
At a Glance: Key Takeaways
- Architectural Brass Metallurgy: Uses UNS C36000 free-cutting or C38500 architectural brass flat bars with matching hardness for uniform abrasive polishing.
- Zero-Tolerance Template Routing: Precision CNC or router guide bushings cut clean, tear-out-free channels in end-grain and quarter-sawn hardwoods.
- Structural Epoxy Cleating: Two-part thixotropic epoxies bonded with perforated anchoring legs embed bars permanently into concrete subfloors.
- Differential Expansion Management: Engineered compressible cork or elastomeric slip layers accommodate wood cross-grain movement while maintaining flush alignment.
- Progressive Diamond Honing: Planetary rotary floor grinders with 50- to 3,000-grit resin-bond diamond pads polish brass and flooring into a single planar surface.
In-Depth Guides in this Directory
Explore specialized subtopic blueprints, technical dimensions, and execution checklists:
Router Template Channel Cutting: Precision Brass Inlays in Hardwood
Execute zero-tolerance brass inlay channels in solid and engineered hardwood: guide bushings, down-cut spiral carbide bits, depth stops, and grain climb-cutting.
Brass Bar Anchoring & Expansion Tolerances: Epoxy & Mechanical Cleats
Engineer permanent brass bar floor transitions: two-part structural thixotropic epoxies, dovetail kerf anchoring, and wood seasonal expansion allowances.
Flush Diamond Grinding & Honing: Terrazzo & Brass Seamless Surfaces
Grind and polish brass divider strips flush with cementitious or epoxy terrazzo: metal-bond diamond abrasives, resin-bond honing pads, and mirror polishing.
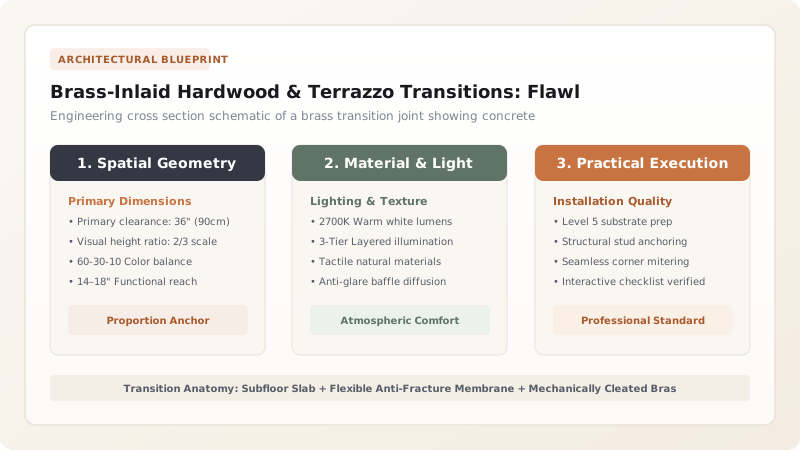
1. Material Selection: Architectural Brass Alloys & Hardness Matching
Creating a flawless floor transition requires matching the abrasive grindability of the metal strip to the hardness of the adjacent flooring. If the metal is too hard (such as 304 stainless steel), planetary diamond grinders will dish out the surrounding terrazzo or oak, leaving the metal standing proud like a blade. If the metal is too soft (pure copper or aluminum), it smears and clogs diamond abrasives.
The universal standard for luxury architectural floor inlays is Free-Cutting Architectural Brass (UNS C36000 / UNS C38500), composed of approximately \(60\% \text{ Copper}\), \(37\% \text{ Zinc}\), and \(2.5\% \text{ to } 3\% \text{ Lead}\). Lead acts as an internal microscopic lubricant and chip-breaker:
- Mohs Hardness: ~3.0 to 3.5, closely matching terrazzo marble aggregate and hardened oak flooring.
- Rockwell Hardness: HRB 65 to 75, allowing aggressive 50-grit diamond grinding followed by high-gloss resin honing without differential dishing.
- L-Profile vs Flat Bar: Flat bars (e.g., 1/4\" × 1/2\") are chosen for flush hardwood-to-hardwood inlays, while perforated L-angle divider strips (with punched anchor feet) are embedded directly into wet cementitious or epoxy terrazzo screeds.
Learn more about router channel methods in our guide to router template channel cutting.

2. Movement Physics: Wood Expansion vs Metal Stability
The primary technical challenge when marrying hardwood to terrazzo or brass is Hygroscopic Movement Differential. While brass has a predictable, isotropic linear thermal expansion rate (\(\alpha = 11.2 \times 10^{-6} \text{ in/in/}^\circ\text{F}\)), natural solid hardwood is an anisotropic hygroscopic material that expands dramatically across its grain when indoor relative humidity rises:
Where \(C_T\) is the tangential shrinkage/swelling coefficient (approx. \(0.00365\) for white oak) and \(\Delta \text{MC}\) is the change in moisture content. A 20-foot wide solid oak floor can expand by more than 1/2 inch from winter heating season to summer humidity.
If a brass bar is glued rigidly to both the terrazzo concrete slab and the hardwood without an expansion allowance, the swelling wood will buckle or shear the brass strip out of the floor. Specifiers must integrate a Compressive Relief Kerf—a 1/8-inch concealed expansion channel packed with compressed cork or high-performance flexible polyurethane sealant (e.g., Sikaflex-11FC) concealed under the hardwood margin. Master expansion tolerances in our guide to epoxy anchoring and expansion tolerances.
3. Subfloor Anchoring: Structural Epoxies & Mechanical Dovetails
A brass inlay that loosens under foot traffic creates an immediate trip hazard and destroys expensive vacuum cleaners. The brass must be chemically and mechanically integrated with the subfloor.
For terrazzo transitions, the brass L-angle features factory-punched trapezoidal anchor tabs. The angle is bedded into a high-strength acrylic-modified cementitious screed or structural two-part epoxy adhesive (such as Laticrete LATAPOXY 300) applied over an uncoupling anti-fracture membrane. For hardwood inlays, the bottom edge of the brass bar is scored with a dovetail kerf and bedded in Thixotropic Structural Epoxy, ensuring the bar cannot lift vertically even under severe wood movement.
Review related exterior hardware detailing in our architectural bronze hardware hub.
4. Flush Diamond Grinding & Mirror-Honing Protocol
Achieving a 100% planar transition requires a multi-stage planetary rotary diamond grinding procedure:
- Coarse Leveling (40–80 Grit Metal-Bond Diamonds): Wet-grinds both the cured terrazzo/hardwood and the proud brass strip down to an absolute coplanar plane (\(\pm 0.2 \text{ mm}\)).
- Matrix Grouting: An identical resin or cementitious slurry is spread over the floor to fill microscopic pinholes exposed during initial grinding.
- Progressive Honing (100 to 800 Grit Resin-Bond Diamonds): Polishes the surface, stripping scratch patterns from both the stone aggregate and the brass metal.
- Mirror Polishing (1,500 to 3,000 Grit & Buffing Compounds): Restores the glorious, radiant warm gold luster of the brass while bringing the surrounding floor to a brilliant reflective sheen.
Follow the complete step-by-step honing protocol in our guide to flush diamond abrasive grinding and honing.
Brass-Inlaid Hardwood & Terrazzo Transitions: Flawless Floor Flush Details Architectural Decision Matrix
Use this reference table to calculate exact physical dimensions, ratios, and specifications before purchasing:
| Architectural Factor | Professional Recommendation | Significance |
|---|---|---|
| Brass Alloy Selection | Architectural Brass (UNS C36000 / C38500) | Lead content 2.5–3.0%; Rockwell HRB 65–75; ideal diamond grindability |
| Transition Profile | L-profile with perforated footer for terrazzo; solid flat bar for wood | Footer provides mechanical key into mortar; flat bar fits tight router kerfs |
| Subfloor Movement Isolation | Uncoupling anti-fracture membrane beneath transition | Absorbs up to 1/8" concrete slab shrinkage and in-plane movement |
| Expansion Allowance | Concealed 1/8" compressible cork/elastomer kerf at hardwood edge | Prevents cross-grain swelling from buckling brass or spalling terrazzo |
Execution Blueprint & Craftsmanship Sequence
Execute this professional sequence to achieve flawless results without backtracking:
Phase 1: Subfloor Slab Preparation & Membrane
Diamond-grind concrete subfloor to CSP 3, fill cracks, and roll out elastomeric uncoupling sheet (Benchmark: Subfloor flat within 1/8" in 10 feet; membrane free of air bubbles or wrinkles)
Phase 2: Brass Divider Bar Layout & Mechanical Anchoring
Form curved or straight lines using brass L-strips; anchor footers using pneumatic concrete pins (Benchmark: Bars set 1/16" proud of target floor plane; curvature smooth with zero kink defects)
Phase 3: Flooring Pour & Hardwood Installation
Pour epoxy/cement terrazzo screed on one side and install hardwood on the other with cork expansion joint (Benchmark: Terrazzo fully compacted around brass tabs; hardwood expansion gap verified)
Phase 4: Multi-Stage Planetary Diamond Grinding
Wet-grind floor using 40-grit metal bond diamonds until brass and flooring are perfectly planar (Benchmark: Digital lipage gauge reads 0.00" across 100% of brass transition perimeter)
Phase 5: Resin Honing & Buffing
Progressively hone through 100, 200, 400, 800, 1500, and 3000-grit resin diamond pads (Benchmark: Brass shines like polished jewelry; surrounding floor shows mirror clarity)
Common Mistakes & Countermeasures
Avoid these costly errors that compromise aesthetics, ergonomics, and budget:
Using Stainless Steel Dividers with Soft Terrazzo
Gluing Brass Inlays Directly to Expanding Hardwood Without Expansion Gaps
Dry Grinding Brass Transitions
Setting Brass Bars Too Low Prior to Screed Pour
Project Execution Checklist
Track your physical progress. Checkboxes persist automatically on this device:
Frequently Asked Questions
Can brass floor inlays be installed in a curved radius pattern?
Yes. Architectural brass divider strips for terrazzo are available with flexible perforated pre-notched flanges (often called scalloped or serpentine dividing strips) that can be easily formed by hand into flowing organic curves, circles, or geometric arabesques with radiuses as tight as 12 inches.
How do you protect brass inlays from tarnishing after floor installation?
During final floor finishing, the polished brass is sealed alongside the hardwood or terrazzo using a penetrating fluoropolymer stone sealer or hardwax oil. For high-wear commercial areas, applying microcrystalline paste wax to the brass strip preserves its golden mirror shine without disallowing natural patina evolution.
Are flush brass floor transitions acceptable under ADA accessibility guidelines?
Yes. Because flush brass transitions are diamond-honed to a planar tolerance with lipage under 1/16" (0.0625"), they comply fully with ADA Section 303 guidelines for level changes, completely eliminating trip hazards for wheelchairs, strollers, and pedestrians.


