
Close-mitered slate hips are constructed by hand-beveling the intersecting edges of slates from adjoining roof pitches to form a razor-sharp, seamless diagonal junction. Waterproofing is guaranteed not by mortar or ridge caps, but by interleaving a concealed folded Code 3 (1.32mm) lead soaker beneath every single course of slate, creating an invisible, layered water barrier that flexes with building settlement.
At a Glance: Key Takeaways
- Seamless Diagonal Geometry: Slates cut and beveled to the compound hip angle, meeting tightly at the centerline without bulky terracotta ridge tiles.
- Interleaved Lead Soakers: Code 3 (1.32mm) rolled sheet lead soakers bent at the hip angle, fixed under every slate course to provide continuous drainage.
- Soaker Dimensioning: Length = Gauge + Lap + 25mm; Width = 100mm to 150mm wing flanges on each side of the hip centerline.
- Compound Bevel Angle: Slates are back-beveled at the hip junction so that outer top edges touch perfectly while leaving relief space for lead underneath.
- Swept & Laced Valleys: Traditional mortarless stone valley detailing where curved courses sweep seamlessly through internal roof angles.
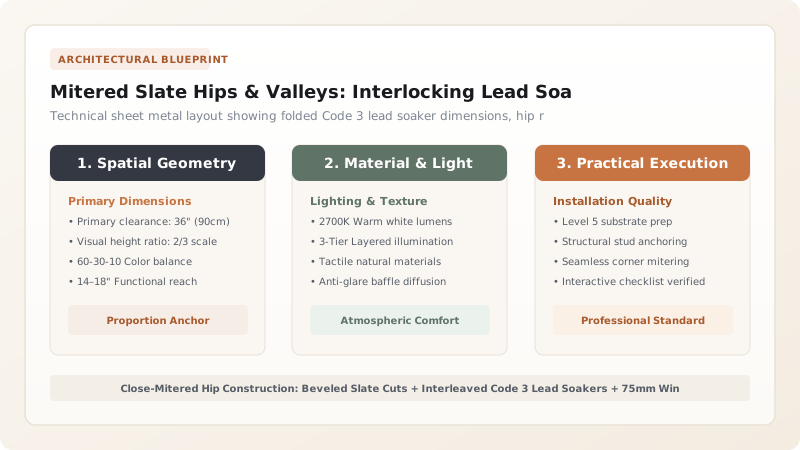
1. Compound Hip Geometry: Angle Calculations & Back-Bevel Cutting
In high-end architectural slate roofing, traditional rounded clay ridge caps are rejected in favor of the Close-Mitered Hip. This creates a clean, continuous stone plane where two roof slopes meet along a sharp diagonal knife-edge.
Achieving this requires compound trigonometric angle cutting:
For a standard 45-degree roof pitch, the true hip rafter angle is \(35.26^\circ\). Each slate meeting the hip must be cut at this exact compound angle using a slater's axe or diamond wet saw. Furthermore, the cut edge must be Back-Beveled at 45 degrees toward the underside. This ensures the top finished stone surfaces touch tightly in a hairline seam, while leaving an open internal wedge beneath to accommodate the thickness of the folded lead soaker.
2. Lead Soaker Engineering: Code 3 Fabrication & Wing Dimensions
The close-mitered hip is not watertight by stone contact alone; wind-driven rain penetrates the hairline miter seam. Watertightness is achieved entirely by the concealed Interleaved Lead Soakers:
- Lead Specification: Milled Sheet Lead under BS EN 12588, specified as Code 3 (1.32mm thick, 15 kg/m²) for standard pitches, or Code 4 (1.80mm thick) for severe exposures. Code 3 is preferred because its low profile prevents unsightly kick-up of overlapping slates.
- Soaker Length Calculation: The length of each soaker must equal:
$$L_{\text{soaker}} = \text{Gauge} + \text{Head-Lap} + 25\text{ mm (turning nib)}$$
- Wing Width Flanges: Each soaker is folded along its centerline to match the hip angle, with wing flanges extending \(100\text{ mm} \text{ to } 150\text{ mm}\) (4 to 6 inches) onto each roof slope. The top edge features a 25mm folded tab that hooks over the timber batten, preventing the lead from sliding down the slope.
3. Swept Valleys & Secret Gutters: Traditional Mortarless Transitions
Where two roof slopes meet at an internal angle, traditional Welsh slating avoids open metal valley troughs by constructing Swept Valleys or Laced Valleys:
- Swept Valley Construction: Curved valley boards (cradles) are built into the internal angle. Narrow wedge-shaped slates are custom-cut and curved through the valley, sweeping the courses continuously across the junction without a single broken seam or exposed metal strip.
- Laced Valley Detailing: A line of wide, diamond-shaped 'lace slates' runs down the center of the valley, interleaved with triangular cut course slates and concealed lead soakers. Water flows down the center of the lace without penetrating side joints.
- Secret Gutters: For modern high-performance envelopes, a concealed 50mm stainless steel or zinc trough is recessed beneath the slate verge, creating a hidden drainage channel that maintains clean architectural lines. Explore geodesic geometry in our guide to timber geodesic dome framing.
Hip & Valley Detailing System Comparison Matrix
Use this reference table to calculate exact physical dimensions, ratios, and specifications before purchasing:
| Detailing Method | Lead Code / Material | Weathertightness Index | Architectural Aesthetic |
|---|---|---|---|
| Close-Mitered Hip with Soakers | Code 3 (1.32mm) Lead | Maximum (Dual-plane defense) | Razor-sharp, monolithic stone plane |
| Traditional Slate Hip Roll | Code 4 Lead over Wood Roll | High (Gravity shedding) | Prominent raised classical bead |
| Terracotta Hip Tile in Mortar | Clay Ridge Tile + Sand/Cement | Poor (Mortar cracks in 10-15 yrs) | Heavy, utilitarian, commercial |
| Swept Valley (Artisan Stone) | Concealed Code 3 Lead Soakers | Exceptional (Zero exposed metal) | Curving continuous organic transition |
| Open Copper Valley Trough | 0.7mm Cold-Rolled Copper | High (High hydraulic capacity) | Visible metallic ribbon, modern accent |
Cutting & Lead Craftsmanship Constraints
Every successful decoration project must account for physical and environmental constraints:
Slate Kick-Up from Lead Thickness
If Code 5 (2.24mm) lead is mistakenly used for soakers, the accumulated thickness of lead layers lifts the tails of overlapping slates, creating visible gaps that chatter in wind. Never exceed Code 3 lead.
Hip Slate Width Minimums
Cutting a compound angle on a narrow slate leaves a tiny triangular sliver at the hip that cannot be nailed. Slaters must use 'Slate-and-a-Half' pieces (width ≥ 350mm) to ensure adequate nailing width.
Lead Oxidation Staining (Runoff)
Fresh lead soakers oxidize to white lead carbonate, which washes down the dark Welsh slate, causing unsightly streaks. Treat all lead soakers with patination oil before installation.
Mitered Slate Hip Installation Sequence
Execute this professional sequence to achieve flawless results without backtracking:
Hip Rafter Solid Timber Sarking
Install continuous 25mm thick timber valley/hip boards extending 200mm each side of the hip centerline to provide solid nailing support.
Lead Soaker Pre-Fabrication
Cut Code 3 sheet lead into rectangles (Gauge + Lap + 25mm long by 250mm wide). Fold centerlines to hip angle. Apply patination oil to both faces.
Course Slate Angle Cutting & Back-Beveling
Measure hip cut angle with sliding bevel gauge. Cut slate-and-a-half stones, back-beveling cut edges at 45 degrees with slater's axe.
Soaker Interleaving & Nailing
Position the first lead soaker centered over the hip rafter. Hook top tab over the timber batten. Nail soaker at top edge with two copper clouts.
Miter Slate Laying & Hairline Fit
Lay the cut hip slates from both roof slopes over the lead soaker, pressing the back-beveled stone edges together into a tight hairline miter seam.
Progressive Course Overlap up to Apex
Repeat sequence up the hip rafter, ensuring every course has its dedicated lead soaker, terminating at the ridge in a lead saddle cap.
Common Mistakes & Countermeasures
Avoid these costly errors that compromise aesthetics, ergonomics, and budget:
Using Narrow Slates at Hips
Omitting Patination Oil on Lead
Bedding Mitered Hips in Cement Mortar
Project Execution Checklist
Track your physical progress. Checkboxes persist automatically on this device:
Frequently Asked Questions
Can close-mitered hips be used on low-slope slate roofs (<30 degrees)?
No. Below 30 degrees pitch, wind-driven rain can push sideways beyond the 100mm lead soaker wings. For pitches below 30 degrees, an open metal valley/hip with continuous 150mm water-checks or a traditional lead-covered wood roll is required.
How many lead soakers are needed for a 6-meter hip rafter?
Because every single slate course requires its own soaker, the number of soakers equals the number of courses along the hip. For a 6-meter hip with an average 150mm gauge, approximately 40 lead soakers are required per hip rafter.
What is a slate-and-a-half?
A slate-and-a-half is a custom slate manufactured to the same length as standard slates but 1.5 times the width (e.g., 20x15 inches instead of 20x10 inches). Slaters use them at hips, valleys, and gable verges to maintain full 75mm bond overlaps without resorting to narrow, fragile slivers of stone.


