Proper installation of cork wall surfacing requires a rigorous understanding of natural suberin compatibility and vapor-permeable adhesion. Because cork is a living, breathing cellular material that expands and contracts with atmospheric humidity, panels must never be installed with rigid, moisture-trapping petrochemical cements. Professional installation utilizes solvent-free, waterborne polymer dispersion contact adhesives or breathable natural hydraulic lime mortars applied over flat, acclimated substrates. Surfaces are sealed with penetrating natural beeswax or plant-based hardwax oils that preserve acoustic porosity (NRC > 0.60) while providing washable, anti-static durability.
At a Glance: Key Takeaways
- Adhesive Type: Solvent-free waterborne acrylic/natural latex dispersion contact adhesive
- Adhesive Open Time: 20 to 45 minutes flash-off until transparent and dry to touch
- Protective Sealer: Breathable natural beeswax paste or plant-based hardwax oil
- Acoustic Impact: Reduces room reverberation time (RT60) by 40% to 60%
- Substrate Flatness: Maximum 2 mm deviation over a 2-meter straightedge (Class A preparation)
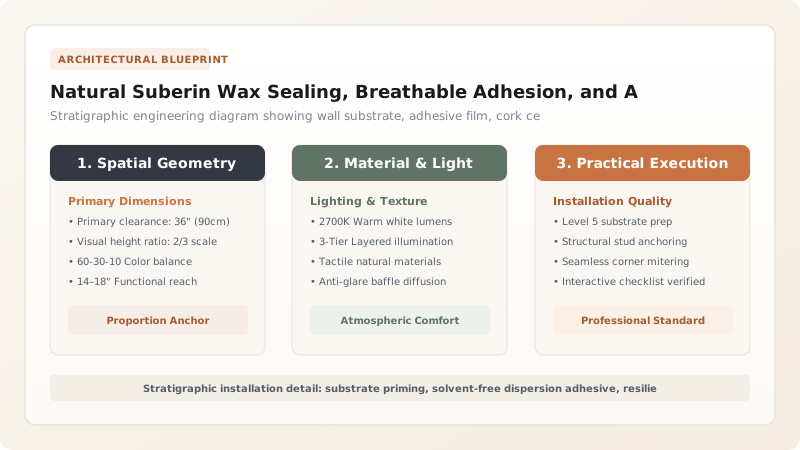
The Chemistry of Suberin-Compatible Wall Adhesives
Installing natural cork oak panels as interior architectural surfacing is fundamentally different from hanging vinyl wallpaper or mounting wood paneling. Cork is a living, elastomeric biological tissue containing high concentrations of suberin—a complex, waxy biopolymer that naturally resists chemical wetting.
For decades, commercial installers used solvent-based neoprene contact cements laden with toluene, acetone, and petroleum distillates. While these glues provided instant grab, their aggressive solvents chemically attacked the natural suberin wax, turning cork cell walls brittle and causing perimeter edges to curl away from the wall over time. Modern sustainable practice specifies high-solids waterborne polymer dispersion adhesives. Formulated from modified natural latex and waterborne acrylics, these zero-VOC adhesives bond tenaciously to both the cork and the wall without compromising the material’s cellular elasticity or indoor air quality.
Substrate Preparation and Acclimation Ergonomics
Because cork is flexible and resilient, it has zero ability to bridge structural wall flaws. If applied over uneven drywall joints, trowel ridges, or pitted concrete, every sub-surface defect will telegraph directly through the face of the tile. Substrates must be prepared to a flat Class A finish (deviation less than 2 mm under a 2-meter straightedge), completely clean, dry, and primed with an acrylic bonding agent to consolidate surface dust.
Equally critical is hygrometric acclimation. Cork cells absorb and release microscopic amounts of ambient water vapor as atmospheric humidity fluctuates. If cork tiles stored in a damp warehouse are installed immediately in an air-conditioned residential interior, the tiles will lose moisture and shrink, leaving gaping hairline seams. Unpacking tiles and cross-stacking them in the installation space for a minimum of seventy-two hours ensures they reach dimensional equilibrium before adhesive contact occurs.
Acoustic Physics: Porosity and Reverberation Decay
In modern architectural design, cork wall cladding is celebrated for its phenomenal acoustic dampening capabilities. Contemporary interiors featuring polished concrete floors, hard plaster walls, and floor-to-ceiling glass suffer from prolonged reverberation times (RT60), creating harsh flutter echoes that make conversation exhausting and noisy.
Cork functions as an acoustic energy trap. When sound waves strike the unsealed or wax-finished cork surface, the acoustic energy penetrates into the open interstitial surface pores. As the sound waves circulate through the labyrinth of millions of flexible, gas-filled cellular chambers, the vibrational energy is converted into minute amounts of heat through friction and molecular deflection. Installing cork on even a single feature wall can reduce ambient room reverberation by 40% to 60%, creating an intimate, tranquil acoustic sanctuary.
Natural Suberin-Compatible Wax and Oil Finishing
The crowning touch of architectural cork installation is surface protection. Coating cork with modern, film-forming polyurethane or epoxy varnishes is a fatal error: it blankets the breathable cellular honeycomb in a reflective plastic crust that destroys its acoustic absorption and creates an artificial, synthetic glare.
Authentic Portuguese finishing relies on suberin-compatible natural waxes and plant oils. Master finishers apply micro-thin coats of refined beeswax, Brazilian carnauba wax, or cold-pressed linseed hardwax oils. These organic finishes penetrate into the outer cell walls without sealing the acoustic pores. The natural wax enhances the rich, warm amber-and-cinnamon tones of the cork, repels water and wine spills, and creates an anti-static, velvety satin sheen that can be refreshed effortlessly for centuries with a simple cloth buffing.
Adhesive Systems for Architectural Cork Wall Surfacing
Use this reference table to calculate exact physical dimensions, ratios, and specifications before purchasing:
| Adhesive Technology | VOC & Chemical Off-Gassing | Suberin Compatibility | Initial Tack & Shear Grab | Substrate Suitability |
|---|---|---|---|---|
| Waterborne Polymer Dispersion Contact | Zero VOC; completely odorless | Excellent; chemically inert to suberin | High immediate contact bond | Drywall, smooth concrete, plywood, MDF |
| Natural Hydraulic Lime Mortar (NHL 2.0) | Zero chemical off-gassing; 100% mineral | Outstanding; fully breathable & moisture-open | Slow grab; requires temporary propping | Historic brickwork, stone, & unpainted masonry |
| Solvent-Based Neoprene Contact Cement | Extremely High (releases toxic VOCs) | Poor; solvents soften natural resins | Instantaneous aggressive bond | Unsuitable for enclosed residential interiors |
| Polyurethane Construction Adhesive | Low to Moderate VOC | Fair; rigid glue lines restrict movement | Moderate; requires mechanical taping | Heavy exterior facade panels and uneven masonry |
Practical Constraints
Every successful decoration project must account for physical and environmental constraints:
Ambient Humidity Spikes (>75% RH) During Rainy Seasons
Excessive indoor humidity slows waterborne adhesive flash-off times from 20 minutes to over 2 hours. Mitigation: Operate commercial dehumidifiers and maintain auxiliary space heaters to keep ambient RH below 55% during installation.
Uneven or Chalky Wall Substrates in Historic Renovations
Loose paint or gypsum dust prevents adhesive from gripping, causing entire cork panels to fall off. Mitigation: Scrape loose layers, patch with setting compound, and apply a deep-penetrating stabilizing acrylic primer.
Execution Blueprint & Craftsmanship Sequence
Execute this professional sequence to achieve flawless results without backtracking:
Substrate Moisture and Soundness Verification
Test substrate with an electronic pinless moisture meter to ensure moisture content is below 12% in wood and 4% in drywall. Remove all dust, grease, and peeling paint.
Precision Acclimation Protocol
Unpack cork tiles and stack them loosely in the installation space for a minimum of 72 hours, maintaining stable ambient conditions at 20°C (±3°C) and 45%–55% relative humidity.
Chalk Scribing and Balanced Grid Layout
Establish the optical focal center of the wall with laser levels. Snap plumb and level chalk lines, dry-laying a central row to verify that perimeter tiles exceed half-tile width.
Double-Sided Adhesive Rolling
Pour solvent-free waterborne contact adhesive into a tray. Using a short-nap 6 mm microfiber roller, apply a thin, uniform, uninterrupted coat to both the wall and the back of the cork tile.
Flash-Off Monitoring (The Touch Test)
Allow adhesive to dry for 25 to 35 minutes. When the milky white film turns completely clear and does not transfer to clean fingertips under pressure, the bond window is active.
Setting and Edge-Compression Placement
Align the top edge of the tile precisely with the chalk line. Press into place from center to edges, applying slight compressive inward pressure against adjacent tiles to ensure zero gap.
Mechanical Consolidation with Steel Roller
Roll the installed tile immediately with a 3-section weighted steel hand roller, applying firm body pressure across all corners and seams to eliminate micro-voids and achieve 100% contact.
Natural Suberin Wax Sealing and Buffing
Apply a micro-thin coat of liquid beeswax or carnauba-linseed hardwax oil with a lint-free pad. After 20 minutes, buff with a soft microfiber cloth to produce a silky, water-repellent satin finish.
Common Mistakes & Countermeasures
Avoid these costly errors that compromise aesthetics, ergonomics, and budget:
Using solvent-based, toluene-laden contact cements to bond cork wall tiles
Stretching resilient cork tiles during installation to close unsightly gaps
Applying heavy, high-build topical varnishes or urethanes over acoustic wall cork
Project Execution Checklist
Track your physical progress. Checkboxes persist automatically on this device:
Frequently Asked Questions
Why is waterborne contact adhesive preferred over standard wood glue for cork walls?
Standard wood glue (PVA) requires one porous surface to absorb water and takes hours of clamping pressure to cure, which is impossible on vertical walls without mechanical nails. Contact adhesive is applied to both surfaces and dried until tacky; when the two coated surfaces touch, they form an instantaneous, permanent molecular bond that holds heavy cork panels against gravity immediately without sagging.
How does cork improve interior acoustics in echoey modern rooms?
Modern open-concept rooms with hard tile floors, large glass windows, and flat drywall suffer from severe acoustic reverberation (flutter echo). Cork's cellular structure acts as a microscopic acoustic baffle. When sound waves hit the millions of flexible suberin-lined air cells, the sound energy is absorbed and converted into tiny amounts of friction heat, reducing reverberation times (RT60) to comfortable conversational levels.
Can cork wall panels be cleaned without damaging the surface?
Yes. When sealed with breathable natural beeswax or hardwax oil, cork is highly water-repellent and anti-static (it does not attract dust). Routine maintenance requires only light dusting or vacuuming with a soft brush attachment. Spots and fingerprints can be wiped away using a damp cloth moistened with mild pH-neutral soap and warm water.
What happens if cork tiles are installed without leaving an expansion perimeter gap?
Like solid hardwood, cork expands slightly during hot, humid summer weather. If installed tightly against adjacent ceiling corners, baseboards, and side walls without a 3 mm expansion reveal, the expanding panels will exert lateral compression against each other, causing the tiles to buckle outward in ridge-like blisters.