Mar Largo (Wide Sea) is the legendary optical wave mosaic of Calçada Portuguesa, first laid at Lisbon's Rossio Square in 1848. Composed of alternating sinusoidal ribbons of white limestone and black basalt, the pattern creates a mesmerizing three-dimensional illusion of rolling ocean waves. Master calceteiros lay the wave contours using flexible brass stencils, cord lines, and curved template boards (moldes), setting boundary stones first before filling the infill field.
At a Glance: Key Takeaways
- Pattern Name: Mar Largo (Wide Sea / Undulating Sinusoidal Wave)
- Geometric Basis: Alternating offset Sine-Wave ribbons with 120° inflection
- Layout Tooling: Sheet Brass Stencils, Zinc Contours & Plywood Moldes
- Chromatic Palette: White Vidraço Limestone & High-Contrast Black Basalt
- Visual Dynamics: Dynamic 3D kinetic optical roll under pedestrian movement
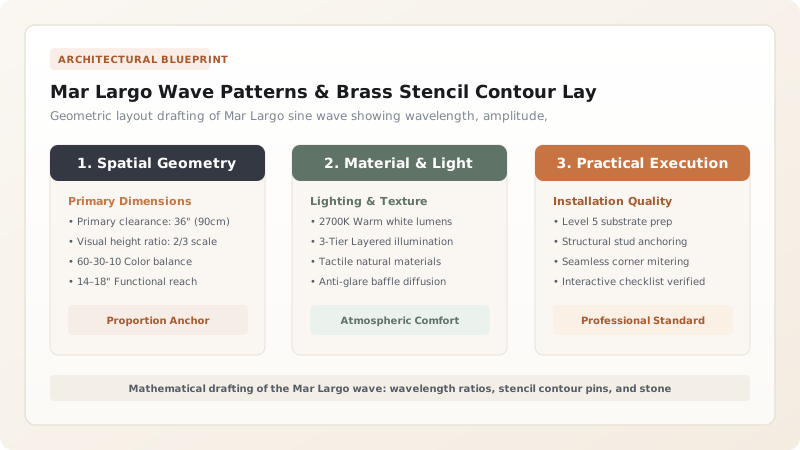
The Optical Genius of Mar Largo at Rossio Square
When pedestrians walk across the vast expanse of the Praça de D. Pedro IV (Rossio Square) in downtown Lisbon, many experience a strange sensory vertigo: the ground appears to be rolling, surging, and cresting like ocean swells. This astonishing three-dimensional kinetic illusion is created entirely in a two-dimensional plane through the Mar Largo (Wide Sea) pattern.
Devised by General Pinheiro Furtado in 1848 and executed by master calceteiros, Mar Largo translates the mathematical rhythm of sinusoidal ocean swells into contrasting bands of black basalt and white limestone. The alternating dark and light crests manipulate pedestrian depth perception, creating one of urban design's greatest optical achievements.
Mathematical Drafting: Wavelength, Amplitude, and Tonal Symmetry
Drafting an authentic Mar Largo pattern requires precise geometric trigonometry:
- Wavelength (Comprimento da Onda): The distance between two consecutive wave crests is calibrated to standard pedestrian strides—typically 1.8 to 2.4 meters.
- Amplitude (Altura da Onda): The peak-to-trough vertical displacement is set between 400 mm and 600 mm, maintaining a gentle 1:4 aspect ratio that produces continuous fluid motion rather than abrupt zigzags.
- Band Symmetry: Both the black basalt wave and the white limestone wave are identical in thickness (typically 300 mm to 450 mm wide ribbons), ensuring optical balance across the plaza.
The Brass Stencil and Wooden Molde Layout System
Transferring complex sine waves onto loose, uncompacted sand requires rigid templates. Calceteiros use two primary layout aids:
1. Flexible Brass Contour Strips (Fitas de Latão): Thin, flexible sheet brass strips bent to the exact mathematical wave curve and pinned into the sand sub-base with steel spikes. The paver places stones directly against the brass ribbon to establish razor-sharp boundary lines.
2. Wooden Segment Templates (Moldes de Madeira): Full-scale plywood or sheet zinc curved frames representing one half-cycle of the wave. The master artisan aligns the molde against reference chalk lines snapped across the plaza grid, scoring the curve into the sand bed with a pointed trowel before removing the template.
The Sequence of Setting: Boundary Lines First, Infill Second
When paving Mar Largo, order of operations is critical. If a worker attempts to fill the entire area randomly, the wave curves will quickly distort and lose their mathematical rhythm.
The calceteiro first sets the mestreira (master boundary line)—a single, unbroken row of selected, perfectly squared black basalt cubes following the brass stencil curve. Once this continuous black contour is pinned firmly into the sand, the artisan sets the adjoining row of white limestone cubes, locking the boundary in place. Only after the boundary curves are established across multiple wave cycles does the team begin filling the interior fields (o enchimento) with diagonal rows of matching stones.
Iconic Calçada Patterns: Geometry, Complexity, and Optical Impacts
Use this reference table to calculate exact physical dimensions, ratios, and specifications before purchasing:
| Pattern Designation | Geometric Structure | Tesserae Selection | Laying Complexity | Optical / Aesthetic Impression |
|---|---|---|---|---|
| Mar Largo (Wide Sea) | Sinusoidal undulating wave ribbons | Selected 50-mm Basalt & Limestone cubes | High; requires brass stencils and master lines | Kinetic rolling 3D wave; maritime movement |
| Espiga (Herringbone / Chevron) | 45° diagonal interlocking zigzag courses | Standard 60-mm rectangular limestone | Moderate; established with snap chalk lines | Directional acceleration; guides pedestrian flow |
| Rosácea dos Ventos (Compass Rose) | Concentric radiating 8-point nautical star | Fine 30-mm multi-colored tesserae | Master Grade; complex center-point drafting | Monumental focal point; civic prominence |
| Malha Regular (Diagonal Grid) | Orthogonal diamond lattice with black dots | Standard 50-mm white with basalt accents | Low to Moderate; simple grid alignment | Clean, orderly, quiet civic backdrop |
Practical Constraints
Every successful decoration project must account for physical and environmental constraints:
Pattern Termination Against Irregular Street Perimeters
Plaza edges rarely align cleanly with integer multiples of the wave cycle Mitigation: Establish wide solid white or black perimeter border margins (faixas de enquadramento) that frame the wave field cleanly
Wind Disruption of Sand Markings During Layout
Gusty urban winds can blow dry sand, erasing scribed pattern lines before stones are placed Mitigation: Mist the sand bed lightly with water before scribing and set boundary stones immediately behind the layout tool
Execution Blueprint & Craftsmanship Sequence
Execute this professional sequence to achieve flawless results without backtracking:
Plaza Grid Survey and Centerline Snapping
Establish master orthogonal baseline grid across the site using transit levels. Snap chalk lines defining the central axis of the wave corridor.
Wave Crest and Trough Node Pegging
Drive steel layout pins into the sand bed at exact 2.0-meter wavelength intervals, offsetting alternating crests and troughs by 500 mm.
Brass Stencil Positioning and Scribing
Anchor flexible brass template strips between node pins, smoothing into continuous sine curves. Scribe curve into the sand bed with a pointing trowel.
Setting the Black Basalt Master Line (Mestreira)
Hand-knap calibrated 50-mm black basalt cubes. Set a single unbroken row along the scribed curve, bedding firmly into the sand.
White Limestone Complementary Boundary Setting
Set a matching row of white limestone cubes immediately abutting the black master line, establishing a razor-sharp 2-mm color contrast boundary.
Diagonal Field Infill Paving
Fill the interior wave body with diagonal stone courses, working backward from the boundary to prevent disturbing the master curve.
Curvature Continuity Visual Inspection
Step back 10 meters and sight along wave crests to ensure smooth organic continuity without jagged angular discontinuities.
Surface Consolidation with Maço Rammer
Tamp the entire wave field with a 15-kg wooden block rammer, driving all tesserae down to an even, unbroken mosaic plane.
Common Mistakes & Countermeasures
Avoid these costly errors that compromise aesthetics, ergonomics, and budget:
Setting wave infill stones in straight horizontal lines across the curves
Allowing wave crest amplitudes to vary between adjacent cycles
Mixing greyish, low-grade limestone into the white wave band
Project Execution Checklist
Track your physical progress. Checkboxes persist automatically on this device:
Frequently Asked Questions
Why does the Mar Largo pattern make some people feel like they are moving?
The alternating dark and light sinusoidal curves manipulate the brain's motion parallax processing. As a pedestrian walks across the pattern, the converging and diverging wave bands create peripheral optical flow signals identical to those produced by liquid waves, generating a subtle sensation of motion.
How did the Mar Largo pattern travel from Lisbon to Rio de Janeiro?
In the early 20th century, Lisbon calceteiros traveled to Brazil to pave civic boulevards in Rio de Janeiro. In 1970, famed landscape architect Roberto Burle Marx modernized and monumentalized the pattern across the 4-kilometer beachfront promenade of Copacabana, making it a global Brazilian icon.
Can Mar Largo be executed with different colors?
While the classic palette is black basalt and white limestone, regional variants sometimes incorporate red or terracotta limestone (calcário encarnado) to introduce warmth or highlight specific wave crests.
How do calceteiros maintain pattern curves around street trees or manhole covers?
Artisans cut concentric circular border rings (aros) of black basalt around obstacles, gently feathering and bending the incoming wave curves around the circular margin without breaking overall flow.