Architectural ceramic restoration relies on three specialized Urushi formulations: Mugi-urushi (raw lacquer kneaded with wheat flour and water at 1:1 ratio) provides high-tensile structural adhesion. Kokuso (raw lacquer blended with tonoko clay, cedar sawdust, and chopped hemp fibers) rebuilds large missing voids and broken facets. Sabi-urushi (raw lacquer mixed with water-slaked tonoko clay) levels micro-porosity and prepares the seam for water-stone honing.
At a Glance: Key Takeaways
- Structural Joint Strength: Tensile shear strength exceeds 18 MPa (higher than terracotta)
- Mugi-Urushi Ratio: 1 part wheat flour paste to 1 part raw ki-urushi
- Kokuso Composition: Ki-urushi + tonoko clay + shinki (sawdust) + jinba (hemp)
- Sabi-Urushi Ratio: 100 parts water-slaked tonoko to 80-100 parts ki-urushi
- Max Single Layer Thickness: 1.5 mm for kokuso; 0.5 mm for sabi-urushi
- Abrasive Honing Medium: Nagura stone, Suruga charcoal, and #1000 water sandpaper
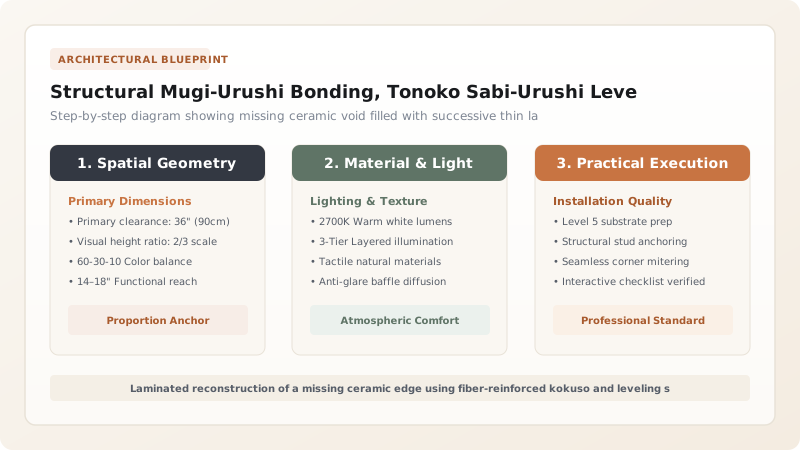
Formulating Structural Mugi-Urushi: Gluten-Urushiol Synergy
Mugi-urushi is the premier structural bonding agent in authentic Japanese joinery. The compound achieves its extraordinary bond strength through a synergistic mechanism between plant gluten proteins and urushiol polymers. To prepare mugi-urushi, high-gluten refined wheat flour (komugiko) is mixed with tiny increments of cold water on a glass or ceramic plate. The artisan kneads the dough vigorously with a wooden or horn spatula for 5 to 10 minutes until the gluten strands develop, yielding an extremely elastic, gummy paste that forms long, unbroken threads when lifted.
Next, an equal volume of raw lacquer (ki-urushi) is introduced in small fractional batches. The craftsman works the lacquer into the gluten dough using circular spatula sweeps until the mixture transforms from a murky brown into a smooth, glossy chocolate-brown adhesive paste. If the ratio contains too much flour, the bond will be brittle and vulnerable to moisture degradation; if it contains too much lacquer, the adhesive will slump, run out of the joint, and take weeks to achieve structural tack.
Reconstructing Structural Voids with Kokuso Fiber-Clay Paste
When ceramic vessels or architectural wall tiles suffer major impact damage, fragments are frequently missing entirely (lacunae). Traditional Kintsugi never uses synthetic polyester putties or plaster to fill these losses. Instead, artisans prepare kokuso—a fiber-reinforced structural composite dough.
The foundation of kokuso begins with nori-urushi (a 1:1 paste of boiled rice paste or wheat paste and raw urushi) or mugi-urushi. To this binder, three dry structural components are kneaded in:
- Tonoko: Micro-fine powdered sedimentary clay derived from calcined Yamashina clay beds, providing compressive strength and dimensional stability.
- Shinki (or Ki-no-ko): Ultra-fine, sifted cedar or cypress wood flour, which absorbs lacquer, reduces overall density, and mimics the thermal expansion coefficient of ceramics.
- Jinba (Chopped Hemp): Natural raw hemp fibers cut into 1-2 mm lengths and teased apart into individual filaments. These fibers act like structural rebar within the composite matrix, resisting shrinkage stress and bridging tensile cracks across wide voids.
Because kokuso cures strictly through laccase enzymatic oxidation which requires water vapor penetration, it must be applied in thin laminations not exceeding 1.5 mm in thickness. Each layer is cured in the furo for 5 to 7 days before the subsequent layer is built up.
Sabi-Urushi Preparation, Micro-Leveling, and Water-Honing
Following the structural curing of mugi-urushi joins and kokuso fills, surface imperfections and microscopic pits must be leveled flush with the surrounding ceramic glaze. This is accomplished with sabi-urushi. High-grade dry tonoko clay is first slaked on a glass board with a few drops of water, forming a buttery paste without any grit. Raw ki-urushi is then kneaded into the clay in a ratio of approximately 100 parts clay paste to 80-100 parts lacquer.
The artisan applies sabi-urushi across the fracture line using a flexible horn spatula (tsuno-bera), pressing firmly to force the paste into every microscopic pore while scraping away excess material from adjacent glazed surfaces. After curing in the furo for 24 to 48 hours, the hardened sabi is honed flat. Water is sprinkled over the seam, and the artisan wet-sands the repair using Suruga-charcoal (soft paulownia or magnolia charcoal) or 1000-grit silicon carbide water-paper backed by a hard wooden block. The goal is to produce a seam that is completely imperceptible to the touch, establishing a flawless substrate for the final lacquer undercoats and gold powder.
Formulation Proportions and Characteristics of Kintsugi Structural Pastes
Use this reference table to calculate exact physical dimensions, ratios, and specifications before purchasing:
| Compound | Constituents & Ratio | Consistency / Texture | Working Time | Shrinkage Rate |
|---|---|---|---|---|
| Mugi-Urushi | 1 part flour dough (50% water) : 1 part Ki-Urushi | Tacky, highly elastic gum (forms long threads) | 45 to 60 minutes | < 2% (negligible) |
| Nori-Urushi | 1 part cooked rice paste : 1 part Ki-Urushi | Smooth, creamy adhesive (lower shear strength) | 60 to 90 minutes | ~ 3% |
| Kokuso | Mugi-urushi (40%) + Tonoko (30%) + Sawdust (20%) + Hemp (10%) | Stiff modeling clay / sculptural dough | 2 to 3 hours | < 1.5% per thin layer |
| Sabi-Urushi | 100 parts water-slaked Tonoko : 85 parts Ki-Urushi | Smooth buttery paste (spreads like fine spackle) | 90 minutes | < 1% (ideal for honing) |
Practical Constraints
Every successful decoration project must account for physical and environmental constraints:
Long Structural Drying Times for Architectural Tile Assemblies
Multi-tile kintsugi panels require weeks of progressive layering before installation on architectural substrates. Solution: Plan structural joint work in modular shop phases, allowing ample curing windows before site delivery.
Differential Thermal Expansion in Ceramic Bodies
High-expansion earthenware paired with dense low-expansion porcelain can experience thermal shear stresses. Solution: Incorporate higher proportions of flexible hemp fiber (jinba) in kokuso to absorb differential expansion.
Execution Blueprint & Craftsmanship Sequence
Execute this professional sequence to achieve flawless results without backtracking:
Gluten Dough Development
Place 5 grams of high-gluten wheat flour on a glass slab. Add water drop by drop, kneading vigorously with a spatula for 8 minutes until elastic gluten chains form.
Mugi-Urushi Incorporation
Add raw ki-urushi in three equal increments. Knead continuously until the paste achieves a uniform glossy dark-brown tone and strings 50 mm without breaking.
Joint Alignment and Clamping
Apply a razor-thin layer of mugi-urushi to both broken edges. Mate the shards with firm compressive pressure, wiping away extruded bead with alcohol. Secure with low-tack washi tape and cure in the furo for 10-14 days.
Kokuso Lamination for Missing Shards
Blend mugi-urushi with tonoko, cedar sawdust, and teased hemp fibers. Press into ceramic voids in 1.0 mm increments. Cure each lamination inside the furo for 5 days before adding the next.
Sabi-Urushi Surface Leveling
Slake tonoko with water to a buttery paste, blend with ki-urushi (1:0.85 ratio), and spread across seams using a horn spatula. Cure in the furo for 36 hours.
Precision Wet Honing
Dip Suruga charcoal or 1000-grit wet sandpaper in water. Hone the cured sabi-urushi seam smooth using gentle circular strokes until no ridge is detected when running a fingernail across the boundary.
Common Mistakes & Countermeasures
Avoid these costly errors that compromise aesthetics, ergonomics, and budget:
Adding Water Directly to Urushi During Mugi-Urushi Mixing
Applying Kokuso in a Single Deep Fill (> 3 mm)
Dry Sanding Sabi-Urushi with Coarse Dry Sandpaper
Project Execution Checklist
Track your physical progress. Checkboxes persist automatically on this device:
Frequently Asked Questions
Can cornstarch or rice flour be substituted for wheat flour in mugi-urushi?
No. Cornstarch and rice flour lack the high concentrations of gluten proteins found in wheat flour. Gluten's unique viscoelastic protein chains interlock with urushiol polymers; substituting gluten-free flours results in a weak, crumbly bond that fails under architectural loads.
What is 'Tonoko' made of and why is it used?
Tonoko is a micro-fine clay powder produced from natural sedimentary clay deposits quarried near Kyoto, weathered, washed, and calcined. It possesses microscopic platelet particles that suspend perfectly in raw urushi, creating an exceptionally smooth, shrink-resistant paste ideal for fine architectural surface leveling.
How strong is a Mugi-Urushi ceramic repair compared to epoxy?
When properly cured, mugi-urushi exhibits tensile shear strengths between 18 and 24 MPa, which matches or exceeds the internal tensile strength of many high-fired stoneware ceramics. Unlike epoxy, which degrades and softens when exposed to boiling water or steam, cured mugi-urushi is completely impervious to heat, moisture, and aging.