
Tiered floating sauna benches and balanced convection ventilation are the architectural components that govern bather comfort and fresh oxygenation in an authentic Finnish sauna. Engineered with clear Western red cedar slats mounted to cantilevered wall blocking to eliminate floor-cluttering posts, benches are dimensioned to position bathers 1,100mm below the ceiling and elevate feet above the heater rock line, while balanced convection vents deliver 6 air changes per hour without chilling the room.
At a Glance: Key Takeaways
- The 1,100mm Ceiling Rule: Top bench positioned exactly 1,100mm below ceiling level to place bathers in the optimal 85°C–90°C thermal layer.
- Foot-Bench Elevation: Placing the lower foot bench level with or above the top surface of the heater stones to eliminate cold feet.
- Cantilevered Floating Framing: 2x4 cedar bench trusses anchored to reinforced in-wall structural blocking, leaving the tiled floor 100% open for washing.
- 10mm Slat Expansion Gaps: Clear 2x2 or 2x4 top cedar slats spaced with 10mm finger gaps to facilitate rapid vertical steam drainage.
- Sub-Bench Exhaust Aerodynamics: Mechanical or gravity exhaust vent positioned directly beneath the lower bench, drawing stale CO2 out of the room.
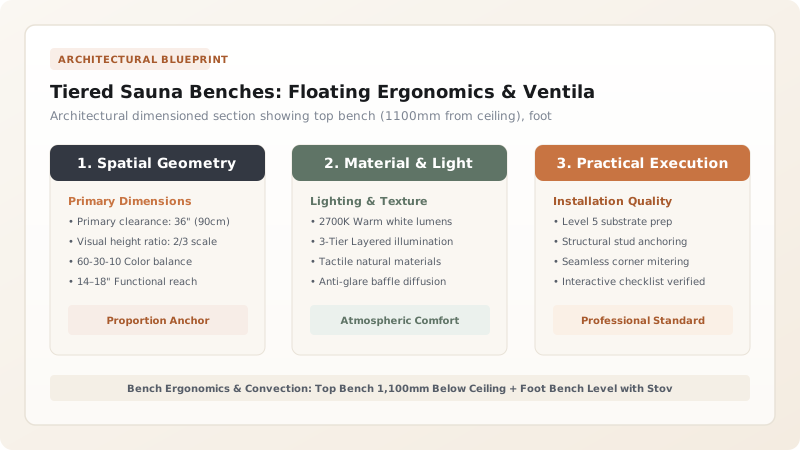
1. Thermal Stratification: The 1,100mm Ceiling Rule & Foot-Bench Physics
Because hot air rises and cold air sinks, temperature inside a sauna is heavily stratified along vertical height \(h\):
In a standard 2.2-meter tall sauna, the air temperature at floor level is barely 30°C, at waist level it is 60°C, and at ceiling height it reaches 95°C to 105°C.
To maximize physiological benefits without causing head overheating:
- The 1,100mm Headroom Rule: The top bench must be positioned exactly \(1,100\text{ mm}\) (44 inches) below the finished ceiling. A seated human torso measures approximately 900mm from bench to crown of head; this positions the bather's head safely 200mm below the superheated ceiling pocket while bathing the shoulders in optimal 85°C heat.
- The Foot-Bench Elevation: The lower bench (where bathers place their feet) must be positioned level with or slightly above the top surface of the stove stones (typically 450mm below the top bench). If feet hang below the rock line, the bather experiences cold feet and hot head, leading to circulatory fatigue and dizziness. Review whole sauna design in the sauna hub.

2. Structural Joinery: Cantilevered Wall Cleats & Blind Fastening
Traditional saunas had vertical wooden legs resting on the floor. However, floor legs absorb water, develop black rot at the base, and trap hair and dirt, making floor mopping difficult. Modern architecture specifies Floating Cantilevered Benches:
- Heavy In-Wall Structural Blocking: Double 2x6 timber blocking is installed between wall studs prior to foil barrier application, providing solid anchorage.
- Cantilevered Wall Ledger Cleats: 2x4 clear cedar cleats are through-bolted into the wall blocking using \(10\text{mm} \times 100\text{mm}\) Type 316 stainless steel lag bolts. Heavy diagonal knee-braces transfer the cantilever moment directly into the wall studs, rated to carry a live load of \(3.0\text{ kN/m}\) (200 lbs per linear foot).
- Under-Bench Fastening: Bench top slats (clear 2x2 or 2x4 Western red cedar) are secured to cross-bearers from the underside using stainless steel wood screws. This guarantees that zero screw heads are exposed on the top surface, eliminating any hot metal points that could burn skin. Explore cladding in cedar cladding and vapor barriers.
3. Thermodynamics & Ventilation: Thermosiphon Loops & CO2 Control
In an enclosed, unventilated hot room, four bathers will raise carbon dioxide levels above \(3,000\text{ PPM}\) within 15 minutes, causing headaches, lethargy, and shortness of breath. Authentic Finnish saunas employ a Balanced Thermosiphon Convection Loop:
- Fresh Air Supply Vent (Intake): A 100mm to 125mm vent cut through the wall directly beneath the stove (or just above the rocks). Cool exterior air is drawn in by the stove's rising heat plume, preheating as it mixes with rising steam.
- Mechanical / Gravity Exhaust Vent: Located on the opposite wall directly beneath the lower bench (approx. 300mm above the floor). As the hot air and steam cool along the far wall, it descends and is sucked out through this low exhaust vent at a rate of \(15\text{ to } 25\text{ liters/second}\).
- Drying Vent (High Level): A secondary ceiling-level slider vent that remains tightly shut during bathing, opened only after the session is complete to rapidly dump moisture and dry out the timber envelope within 30 minutes. Pair with cold immersion in cold plunge pools.
Sauna Ventilation Architecture Comparison
Use this reference table to calculate exact physical dimensions, ratios, and specifications before purchasing:
| Ventilation Scheme | Traditional Finnish Gravity Convection | Mechanical In-Line Exhaust Fan (Modern Standard) | Unventilated Closed Room (DIY Error) |
|---|---|---|---|
| Air Changes per Hour (ACH) | 4 to 6 ACH (driven by stove heat) | 6 to 8 ACH (continuous variable-speed) | < 0.5 ACH (stagnant air) |
| CO2 Level After 30 Mins | < 900 PPM (fresh, invigorating) | < 700 PPM (crystal clean air) | > 3,500 PPM (causes severe headaches) |
| Thermal Stratification | Smooth natural gradient | Extremely even (pulls heat down to feet) | Severe (95°C ceiling, 25°C floor) |
| Electric Power Required | Zero power (pure gravity thermodynamics) | Consumes 25W (ultra-quiet in-line fan) | Zero power |
| Bathing Comfort & Endurance | High (bathers stay comfortable longer) | Superior (no oxygen depletion) | Poor (bathers exit early due to suffocation feel) |
Bench Framing & Airflow Constraints
Every successful decoration project must account for physical and environmental constraints:
Wall Stud Pullout Under Bench Cantilever Load
A top bench holding three adults carries ~250 kg of dynamic live load. If the bench ledger is fastened with drywall screws or into un-blocked studs, the screws will strip out, collapsing the bench during a sauna session. Solid 2x6 structural blocking and 10mm lag bolts are mandatory.
Exhaust Vent Duct Condensation Leaks
Air leaving the sauna exhaust is saturated with steam (100% RH at 45°C). Running an uninsulated exhaust duct through a cold attic causes water to condense inside the pipe, dripping gallons of brown water back onto the ceiling. All exhaust ducts must be insulated with minimum 50mm fiberglass wrap.
Bench Slat Gaps Too Wide or Too Narrow
Spacing bench slats less than 6mm apart causes wood expansion to buckle slats when wet; spacing wider than 15mm pinches bathers' skin when sitting. A uniform 10mm (3/8-inch) finger gap is the universal golden standard.
Floating Bench Construction & Vent Tuning Sequence
Execute this professional sequence to achieve flawless results without backtracking:
In-Wall Blocking & Height Marking
Snap laser lines on cedar walls: mark top bench ledger at 1,100mm below ceiling; mark foot bench at 450mm below top bench.
Wall Ledger Bolting
Pre-drill 2x4 clear cedar ledgers; drive 10mm x 100mm stainless lag bolts through cedar cladding into solid in-wall blocking; level with digital transit.
Modular Bench Frame Fabrication
Construct rigid 2x4 cedar bench perimeter frames with interior joists spaced at 400mm centers; assemble using pocket screws on frame undersides.
Top Slat Blind Screwing
Lay 2x2 or 2x4 clear cedar top slats using 10mm spacer blocks; fasten slats from underneath through the frame using countersunk stainless steel screws.
Fresh Air & Exhaust Vent Coring
Core drill 125mm intake hole beneath stove; core 125mm exhaust hole on opposite wall 300mm above floor; install sliding cedar louver grilles.
Anemometer Airflow Balancing
Fire stove to 85°C; measure exhaust duct airflow with vane anemometer; adjust slider louver until exhaust maintains continuous 20 L/s airflow.
Common Mistakes & Countermeasures
Avoid these costly errors that compromise aesthetics, ergonomics, and budget:
Fastening Bench Slats from the Top
Placing the Intake Vent Near the Ceiling
Making the Top Bench Too Narrow
Project Execution Checklist
Track your physical progress. Checkboxes persist automatically on this device:
Frequently Asked Questions
What is the ideal width and depth for sauna benches?
For optimal comfort, the top sitting bench should be 600mm to 650mm (24 to 26 inches) deep, which accommodates comfortable sitting or full reclining. The lower foot bench should be 400mm to 450mm (16 to 18 inches) deep, providing a stable footrest or secondary seating tier for children and bathers who prefer milder heat.
Can sauna benches be treated with mineral oil or polyurethane?
NEVER use polyurethane, varnish, or chemical sealers. The only acceptable treatment is pure, food-grade paraffin oil (sauna oil) specifically formulated for sauna benches. Paraffin oil penetrates deeply into the cedar pores, repelling body sweat and oils without sealing the wood or emitting toxic fumes at high heat.
Why does fresh air ventilation not make the sauna cold?
Because incoming fresh air enters beneath the stove, it is instantly drawn up through the superheated 350°C peridotite stones and heating elements, warming to room temperature in a fraction of a second. The continuous convective draft actually improves heating efficiency by actively circulating hot air downward rather than letting heat trap uselessly against the ceiling.


