
Face-down jigsaw mosaic assembly is the specialized construction methodology used to manufacture monolithic Moroccan zellij panels. Artisans arrange thousands of hand-cut terracotta pieces face down upon a perfectly level sand or plaster bed, fitting the reverse-beveled tiles together like an intricate puzzle. Once the blind pattern is completed, slaked lime and hydraulic mortar are poured over the exposed terracotta backs, binding the individual pieces into a rigid structural slab that can be transported and erected on masonry walls without surface grout lines.
At a Glance: Key Takeaways
- Blind Geometry Layout: Craftsmen memorize entire mathematical star patterns, assembling inverted colored tiles without viewing the glazed surface.
- Sand Bed Tolerance: Screeded fine river sand provides an elastic, uniform surface that absorbs minor 0.5mm tile glaze thickness variations.
- Zero Grout Infiltration: Face-down compression on sand prevents liquid backing mortar from bleeding through hairline tile joints to foul glazed faces.
- Natural Hydraulic Lime (NHL 3.5): Provides vapor-permeable, flexible mortar matrix matching the thermal expansion of terracotta tiles.
- Crushed Terracotta Chamotte: Adding 20% calcined brick pozzolana reduces matrix shrinkage to under 0.08%, preventing slab warping.
- Monolithic Structural Panels: Assembled into transportable 1.0m x 1.0m slabs weighing 45 kg, reinforced with stainless steel or hemp mesh.
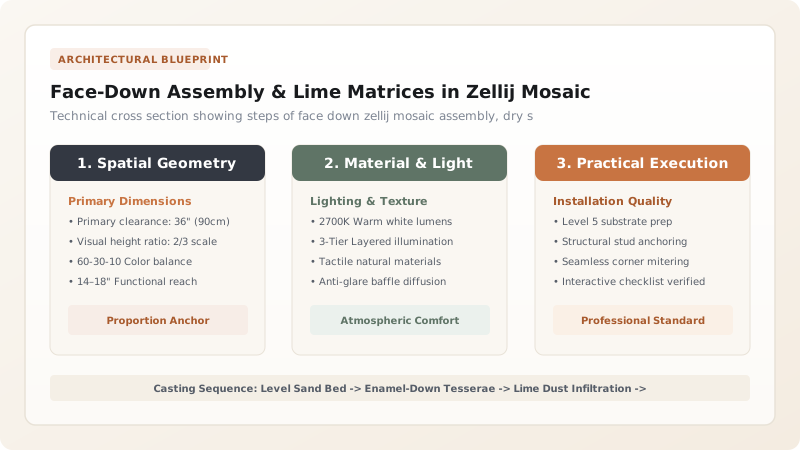
1. The Blind Assembly Plane: Sand Beds and Memory Grids
Assembling a complex Moorish mosaic face up is virtually impossible: mortar would squeeze out between tiles, staining the glazes, while maintaining hairline joints across thousands of uneven handmade pieces would cause pattern drift.
To overcome this, Moroccan artisans work on the blind assembly plane:
- Screeded Casting Sand: A wooden casting frame is laid on a concrete floor and filled with \(25\text{ mm}\) of dry, screeded fine silica sand. The soft sand cushions the glazed faces and prevents scratching.
- Radial Chalk Guidelines: Using a central pivot string and carpenter's square, the master craftsman snaps radial axes marking \(8\), \(16\), or \(24\) sectors onto the sand.
- Inverted Geometry: The artisan begins at the central star rosette, laying each chiseled piece face-down into the sand. The craftsman recognizes each piece's color solely by small glaze overflow droplets visible on the terracotta edges.
2. Mortar Matrix Formulation: Lime, Chamotte, and Pozzolanic Chemistry
Pouring modern Portland cement over the backs of zellij panels causes severe bowing and cracking due to cement's high drying shrinkage and excessive modulus of elasticity (\(E \approx 30\text{ GPa}\)). The historic backing matrix relies on natural hydraulic lime (NHL 3.5) and pozzolanic additives:
Crushed porous brick chamotte (fired terracotta dust) reacts with calcium hydroxide in the lime, generating insoluble calcium silicate hydrates (C-S-H) while keeping total volumetric shrinkage below \(0.08\%\). Furthermore, the lime slurry flows into the \(60^\circ\) dovetail chamfers between tiles, mechanically locking each piece into a monolithic reinforced slab.
3. Erection Mechanics: Setting Prefabricated Panels onto Masonry
After a 72-hour cure, the hardened zellij panel is tilted vertically. The sand is swept away, revealing an immaculate glazed ceramic surface with continuous hairline joints.
The panel is buttered on the reverse with a \(15\text{ mm}\) coat of hydraulic lime setting mortar and pressed against the damp brick or stone substrate. Adjoining panels are keyed together with interlocking staggered tile teeth, creating an unbroken mosaic facade across an entire courtyard. Explore water fountain applications in radial octagram and star polygon interlocking courtyard fountains.
Zellij Mosaic Backing Matrix Engineering Comparison
Use this reference table to calculate exact physical dimensions, ratios, and specifications before purchasing:
| Matrix Material | Curing Shrinkage | Flexural Modulus (E) | Vapor Permeability | Efflorescence Risk | Structural Durability |
|---|---|---|---|---|---|
| NHL 3.5 Lime + Crushed Chamotte | < 0.08% (Zero Warping) | 6 to 8 GPa (Flexible) | High (15–20 Perms) | Zero (No Free Alkalis) | 100+ Years Monolithic |
| Standard Portland Cement Mortar | 0.25% to 0.40% (Severe Curl) | 28 to 32 GPa (Brittle) | Very Low (< 3 Perms) | Severe White Alkali Leaching | Cracks Panels Within 5 Years |
| Epoxy Resin Backing Slabs | 0.02% (Virtually Zero) | 3.5 GPa (Tough) | Zero (Impermeable Vapor Dam) | Zero | 50+ Years (Indoor Only) |
| Gypsum Plaster (Traditional Quick-Set) | 0.05% (Expands Slightly) | 4 to 6 GPa | Moderate | Degrades in Damp Environments | Indoor Arid Use Only |
Practical Constraints
Every successful decoration project must account for physical and environmental constraints:
Panel Lifting Stress and Diagonal Shear Cracking
Tilting a 1.2m x 1.2m green lime panel (weighing 60 kg) from a horizontal sand bed into a vertical lifting position imposes heavy bending moments. If lifted by the corners, the unreinforced lime slab snaps diagonally across star centers. Panels must be cast with embedded 4mm 316 stainless steel wire mesh ladders or lifted with rigid plywood sandwich clamps.
Sand Intrusion into Inter-Piece Chamfer Voids
If the sand bed is too coarse or overly dry, loose sand grains can wedge into the hairline joints between tiles during placement. This prevents tiles from contacting tightly and creates visible sandy gaps on the finished face. Sand must be sifted through a 0.5mm screen and lightly misted before tile laying.
Execution Blueprint & Craftsmanship Sequence
Execute this professional sequence to achieve flawless results without backtracking:
Casting Table Setup & Level Sand Screeding
Construct a rigid timber casting box on a level workshop floor. Fill with 25mm of clean, washed silica sand sifted through a 0.5mm mesh. Screed perfectly flat with an aluminum straightedge.
Face-Down Jigsaw Placement of Furmah Tesserae
Commence laying chiseled zellij pieces enamel-side down into the sand, starting from the central star rosette. Tap each piece gently into the sand so all glazed faces sit in a dead-flat horizontal plane.
Slaked Lime Dusting & Seam Infiltration
Sift dry slaked hydraulic lime powder over the exposed terracotta backs. Brush the powder deeply into the dovetail seams between pieces. Mist lightly with clean water to activate the hydraulic bond.
Pouring Pozzolanic Hydraulic Backing Mortar
Mix 1 part NHL 3.5, 1.5 parts silica sand, and 0.5 parts crushed fired brick chamotte with water to a stiff mortar consistency. Spread a 30mm continuous layer over the tiles and embed a stainless wire mesh grid. Screed flat.
Curing, Panel Erection & Glaze Cleansing
Keep the mortar damp under wet burlap for 72 hours. Lift the panel vertically using sandwich boards. Wash away sand backing with water, revealing the pristine glazed zellij mosaic face.
Common Mistakes & Countermeasures
Avoid these costly errors that compromise aesthetics, ergonomics, and budget:
Using Coarse, Unwashed Beach Sand for the Casting Bed
Premature Vertical Lifting Before Mortar Reaches Shear Strength
Project Execution Checklist
Track your physical progress. Checkboxes persist automatically on this device:
Frequently Asked Questions
How are field joints between neighboring pre-cast panels concealed?
Panel edges are not cast in straight lines. Instead, tiles are left missing along the perimeter to form a zigzag jigsaw pattern. When two panels are erected side by side on the wall, individual hand-cut pieces are inserted into the interlocking fingers, making the panel joints 100% invisible.
Can pre-cast zellij panels be installed on drywall or stud partitions?
Yes, provided the wall is reinforced with 18mm marine plywood and covered with cement backer board. Panels are secured using flexible polymer-modified thin-set mortar and mechanical stainless steel L-brackets screwed into wall studs.


