
Tommettes de Provence are iconic hexagonal terracotta floor tiles originating in the Var region of southern France (most notably the village of Salernes) during the 18th and 19th centuries. Manufactured from iron-rich local clay, hand-molded, and wood-kiln fired, these hexagonal tiles (typically 13cm to 16cm across) feature rich ochre-to-crimson patinas, tight butt-jointed lime bedding, and deep boiled linseed oil finishes.
At a Glance: Key Takeaways
- Hexagonal Geometry: Classic 13cm, 16cm, or 18cm point-to-point regular hexagons distributing load across 120° tri-radial joints.
- Iron-Rich Salernes Clay: High hematite iron content delivering vibrant crimson, terracotta orange, and variegated wood-fired flashing.
- Traditional Butt-Joint Installation: Laid with hairline 1mm to 2mm joints using a fluid slaked lime and river sand slurry.
- Boiled Linseed Oil & Turpentine Saturation: Deep hydrophobic treatment penetrating clay pores to prevent staining without synthetic films.
- High Thermal Mass: Exceptional heat-banking capacity, naturally cooling interiors in summer and radiating underfloor heat in winter.
In-Depth Guides in this Directory
Explore specialized subtopic blueprints, technical dimensions, and execution checklists:
Iron-Rich Salernes Clay Molding & Wood-Kiln Firing Dynamics
Geology, wooden mold pressing, and wood-fired kiln aerodynamics of authentic Provençal red clay hexagonal tommettes de Salernes.
Breathable Hydraulic Lime Screed Bedding & Tight Butt-Joints
Formulation of NHL 3.5 lime bedding screeds, tile soaking protocols, and 1mm tight butt-joint grouting for French Provençal tommettes.
Boiled Linseed Oil Saturation & Carnauba Wax Patination Protocols
Multi-coat boiled linseed oil penetration, turpentine dilution ratios, and hard carnauba wax burnishing for French Provençal terracotta floors.
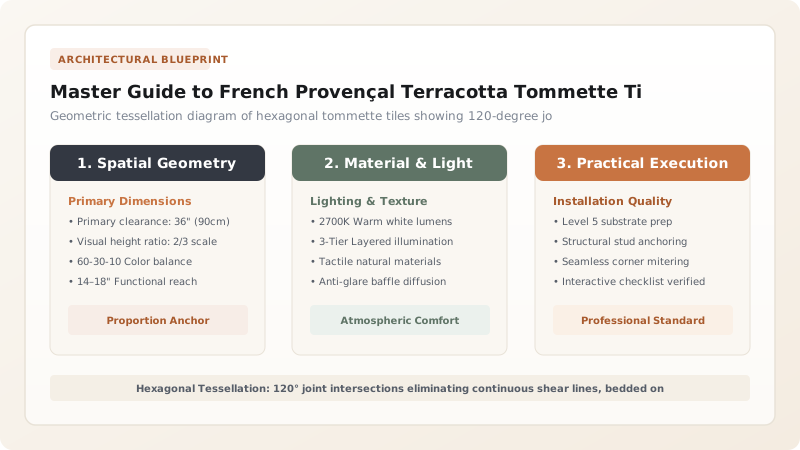
1. History & Geological Provenance: The Clays of Salernes
The hexagonal terracotta floor tile—the tommette—is synonymous with the architectural vernacular of Provence, from grand bastides in Aix-en-Provence to rustic farmhouses in the Luberon. While terracotta paving dates to Roman Gaul, the specialized production of small hexagonal tiles centered in the town of Salernes in the Var département during the early 19th century.
The secret of Salernes tommettes lies in the local geology: rich alluvial clay beds containing high concentrations of ferric oxide (hematite, \(\text{Fe}_2\text{O}_3\)), silica, and alumina, naturally low in limestone nodules that cause lime pops. When fired in traditional wood-burning bottle kilns at 950°C to 1,020°C, the fluctuating reduction-oxidation atmospheres create intense color variegation: from brilliant terracotta orange to deep oxblood crimson, purple flashings, and warm honey ochre.

2. Geometric Advantages of the Hexagonal Profile
Unlike square or rectangular paving tiles, the regular hexagon is one of only three regular polygons capable of tiling a Euclidean plane without gaps or overlaps (honeycomb conjecture). In architectural flooring, the hexagonal shape offers profound physical and mechanical benefits:
- Equilateral Stress Distribution: In a hexagonal grid, three tiles meet at every vertex at an exact angle of 120°. This eliminates the straight, continuous perpendicular shear joints found in grid-aligned square tiles, dramatically reducing the risk of reflective subfloor cracking telegraphing through the floor.
- Isotropic Resistance: Wheelbarrow or foot traffic traversing the floor encounters multi-directional edge resistance, preventing tile edge chipping (spalling).
- Visual Expansion: The absence of continuous straight joint lines visually broadens compact Provençal rooms, making small village houses feel substantially larger.
3. The Traditional Breathable Lime Mortar Setting Bed
Modern Portland cement thin-set mortars are fundamentally incompatible with porous terracotta tommettes. Portland cement contains soluble salts that migrate into the clay pores, causing permanent white efflorescence (salpêtre), while its excessive rigidity and vapor impermeability trap moisture in the subfloor.
Authentic Provençal installations rely on a chape à la chaux (natural hydraulic lime screed):
- Sub-Screed: A 40mm to 50mm breathable screed formulated from 1 part Natural Hydraulic Lime (NHL 3.5 or NHL 2) and 3 parts clean, washed river sand (0–4mm).
- Butt-Joint Setting (Pose à bain de mortier): Tommettes are soaked in water for several hours to quench their thirst, then pressed directly into a fresh, semi-dry lime mortar bed dusted with dry hydraulic lime powder.
- Tight Joints (1–2mm): The tiles are set virtually edge-to-edge (pose à joint serré), followed by flooding the floor with a very fluid slurry of pure slaked lime putty (CL90) and fine sand to fill the hairline joints without staining the clay face.
4. The Saturation Cycle: Boiled Linseed Oil & Carnauba Wax
Unsealed terracotta is exceptionally porous, with a water absorption rate of 8% to 15%. Left untreated, wine, olive oil, and kitchen grease will stain the clay permanently. Provençal masons developed a natural saturation process that deepens the tile color and creates an impermeable hydrophobic barrier while allowing the floor to breathe:
Once the lime mortar has cured for a minimum of 30 to 45 days and the subfloor moisture content drops below 3%, the floor is treated with multiple penetrating coats of heated boiled linseed oil (huile de lin cuite) diluted with natural pine turpentine (essence de térébenthine). The mixture penetrates deep into the capillary network of the clay, where atmospheric oxygen polymerizes the oil into a solid, water-resistant linoxin polymer matrix.
Provençal Tommettes Specifications vs Modern Extruded Tiles
Use this reference table to calculate exact physical dimensions, ratios, and specifications before purchasing:
| Technical Metric | Authentic Handmade Tommette | Modern Machine-Extruded Terracotta | Architectural & Performance Impact |
|---|---|---|---|
| Clay Source | Salernes alluvial iron clay (Var) | Industrial ball clay with red iron pigments | Natural variegated hematite hues vs flat uniform orange |
| Kiln Firing Method | Traditional wood-fired brick kilns (980°C) | Automated continuous roller gas kilns (1,080°C) | Unique wood-ash flashings; high capillary porosity |
| Installation Bed | NHL 3.5 hydraulic lime mortar screed | Portland cement polymer thin-set | Complete vapor breathability vs trapped subfloor moisture |
| Joint Width | 1mm to 2mm tight butt-joint (joint serré) | 5mm to 8mm wide grouted joints | Authentic historic look vs wide modern grout grids |
| Surface Treatment | Deep boiled linseed oil + beeswax/carnauba | Topical polyurethane or acrylic plastic sealant | Living breathable patina vs peeling synthetic film |
Critical Installation & Environmental Constraints
Every successful decoration project must account for physical and environmental constraints:
Efflorescence Risk
Subfloors with active rising damp must incorporate a breathable vapor barrier or lime-gravel capillary break.
Acid Vulnerability
Terracotta and lime joints will etch instantly when exposed to harsh muriatic acid or vinegar; use only pH-neutral black soap (savon noir).
Subfloor Deflection
Wooden joist subfloors must have minimum stiffness L/480 reinforced with decoupling membranes to prevent joint cracking.
Protocol for Laying and Finishing Hexagonal Tommettes
Execute this professional sequence to achieve flawless results without backtracking:
Substrate Leveling & Cleaning
Clean and level the masonry slab. Ensure substrate moisture is controlled and install perimeter expansion cork strips.
Tommette Water Soaking
Submerge raw terracotta tommettes in clean water for at least 60 minutes prior to laying to prevent them from sucking water from the mortar.
Hydraulic Lime Screed Application
Spread a 40mm thick semi-dry screed of NHL 3.5 lime and river sand, screeding flat with a straightedge.
Butt-Joint Laying & Tamping
Lay hexagonal tiles in interlocking honeycombs with tight 1-2mm joints; tamp lightly with a wooden mallet across multiple tiles to ensure plane alignment.
Lime Slurry Grouting (Coulis)
Pour a fluid slurry of slaked lime putty and fine silver sand across the floor, working it into joints with a rubber squeegee; sponge clean immediately.
Drying Period & Linseed Oil Saturation
Allow the floor to dry for 30 days. Apply 3 graduated coats of boiled linseed oil and turpentine (50/50, 70/30, 90/10), finishing with carnauba paste wax.
Common Mistakes & Countermeasures
Avoid these costly errors that compromise aesthetics, ergonomics, and budget:
Applying topical polyurethane, acrylic varnish, or epoxy sealers
Laying dry unsoaked terracotta tommettes into fresh lime mortar
Applying linseed oil before the lime mortar bed has fully cured
Project Execution Checklist
Track your physical progress. Checkboxes persist automatically on this device:
Frequently Asked Questions
How do you clean and maintain authentic Provençal tommette floors?
Never use chemical detergents, bleach, or acidic descalers. Routine cleaning should be performed using warm water and authentic liquid black soap (savon noir à l'huile de lin). The natural linseed oil within the black soap gently cleans while replenishing the protective oil patina of the clay.
Can tommettes be installed over modern radiant underfloor heating?
Yes. Terracotta has high thermal conductivity and excellent thermal mass. However, expansion perimeter joints (minimum 8mm hidden beneath baseboards) are critical, and the heating system must be brought up to temperature gradually at 2°C per day after a 60-day curing period.
What is the difference between Salernes tommettes and Spanish or Italian terracotta?
Salernes clay is uniquely rich in iron oxide (hematite), giving it a distinct, deep crimson-ochre flame hue and fine silty texture. Spanish (cotto) and Italian clays often contain higher sand or calcium contents, resulting in lighter peach, pink, or yellow-buff tones.


