
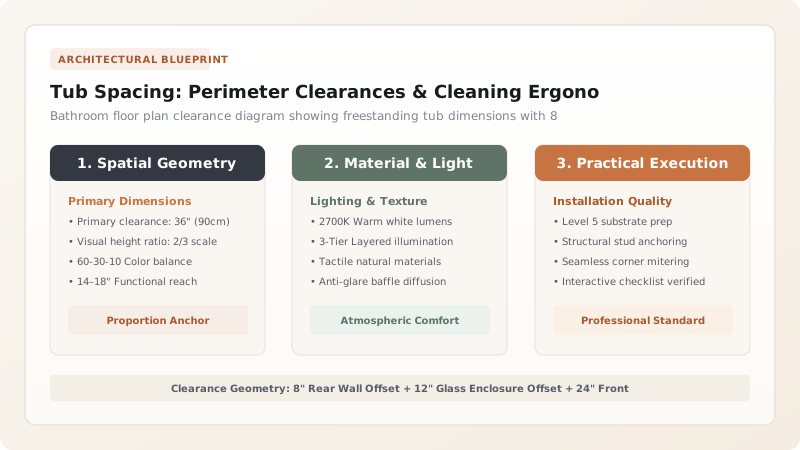
Maintain a minimum perimeter clearance of 6 to 8 inches (150–200mm) behind a freestanding tub, 12 inches (300mm) from side vanities or glass enclosures, and 24 to 30 inches (600–750mm) of open floor in front for safe bather exit and effortless mop access.
At a Glance: Key Takeaways
- 6"–8" Rear Wall Offset: The exact physical dimension required for standard 5-inch microfiber flat mops and vacuum wands.
- 12" Glass Enclosure Spacing: Allows squeegeeing shower glass exteriors without squeezing uncomfortably behind the tub.
- 24"–30" Front Exit Safety Landing: Provides stable footing for exiting wet bathers, complying with NKBA bathroom guidelines.
- Architectural Silhouette Breathing Room: Tighter spacing makes freestanding tubs look cramped and misplaced.
- Window Sill Elevation Alignment: Positioning tubs beneath windows with sills 24"+ above floor preserves exterior privacy.
1. Spatial Ergonomics: Mop Access & Hygiene Dimensions
When builders jam a 67-inch freestanding bathtub into a 70-inch alcove, it leaves an impossible 1.5-inch gap on either side. Dust bunnies, water splashes, and shed hairs accumulate in this dark trench, making cleaning impossible.
The National Kitchen & Bath Association (NKBA) recommends maintaining a Minimum of 6 to 8 Inches (150–200mm) of Open Floor around the entire perimeter. Review anti-wobble mounting in anti-wobble floor filler plates and explore freestanding tub plumbing.

2. Visual Sightlines & Tub-in-Shower Wet Room Clearances
If bathroom dimensions are tight, place the freestanding tub inside an open 'Tub-in-Shower' Wet Room Zone behind a single glass partition.
In wet rooms, water splashes are contained by continuous floor waterproofing and linear trench drains. Learn drain connections in island tub drains.
Freestanding Tub Perimeter Clearances vs Functionality
Use this reference table to calculate exact physical dimensions, ratios, and specifications before purchasing:
| Perimeter Offset Distance | Cleaning Ease (Mop Access) | Visual Aesthetic Rating | Bathroom Size Suitability |
|---|---|---|---|
| 8" to 12" Clearance (Optimal) | 100% Effortless (Flat mop reaches easily) | 5 / 5 (Sculptural breathing room) | Master Bathrooms (120+ sq ft) |
| 6" Clearance (Acceptable Minimum) | Good (Vacuum wand reaches) | 4 / 5 (Clean lines) | Medium Bathrooms (80–100 sq ft) |
| 2" to 4" Clearance (Sub-Standard) | Poor (Traps dust / Hand scrubbing) | 2 / 5 (Cramped / Retrofit look) | Avoid: Convert to drop-in alcove tub |
| 0" Touching Wall (Avoid) | FAILS: Inaccessible mold trap | 1 / 5 (Awkward gap) | FAILS: Unhygienic installation |
Tight Alcove Squeezing Tub Constraints
Every successful decoration project must account for physical and environmental constraints:
Squeezing a Freestanding Tub into a 60-Inch Alcove Leaving Un-Moppable 2-Inch Gaps
Standard 60" tub alcoves cannot accommodate freestanding tubs gracefully; forcing a 58" tub leaves 1" side gaps that accumulate mold and dust; if bathroom width is under 72 inches, specify a Back-to-Wall D-shaped freestanding hybrid tub or a built-in undermount tub instead.
How to Layout Bathroom Dimensions for a Freestanding Tub
Execute this professional sequence to achieve flawless results without backtracking:
Measure Total Available Bathroom Floor Footprint
Map room perimeter, noting locations of doors, vanities, toilet clearances, and shower glass.
Select Tub Length Based on 8" Wall Offsets
Subtract 16 inches (8" each end) from wall width to determine maximum allowable tub length (e.g., 84" wall = max 68" tub).
Verify 24" Clear Floor Egress in Front of Tub
Ensure at least 24 to 30 inches of unobstructed walking space exists between tub front and opposite vanity.
Position Floor Filler 2" Outside Tub Rim
Locate tub filler mounting point so spout extends 4"–6" over tub rim without contacting bather's shoulders.
Mark Drain Rough-In Center on Subfloor
Establish exact center point for Island Tub Drain rough-in box to align with tub factory waste hole.
Common Mistakes & Countermeasures
Avoid these costly errors that compromise aesthetics, ergonomics, and budget:
Placing a Freestanding Tub Closer Than 4 Inches to a Glass Shower Wall
Project Execution Checklist
Track your physical progress. Checkboxes persist automatically on this device:
Frequently Asked Questions
Can I put a freestanding tub right against a window?
Yes, provided the window sill is elevated at least 24 to 30 inches above the floor and you leave at least 6 inches of clearance between the tub rim and the window casing for cleaning and blind operation.


