
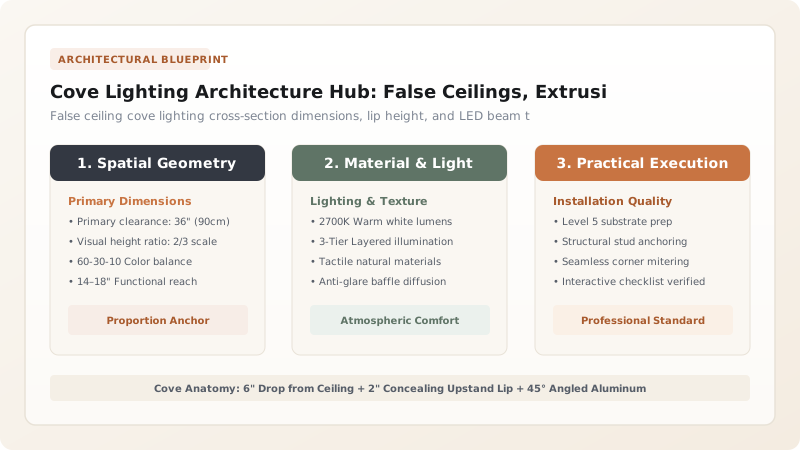
Design architectural cove lighting by dropping a drywall false ceiling perimeter by 6 inches, constructing a 2-inch vertical concealing upstand lip, and mounting a high-density COB LED strip inside a 45-degree aluminum extrusion channel angled inward to bounce soft 2700K light across the ceiling.
At a Glance: Key Takeaways
- False Ceiling Recess: 6-inch vertical drop allows light to expand across the ceiling plane without harsh cutoffs.
- Lip Dimension: 2-inch vertical lip conceals LED diodes from all standing and sitting sightlines in the room.
- Extrusion Channel: Mandatory aluminum extrusion channel dissipates heat and diffuses individual diode dots.
- Lumen Standards: 350 to 500 lumens per linear foot for ambient mood wash; 600+ lm/ft for primary indirect lighting.
In-Depth Guides in this Directory
Explore specialized subtopic blueprints, technical dimensions, and execution checklists:
LED Cove Extrusions: 45° Channels vs Flangeless Plaster-In
Master LED aluminum extrusion profiles: 45-degree corner channels, mud-in flangeless knife-edge trim, milky frosted diffuser lens light transmission, and thermal heat sinking.
Cove Lip & Drop Dimensions: Clearance Math & Hotspot Elimination
Master false ceiling cove dimensions: the 6-inch vertical drop rule, 2-inch concealing upstand lip math, preventing upper-wall light cutoff lines, and LED placement.
Tunable White & RGBW Cove Lighting: 2200K-6500K Circadian DALI
Master tunable white and RGBW cove lighting control: 2200K to 6500K circadian rhythm Kelvin shifting, DALI / 0-10V / Zigbee smart protocols, and high CRI 95+ LEDs.
1. Optical Physics: Diffuse Reflectance & Beam Throw
Unlike direct recessed ceiling spotlights that create harsh downward shadows and glare cones on floors, architectural cove lighting uses the entire ceiling surface as a secondary diffuse reflector. When light strikes a flat-matte white ceiling, photons scatter uniformly in 360 degrees, creating shadow-free ambient illumination.
Achieving a smooth, seamless wash without dark spots requires adhering to precise spatial clearances and optical angles:
- The 45-Degree Rule: Mounting the LED strip flat on the bottom of the cove creates an ugly sharp cutoff line on the upper wall. Angling the strip at 45 degrees throws light across the center of the room.
- Continuous Runs: Soldering strips end-to-end or using interlocking connectors eliminates the 2-inch dark shadows caused by standard strip end-caps.

Cove Lighting Specifications & Sizing Matrix
Use this reference table to calculate exact physical dimensions, ratios, and specifications before purchasing:
| Cove Profile Type | Drop Height (Ceiling to Cove) | Concealing Lip Height | Best Room Application |
|---|---|---|---|
| Standard Perimeter Drop | 6" - 8" drop | 2.0" vertical lip | Living rooms, master bedrooms, primary suites |
| Shallow Floating Ceiling | 4" drop (Compact) | 1.5" minimal lip | 8-foot standard height ceilings, hallways |
| Deep Architectural Trough | 10" - 12" drop | 3.0" high lip | Double-height great rooms, grand dining rooms |
| Plaster-In Flangeless Cove | Flush drywall recess | Zero lip (Knife-edge) | Ultra-minimalist modern galleries, contemporary homes |
Voltage Drop & LED Dimming Flicker Constraints
Every successful decoration project must account for physical and environmental constraints:
LED Strip Dimming at the Far End of a 30-Foot Cove
12V LED strips experience severe voltage drop over 16 feet, causing the end of the strip to look dim and pink; strictly use 24V LED tape and feed DC power to both ends of the run for uniform brightness.
How to Frame and Install Architectural Cove Lighting
Execute this professional sequence to achieve flawless results without backtracking:
Frame Drywall Perimeter Drop
Frame a 6" vertical drop soffit using 2x2 wood or metal studs leaving a 6" gap to the wall.
Add 2" Concealing Upstand Lip
Fasten a 2-inch vertical drywall or wood lip along the inside edge of the trough.
Paint Inside of Trough Flat White
Coat the interior cove cavity in high-reflectance (LRV 85+) flat ceiling paint.
Mount 45° Aluminum Channel
Screw aluminum extrusion along the back corner, angled upward at 45 degrees.
Adhere 24V COB LED Strip
Press continuous 24V dotless COB LED tape into channel and snap frosted diffuser on.
Common Mistakes & Countermeasures
Avoid these costly errors that compromise aesthetics, ergonomics, and budget:
Sticking Bare LED Tape Directly on Raw Drywall Without Aluminum Channels
Project Execution Checklist
Track your physical progress. Checkboxes persist automatically on this device:
Frequently Asked Questions
What CCT color temperature is best for residential cove lighting?
2700K (Warm White) is the gold standard for residential living rooms and bedrooms. For dining rooms and moody dens, 2200K to 2400K ultra-warm dim-to-warm LEDs create cozy candlelight ambiance.


