
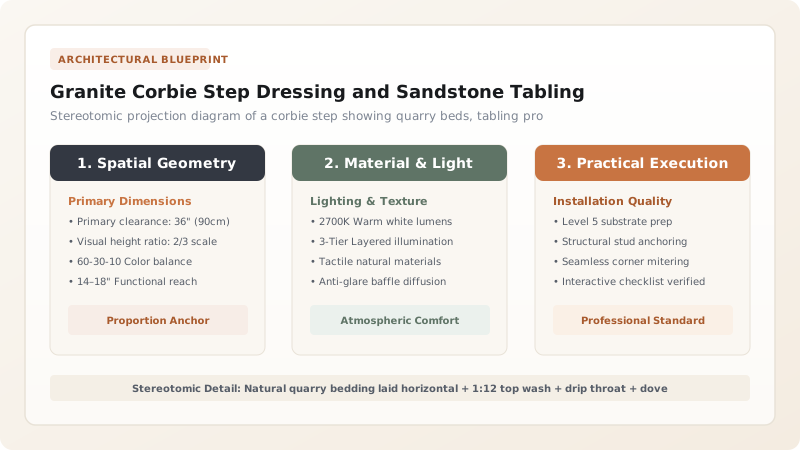
Granite Corbie Step Dressing and Sandstone Tabling represents the high art of traditional Scottish stereotomy. Masons work two contrasting geological materials: indestructible igneous granite for load-bearing base blocks, and fine-grained sedimentary sandstone for intricately molded tabling stones. Utilizing scabbing hammers, punch chisels, and claw chisels, masons dress each step block with perfectly plane beds, an outward fall of 1:12, and continuous undercut drip throating, joining adjoining stones with hand-poured molten lead cramps that lock the stepped parapet against seismic and windward shear.
At a Glance: Key Takeaways
- Aberdeenshire Igneous Granite: Ultra-dense quartz-feldspar stone resisting frost spalling and acidic peat rain.
- Old Red Sandstone Tabling: Fine freestone carved into sloped, molded coping profiles that cap the steps.
- Bush-Hammer & Claw Dressing: Textured stone surfaces matching historic 16th- and 17th-century masonry tooling.
- Undercut Drip Throating (Throats): 8mm semicircular grooves underneath tablings that break capillary water creep.
- Molten Lead Cramping: Dovetailed iron or bronze cramps bedded in molten lead to tie step stones together.
- Balanced Stereotomy: Cutting stones with angled rear seats to interlock with the backing rubble masonry core.
1. Petrography: The Dual Palette of Granite and Freestone
Scottish masonry traditions reflect local geology. In the northeast around Aberdeenshire, masons carved steps from Peterhead and Rubislaw granites—igneous rocks composed of tightly interlocking quartz, orthoclase feldspar, and biotite mica with compressive strengths exceeding 130 MPa and virtually 0% water absorption.
However, because granite is notoriously difficult to carve into fine moldings, masons in the Central Belt, Lothians, and Borders preferred Old Red Sandstone (Devonian) or Craigleith Carboniferous sandstone. These 'freestones' possess a uniform siliceous grain that allows banker masons to carve crisp molded arrises, deep drip throats, and decorative finials that weather gracefully over centuries.
2. Banker Masonry Tooling: From Scabbler to Claw Chisel
Raw quarry blocks (scapplets) arrive on the mason's banker bench to be transformed into finished corbie steps. The process follows a strict tooling progression:
- Punching / Roughing-Out: Heavy point chisels driven with steel club mallets remove the outer quarry crust, establishing rough rectangular geometry.
- Claw Chisel (Droving): A toothed chisel cuts parallel furrows across the stone face, leveling high spots.
- Dressing the Beds: The top and bottom bedding planes are dressed dead flat using a broad boaster chisel, ensuring that stones bear uniformly without point-loading.
- Bush-Hammering: The exposed vertical riser face is textured with a multi-pointed bush hammer, creating a classic weathered quarry texture.
3. Water Shedding Engineering: Undercut Throating and Lead Cramps
A corbie step is essentially a miniature roof exposed to horizontal rain. If rainwater is allowed to flow down the vertical stone face, water clings to the stone via surface tension, creeping into mortar joints and inducing winter frost spalling.
To prevent this, every tabling stone is carved with a continuous undercut drip throat (water groove)—an 8mm wide by 6mm deep semicircular groove carved 20mm in from the outer edge. Water cannot defy gravity to crawl across the inverted groove, causing droplets to fall harmlessly away. To resist the terrifying shear forces of North Sea gales, adjoining stones are locked with dovetailed bronze cramps set into carved pockets and sealed with molten poured lead.
Corbie Step Tooling Profiles & Geometrical Tolerances
Use this reference table to calculate exact physical dimensions, ratios, and specifications before purchasing:
| Stone Feature | Primary Tool Used | Finished Tolerance | Functional Significance | Visual Appearance |
|---|---|---|---|---|
| Bedding Plane (Bottom) | 1.5-inch Flat Boaster chisel | +/- 1.5mm dead flat | Prevents stress concentration fractures | Fine combed chisel strokes |
| Exposed Riser (Vertical) | 16-point Bush Hammer | +/- 3.0mm relief | Diffuses rainwater runoff & glare | Granular stippled texture |
| Tabling Wash (Top Slope) | Broad carver's gouge / rasp | 1:10 outward pitch | Sheds standing rain into roof gutter | Smooth planed surface |
| Drip Throat (Underside) | 1/4-inch Round Gouge | 8mm wide x 6mm deep | Breaks surface tension capillary creep | Crisp shadow line under overhang |
| Lead Cramp Socket | Cross-cut drill & narrow chisel | 120 x 40 x 30mm deep | Locks stones against hurricane wind uplift | Concealed beneath molten lead |
Artisanal & Weight Constraints
Every successful decoration project must account for physical and environmental constraints:
Heavy Lifting Hazards
Individual granite corbie blocks weigh 150kg to 250kg; handling them on a 15-meter gable scaffold requires certified rope winches and shear-legs.
Toxic Lead Fume Hazards
Pouring molten lead cramps on a high windy scaffold requires specialized crucible torches and organic vapor respirators.
Protocol for Banker Dressing a Sandstone Corbie Tabling Stone
Execute this professional sequence to achieve flawless results without backtracking:
Quarry Bed Orientation
Identify the natural sedimentary quarry bed; mark stone so bedding planes will lie horizontally in the wall to prevent delamination.
Drafting the Perimeter Margins
Chisel 20mm wide flat draft margins around the four perimeter edges using a 3/4-inch chisel and steel winding sticks.
Rough Broaching the Core
Knock off center waste stone between draft margins using a heavy punch chisel; check flatness across diagonals with straightedge.
Droving the Upper Wash
Carve the sloped upper wash at a continuous 1:10 fall using a 2-inch wide toothed claw chisel; finish with flat boaster.
Carving the Undercut Drip Throat
Scribe a line 20mm back from the front overhang arris; carve an 8mm semicircular groove along the entire length with a round gouge.
Cramp Pocket Mortising
Chisel matching double-dovetail cramp mortises 30mm deep into both end joints; drill pouring sprue for liquid lead injection.
Common Mistakes & Countermeasures
Avoid these costly errors that compromise aesthetics, ergonomics, and budget:
Setting sandstone corbie steps with the natural sedimentary quarry bed oriented vertically
Using mild steel cramps instead of bronze or austenitic stainless steel for stone ties
Project Execution Checklist
Track your physical progress. Checkboxes persist automatically on this device:
Frequently Asked Questions
What is the purpose of pouring molten lead into stone cramp pockets?
Molten lead (melting point 327°C) flows into every microscopic void around the bronze cramp and the carved stone socket. As lead cools, it contracts slightly, but when driven tight with a caulking punch, it forms an airtight, elastic, corrosion-proof mechanical gasket that absorbs thermal vibration without fracturing the stone.
How do you restore a decayed sandstone corbie step on an ancient castle?
Conservators typically use 'indenting' (piecing-in). The decayed zone of stone is cleanly sawed and chiseled back to sound stone in a square geometric pocket. A matching block of identical geological provenance (e.g., matching Clashach or Cullalo sandstone) is carved to fit with 3mm joints, bedded in slaked lime mortar, and tied with stainless steel dowels.


