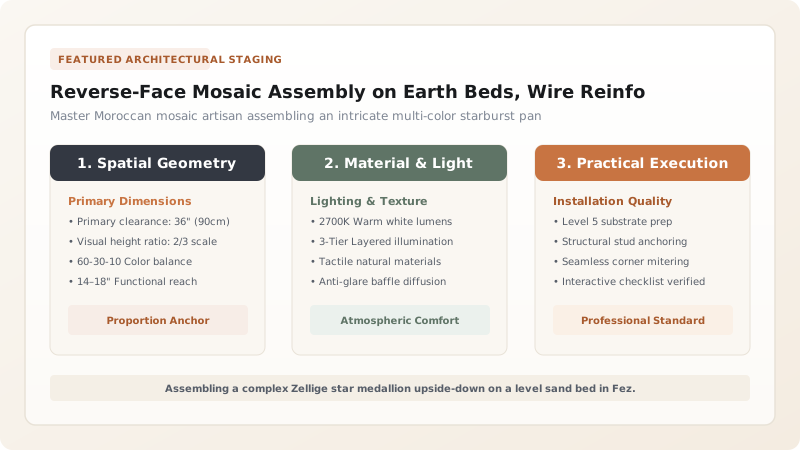
Zellige panels are assembled upside down on a flat sand-earth bed using the reverse-face method (envers). Guided by chalked geometry, the master assembler fits thousands of hand-chamfered pieces face-down without seeing the glazed front. Dry lime-gypsum powder is swept into the back joints to prevent mortar leakage. A reinforced slab of natural hydraulic lime mortar (NHL 3.5) is cast over the back, creating a rigid, lightweight structural tile panel ready for wall installation.
At a Glance: Key Takeaways
- Assembly Method: Reverse-face (sur l'envers / face-down blind puzzle assembly)
- Assembly Bed: Level, compacted fine river sand or earthen workshop floor
- Joint Blocker: Dry powdered gypsum or slaked lime swept into reverse crevices
- Backing Binder: Natural hydraulic lime (NHL 3.5) with coarse quartz sand (1:2 ratio)
- Structural Reinforcement: Galvanized welded steel wire mesh (50x50 mm, 2 mm wire)
- Curing Window: 72 hours before flipping panel upright for inspection
The Reverse-Face (Envers) Method: Blind Puzzle Assembly
Unlike Roman or Byzantine mosaics where tesserae are laid right-side up with visible grout lines, Moroccan Zellige is assembled completely blind on the workshop floor. This reverse-face (sur l'envers) technique is an extraordinary feat of spatial memory and tactile craftsmanship.
The master assembler (farrash) prepares a perfectly level bed of fine, damp river sand or smoothed clay earth. Using string lines and compasses, he chalks the master geometric framework (axes, borders, and star centers) onto the ground. Working from the center star outward, the artisan places each chiseled tile piece glazed face down onto the sand. The craftsman sees only the raw terracotta backsides and chamfered bevels. By feeling the tight contact between adjacent pieces with his fingertips, he fits thousands of polygon shards together like an interlocking jigsaw puzzle, ensuring that the glazed faces below are pressed flat into the sand bed with zero surface misalignment.
Dry Gypsum Sweeping & Glaze Contamination Prevention
Once the entire reverse-face mosaic panel is dry-fitted, a critical technical hurdle must be overcome: when wet backing mortar is poured over the tiles, liquid cementitious slurry could seep through micro-gaps between pieces and coat the glazed front faces, permanently staining the delicate mineral colors.
To prevent this, the artisan sprinkles dry, finely powdered plaster of Paris (gypsum) or dry slaked lime powder across the terracotta backsides. Using a soft palm-leaf broom, the dry powder is swept into the hairline joints. The fine powder fills the microscopic front seams while leaving the wider chamfered V-grooves open. When the wet backing mortar is applied, the dry powder hydrates instantly at the seam line, forming a temporary impermeable barrier that prevents wet mortar slurry from leaking through to the glazed front face.
Hydraulic Lime Casting & Wire Mesh Structural Reinforcement
To transform the thousands of loose, individual tiles into a rigid, transportable architectural slab, the reverse side is cast with a high-performance mortar. Traditional practice strictly forbids Ordinary Portland Cement (OPC); modern cement shrinks during hydration, warping the panel and inducing shear stresses that crack the brittle terracotta tiles.
Artisans pour a backing layer of natural hydraulic lime (NHL 3.5) mixed with coarse, washed river sand in a 1:2 ratio. The mortar is poured to a thickness of 15 mm. A grid of hot-dip galvanized welded steel wire mesh (50x50 mm grid, 2 mm wire) or alkali-resistant fiberglass mesh is embedded into the wet mortar, followed by a final 10 mm topping of lime mortar. The mortar flows into the chamfered V-grooves behind every tile, forming thousands of mechanical dovetail locks. After curing under damp burlap for 72 hours, the consolidated panel is flipped upright, washed with clean water to remove the sand bed, and installed onto the building wall, revealing a seamless, gleaming geometric tapestry devoid of visible grout lines.
Reverse-Face Zellige Panel Fabrication Specifications
Use this reference table to calculate exact physical dimensions, ratios, and specifications before purchasing:
| Assembly Stage | Material / Binder | Thickness / Gauge | Engineering Function | Quality Verification |
|---|---|---|---|---|
| Leveling Bed | Washed fine river sand or compacted silt | 25 mm leveled bed | Cushions glazed face; absorbs tile thickness variations | Check bed with 2-meter straightedge |
| Tile Laying | Hand-chamfered glazed Zellige tesserae | 10 mm to 14 mm tiles | Face-down interlocking geometric pattern | Zero lateral play; hairline front contact |
| Joint Sealer | Dry slaked lime / hemihydrate gypsum | Swept into bottom seams | Prevents wet mortar bleed onto glazed face | Inspect gaps under raking flashlight |
| First Mortar Pass | Natural Hydraulic Lime (NHL 3.5) slurry | 10 mm initial bedding | Fills chamfered V-grooves behind every piece | Vibrate gently with wooden float to expel air |
| Structural Core | Galvanized welded wire mesh (50x50 mm) | 2.0 mm wire gauge | Resists tensile bending and transport shear | Maintain 10 mm cover from back face |
| Topping Mortar | NHL 3.5 lime mortar (1:2 with coarse sand) | 15 mm final topping | Monolithic structural backing panel | Damp hessian cure for minimum 72 hours |
Practical Constraints
Every successful decoration project must account for physical and environmental constraints:
Weight and Fragility During Panel Handling
A 1 m² pre-fabricated Zellige panel weighs approximately 45 kg and is brittle under flexural tension. Solution: Limit modular panel dimensions to maximum 800x800 mm, and transport panels supported on rigid plywood backer boards.
Subtle Tile Color Mismatches Across Separate Panels
If adjacent panels are assembled from different kiln lots, visible color boundary lines appear on the finished wall. Solution: Blend rezola tiles from all kiln lots across all panels before chiseling to ensure homogeneous color distribution.
Execution Blueprint & Craftsmanship Sequence
Execute this professional sequence to achieve flawless results without backtracking:
Sand Bed Leveling and Geometry Chalking
Spread and screed a 25 mm bed of damp sand on the workshop floor. Snap chalk lines defining borders, radial star centers, and panel boundaries with precision straightedges.
Reverse-Face Dry Assembly (Envers)
Lay chiseled tiles glazed face down into the sand, beginning with central star rosettes and working outward in concentric rings, pressing pieces edge-to-edge with zero gaps.
Dry Lime Powder Sweeping
Sprinkle dry slaked lime or gypsum powder over the assembled terracotta backsides. Sweep gently with a palm broom to fill hairline front joints without disturbing tiles.
Initial Hydraulic Lime Grouting
Mix natural hydraulic lime (NHL 3.5) with fine sand into a fluid slurry. Pour a 10 mm bed across the panel, working mortar into all chamfered reverse V-grooves.
Wire Mesh Reinforcement Placement
Lay a sheet of galvanized welded wire mesh over the wet mortar bed. Pour a second 15 mm topping coat of lime mortar, screeding flat with a wooden float.
Curing, Panel Flipping, and Front Washing
Cure under damp burlap for 72 hours. Lift and flip the panel upright. Wash the front face with clean water and a sponge to remove sand, revealing the seamless mosaic.
Common Mistakes & Countermeasures
Avoid these costly errors that compromise aesthetics, ergonomics, and budget:
Using Portland Cement for the Backing Mortar Slab
Skipping the Dry Lime Sweeping Step
Lifting and Flipping the Panel Too Early (< 48 Hours)
Project Execution Checklist
Track your physical progress. Checkboxes persist automatically on this device:
Frequently Asked Questions
Why is Zellige assembled face-down on sand instead of directly on a wall?
Hand-pressed Zellige tiles naturally vary in thickness between 10 mm and 14 mm. If an artisan tried to assemble thousands of tiny pieces directly on a wall, the finished surface would be lumpy and uneven. By assembling face-down on a soft sand bed, all the glazed front faces press down against the same flat plane; the thickness differences are absorbed harmlessly into the backing mortar.
How are pre-fabricated Zellige panels mounted onto a building wall?
Once cured and washed, the rigid Zellige panels are hoisted onto the building wall. The masonry wall is prepared with a rough lime scratch coat. The back of the Zellige panel is buttered with fresh natural hydraulic lime mortar or flexible polymer-modified mortar, pressed against the wall, and temporarily braced with timber shores until the mortar sets.
Can Zellige panels be curved to fit circular columns and fountains?
Yes. Master artisans assemble curved Zellige panels by building curved wooden formwork molds or sand dunes matching the exact radius of the column or fountain basin. The tiles are placed face-down on the curved mold, reinforced with flexible wire mesh, and backed with lime mortar, creating pre-curved architectural segments.