
Saltillo tile is an authentic handmade terracotta floor tile originating exclusively from the valley surrounding Saltillo, Coahuila, Mexico. Handcrafted from local alluvial silt clays blended with natural spring water, the clay is pugged by foot, pressed into open wooden frames, and sun-dried on outdoor earthen drying patios where free-roaming wildlife and dogs frequently leave iconic paw-print impressions. Tiles are fired in traditional adobe beehive kilns fueled by scrap hardwood, where uneven flame paths and atmospheric variations produce a rich, organic spectrum of warm terracotta tones ranging from deep Spanish red to sunlit golden ochre. Because unsealed Saltillo tile is extraordinarily porous (water absorption >14%) and vulnerable to efflorescence, authentic installation demands thorough saturation sealing with multiple coats of hot boiled linseed oil followed by buffed carnauba-beeswax paste.
At a Glance: Key Takeaways
- Geographic Provenance: Sourced exclusively from alluvial riverbed clay deposits of Saltillo, Coahuila, Mexico.
- Hand-Framed Open Molding: Raw clay pressed into wet wooden frames, producing distinctive soft edges and pillowed contours.
- Solar Patio Curing: 14 to 21 days of slow desert sun-drying; famous for authentic coyote, dog, and chicken paw impressions.
- Beehive Wood Kiln Firing: Adobe kilns producing dynamic color variations (flame flashes from golden buff to rich reddish-terracotta).
- Wide Sanded Grout Joints: Traditional 15–25mm grout joints accommodating variable handmade tile dimensional tolerances.
- Boiled Linseed Oil & Carnauba: Multi-coat oil saturation transforming raw clay into a water-resistant, amber-patinated living surface.
In-Depth Guides in this Directory
Explore specialized subtopic blueprints, technical dimensions, and execution checklists:
Coahuila Alluvial Clay Pugging, Wooden Frame Molding, and Sun-Drying
Technical field guide to harvesting Coahuila alluvial clay, traditional foot pugging, open-frame wooden molding, and outdoor patio solar curing.
Beehive Kiln Wood-Firing, Flame Kissing, and Natural Color Variegation
Technical thermal guide to firing Mexican Saltillo tiles in adobe beehive kilns: hardwood combustion, flame kissing, reduction blushes, and color grading.
Boiled Linseed Oil Saturation, Efflorescence Protection, and Carnauba Wax Buffing
Comprehensive finishing manual for sealing Saltillo terracotta tiles with boiled linseed oil, preventing efflorescence, and buffing carnauba paste wax.
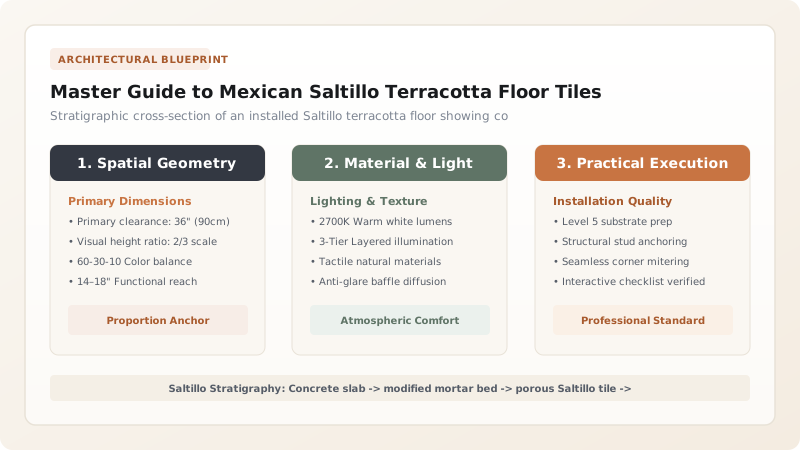
1. Terroir and Craft: The Alluvial Clays of Saltillo, Coahuila
True Saltillo tile cannot be manufactured synthetically in modern ceramic factories; it is a direct product of its regional terroir. In the desert highlands of northern Mexico, centuries of seasonal mountain runoff washed mineral-rich sediment into the dry river valleys around Saltillo. This alluvial clay contains a unique mineral balance of fine montmorillonite, kaolinite, iron oxides, and natural calcium carbonates.
For over four centuries since the Spanish colonial era, local families (tejeros) have excavated this raw clay by pick and shovel. Mixed with water in shallow pit reservoirs (piletas), the clay is kneaded by foot to expel trapped air voids. The damp clay is packed by hand into open wooden forms, struck level with a wet timber straightedge, and laid flat across expansive sun-baking fields (secaderos) where warm Chihuahuan desert breezes initiate slow, crack-free curing.
2. Beehive Wood Kilns: Thermal Variegation and Flame Flashes
After sun-drying, tiles are stacked on edge inside monumental adobe brick beehive kilns (hornos). Unlike modern computer-controlled gas tunnels that fire tiles to uniform industrial perfection, Mexican beehive kilns are fueled with scrap pecan, mesquite, and pine hardwood.
As flames surge through the stacked tile labyrinth, temperatures fluctuate between 850°C and 1000°C depending on proximity to the fire trench. This produces the iconic, beloved color variegation of Saltillo:
- Super-Saltillo (Manganese Buff): Tiles placed in cooler upper kiln zones retain higher porosity and display soft peachy-yellow and golden honey tones.
- Traditional Terracotta Red: Tiles in the central heat zone oxidize into deep, vibrant Spanish brick-red and rust.
- Flame Kissing (Chispas): Where direct flames and flying embers lick against the tile face, intense localized reduction creates dramatic swirling blushes of deep espresso brown, charcoal, and ochre.
3. The Critical Sealing Protocol: Boiled Linseed Oil and Paste Wax
Because Saltillo tiles are low-fired, they are extraordinarily porous—exhibiting water absorption rates between 14% and 18%. An untreated Saltillo tile functions like a sponge: it will stain permanently from a single drop of wine or oil, and if exposed to damp concrete subfloors, soluble salts migrate to the face in powdery white efflorescence plumes.
The traditional treatment consists of saturating the clean, dry tile with 2 to 3 coats of hot boiled linseed oil thinned 50/50 with mineral spirits or turpentine. The oil penetrates deep into the porous clay capillaries, oxidizing over 48 hours into a tough, water-repellent polymer that darkens the pale clay into a deep, rich translucent amber. Once cured, the surface is sealed with hand-rubbed paste wax formulated from Mexican carnauba wax and pure beeswax, providing an easy-to-clean satin luster that patinates gracefully under foot traffic.
Saltillo Tile Dimensions, Patterns, and Sealing Formulations
Use this reference table to calculate exact physical dimensions, ratios, and specifications before purchasing:
| Tile Format | Nominal Dimensions | Grout Joint Width | Clay Porosity | Sealing Protocol |
|---|---|---|---|---|
| Standard Square | 300 x 300 x 18 mm (12x12") | 18–25 mm wide | High (14%–18%) | 3 coats boiled linseed oil + 2 coats carnauba wax |
| Traditional Octagon & Dot | 300mm Octagon + 100mm Square | 15–20 mm wide | High (15%–18%) | Pre-grout penetrating sealer + topical wax finish |
| San Felipe (Arabesque) | 300 x 200 mm curved arabesque | 18–22 mm wide | Medium-High (12%–16%) | Boiled linseed oil saturation + clear solvent lacquer |
| Riviera / Hexagon | 200 x 200 mm hexagonal | 12–18 mm wide | High (14%–17%) | Tung oil blend + paste wax burnish |
| Stair Tread Bullnose | 300 x 350 x 25 mm rounded edge | 15–20 mm wide | High (15%–19%) | Heavy sub-surface oil soak + slip-resistant matte seal |
Practical Constraints
Every successful decoration project must account for physical and environmental constraints:
Freeze-Thaw Exterior Vulnerability
High Thickness and Weight
Master Installation Sequence for Authentic Mexican Saltillo Tiles
Execute this professional sequence to achieve flawless results without backtracking:
Subfloor Moisture Testing and Crack Isolation
Verify concrete subfloor moisture vapor emission (< 1.5 kg/1000 sq ft); apply liquid-applied elastomeric crack isolation membrane.
Pre-Installation Blending and Sorting
Unpack tiles from multiple crates simultaneously; blend varying color hues (buff, red, flashed) across the floor to prevent localized color clumping.
Pre-Sealing Tile Faces (Grout Release)
Apply a light coat of penetrating water-based sealer or dilute linseed oil to tile faces prior to installation to prevent cement grout staining.
Mortar Bedding with Large-Notch Trowel
Comb polymer-modified medium-bed thin-set mortar using 15x15mm square-notch trowel; back-butter each tile 100% to accommodate irregular backs.
Tile Placement and Wide Joint Spacing
Press tiles into mortar with twisting motion; maintain 18–20mm joint gaps using rope or wooden spacers, accommodating ±6mm tile size variations.
Wide Sanded Grout Packing
Pack coarse sanded Portland cement grout firmly into wide joints using a rubber grout float; tool joints slightly concave with rounded wooden stick.
Acid-Free Surface Cleanup
Sponge tile faces with clean water within 30 minutes; never use muriatic acid, which bleaches clay and triggers violent salt efflorescence.
Boiled Linseed Oil Saturation and Carnauba Wax Buffing
Allow 14 days for mortar to dry; apply 2 coats of hot boiled linseed oil; buff with carnauba-beeswax paste using high-speed floor polisher.
Common Mistakes & Countermeasures
Avoid these costly errors that compromise aesthetics, ergonomics, and budget:
Cleaning newly installed Saltillo tiles with muriatic (hydrochloric) acid to remove grout haze
Using a standard narrow tile spacer (3mm or 5mm) on handmade Saltillo tiles
Applying a thick topical polyurethane or acrylic clear coat over damp, unsealed Saltillo tiles
Project Execution Checklist
Track your physical progress. Checkboxes persist automatically on this device:
Frequently Asked Questions
Why do many authentic Saltillo tiles have animal paw prints on them?
In Saltillo, tiles are laid out across vast open-air dirt fields to dry in the sun for several weeks before firing. Local farm dogs, coyotes, chickens, and wild birds walk across the wet clay, leaving footprints. These paw prints are considered authentic badges of handmade honor and are often prized as lucky centerpiece tiles.
Can Saltillo tile be installed over an existing tile floor?
Yes, provided the existing tile floor is structurally sound, level, and abraded with diamond grinding to ensure mechanical bonding. However, you must account for the substantial 30mm height buildup at thresholds, exterior doors, and kitchen appliance recesses.
How do you maintain and clean a sealed Saltillo floor?
Vacuum or sweep regularly. Damp-mop using neutral pH stone and tile cleaners or mild oil-based soaps (such as Murphy's oil soap or castile soap). Never use acidic vinegar, ammonia, or bleach. Reapply a light buffing of carnauba-beeswax paste annually in high-traffic hallways.


