Monolithic cob walling is built without formwork by pitching foot-trodden cob lumps onto the wall using three-pronged cob forks in vertical increments (lifts) of approximately 600 mm. Workers walk along the wall head to heel-tread the material into an interlocking mass. Once a lift has dried to a leather-hard state (typically 3–5 days), its flared, uneven faces are shaved plumb and flat using a razor-sharp, long-handled paring iron (cob cutter).
At a Glance: Key Takeaways
- Standard Lift Height: 500 mm to 600 mm (20 to 24 inches) per course
- Pitching Tool: Three-pronged Devonshire Cob Fork
- Compaction Method: Direct heel treading and flat wooden beetle ramming
- Curing Period per Lift: 3 to 7 days before pitching next course
- Shaving Tool: Long-handled Triangular Paring Iron (Cob Knife)
The Art of Unshuttered Earthen Masonry
One of the most astonishing aspects of traditional English cob building to modern engineers is the complete absence of formwork or shuttering. In rammed earth construction (pisé), heavy timber or steel caissons must be built to contain the earth during mechanical ramming. In cob building, however, the stiff, trodden clay-straw dough possesses sufficient internal cohesive shear strength to stand unsupported up to 600 mm high immediately upon placement.
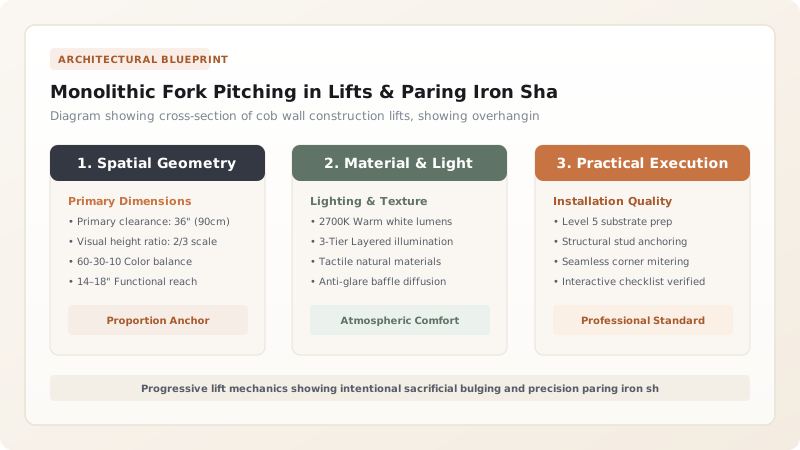
By dispensing with costly wooden formwork, historic English masons could construct vast barns and multi-story dwellings rapidly using simple agricultural tools. The wall is built in progressive horizontal courses termed lifts. Each lift is built slightly oversized and bulbous, allowing the fibers to settle before the wall faces are pared down to true plumb lines.
Fork Pitching Dynamics and Heel-Treading Compaction
Erecting a cob wall is a coordinated rhythmic dance between ground workers and wall head builders. On the ground, workers roll prepared cob into football-sized lumps and spear them with long-handled, curved three-pronged cob forks. The fork is swung upward to the builder standing atop the wall, who deposits the lump with a firm twist of the wrist.
Standing atop a two-foot-wide wall, the waller treads the newly arrived lump into place with direct heel strikes. Heel-treading drives the new cob into the fibrous surface of the underlying course, weaving the straw strands together across the horizontal boundary line. A heavy wooden beetle (rammer) is used around window jambs and wall corners to ensure maximum compaction without blowing out the soft edges.
The Leather-Hard Phase and Paring Iron Geometry
When first pitched, a cob lift is slightly wet and deformable. If trimmed immediately, the soft earth would drag, smear, and pull loose long strands of straw, leaving deep structural voids. Conversely, if allowed to dry completely stone-hard, trimming becomes nearly impossible, blunting hardened steel tools within minutes.
The craftsman waits for the leather-hard state—typically reached in 3 to 5 days under gentle drying breezes. At this moisture content (around 8–10%), the clay cuts smoothly like firm cheese. The artisan stands atop the wall or on scaffolding, holding a traditional Devonshire paring iron (a broad triangular steel blade mounted at an angle on a 1.5-meter ash handle). Slicing downward along taut mason's plumb lines, the paring iron shears cleanly through clay, gravel, and tough straw, revealing a dead-flat, textured surface.
Managing Corners, Joinery Openings, and Timber Lintels
Corners in cob buildings are never formed as sharp, brittle 90° right angles. Sharp earthen corners are vulnerable to mechanical damage from livestock and rain erosion. Traditional builders always curve external corners into soft, sweeping radii (typically 150 mm to 300 mm radius), which dramatically increases wind deflection and structural resilience.
Where doors and windows are located, rough-sawn unseasoned English oak or elm lintels are bedded directly into wet cob across openings, extending at least 450 mm beyond the opening on either side to distribute upper lift loads across the massive wall head. Temporary wooden bracing props support window openings until the entire story height is completed and seasoned.
Cob Wall States: Pitching, Leather-Hard, and Cured Characteristics
Use this reference table to calculate exact physical dimensions, ratios, and specifications before purchasing:
| Moisture Stage | Moisture Content (%) | Structural Behavior | Appropriate Work Phase |
|---|---|---|---|
| Fresh / Wet | 14% to 16% | Deformable, plastic; stands 600 mm unsupported | Fork pitching, placement, heel-treading, and joint stitching |
| Plastic Settling | 11% to 13% | Begins self-weight settling; minor initial shrinkage | Protected from direct sun and heavy rain; no paring |
| Leather-Hard | 7% to 10% | Firm, non-sticky; cuts cleanly like aged cheddar cheese | Down-stroke slicing with long-handled paring irons |
| Fully Cured | 2% to 4% | Monolithic stone-like hardness; unyielding under hammer | Lime plastering, electrical chasing, structural roof loading |
Practical Constraints
Every successful decoration project must account for physical and environmental constraints:
Drying Time Dependence on Humidity and Wind
In cold, damp weather, lifts can take up to 2 weeks to reach leather-hard state Mitigation: Install temporary mobile canvas windbreaks and schedule major cob walling between late May and early August
Scaffolding Attachment to Green Earthen Walls
Standard masonry screw anchors will pull right out of fresh uncured cob Mitigation: Use independent, free-standing timber scaffold towers that do not anchor into or load the curing earthen wall
Execution Blueprint & Craftsmanship Sequence
Execute this professional sequence to achieve flawless results without backtracking:
Substrate Wetting and Key Scoring
Scrape and moisten the top surface of the underlying cured lift with water. Score 25-mm deep criss-cross grooves using a pick to ensure mechanical keying.
Plumb Line and Guide String Setup
Establish taut vertical corner plumb strings to define the finished wall plane, offsetting strings 50 mm outward to accommodate intentional initial bulging.
Fork Pitching from Mixing Ground
Spear prepared cob lumps with three-pronged forks and pitch upward in continuous rhythm to the wall builders standing on the wall head.
Heel Compaction and Perimeter Shifting
Tread newly deposited cob into place with heavy boots, driving heels down along the center of the wall and working outward to lock fibers across courses.
Lift Height Termination at 600 mm
Stop upward pitching when the lift reaches 600 mm in height. Level the top surface roughly, maintaining a slight concave crown to hold rainwater during curing.
Leather-Hard Monitoring
Allow the lift to dry naturally for 3 to 6 days. Test firmness by pressing a thumb into the wall; it should leave an impression of no more than 3 mm.
Down-Stroke Paring Iron Shaving
Stand on the wall head or scaffold and slice downward with the sharp triangular paring iron, cutting off excess bulging earth flush to vertical plumb strings.
Scrap Recycling and Corner Rounding
Collect pared leather-hard shavings at the base of the wall, soak them in water for 24 hours to re-hydrate, and re-tread into subsequent cob batches.
Common Mistakes & Countermeasures
Avoid these costly errors that compromise aesthetics, ergonomics, and budget:
Pitching lifts higher than 700 mm in a single session
Paring the wall while the cob is still wet and plastic
Discarding leather-hard paring scrapings as construction waste
Project Execution Checklist
Track your physical progress. Checkboxes persist automatically on this device:
Frequently Asked Questions
How many lifts can be completed in a typical building week?
In fair English summer weather with moderate breezes, experienced cob builders complete two to three 600 mm lifts per week on a standard cottage perimeter, allowing approximately 1.5 to 1.8 meters of vertical progress weekly.
How are door and window frames anchored into cob walls?
Wooden fixing blocks (known as 'cob bricks' or timber noggins) are built directly into the cob lifts as the wall rises. Window and door sub-frames are later screwed into these embedded timber blocks.
Can cob walls be built during winter months?
Historically, no. Cob building is strictly seasonal, running from April through September. Winter freezing causes water within uncured cob to expand, shattering the clay bonds and turning the wall to loose mud when thawed.
Why are cob walls shaved down rather than built straight from the start?
Because cob has no shuttering, workers deliberately pitch it slightly wider than the finished design. Slicing the faces down with a paring iron after partial drying guarantees a dead-plumb wall with a beautifully textured, toothy surface ideal for lime render bonding.