Protecting cob requires an unyielding stone foundation plinth rising at least 450 mm to 600 mm above ground level to stop rising damp, and a multi-coat sacrificial lime render system. Composed of pure non-hydraulic lime putty (or NHL 2) mixed with coarse sharp aggregate and animal hair, lime render allows internal water vapor to evaporate while repelling liquid storm water, protecting the earthen core from decay.
At a Glance: Key Takeaways
- Plinth Masonry: Knapped Flint, Dartmoor Granite, or Local Rubblestone
- Plinth Height Above Grade: Minimum 450 mm (standard 600 mm to 750 mm)
- Plinth Mortar: Moderately Hydraulic Lime Mortar (NHL 3.5)
- Protective Render: 3-Coat Non-Hydraulic Lime Putty (Fat Lime) + Coarse Sand
- Surface Breathability: 100% Vapour Permeable (Sd < 0.05 m)
The Foundation Plinth: Defeating Capillary Moisture at Ground Level
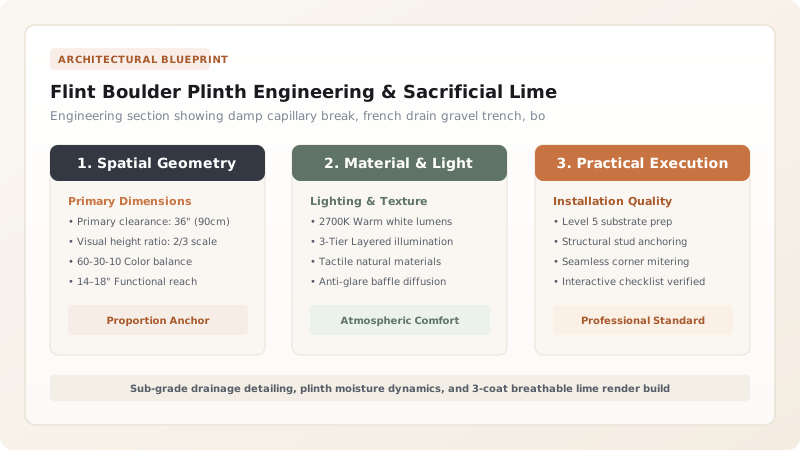
Earthen architecture can withstand wind, frost, and earthquakes, but standing ground water is its fatal vulnerability. If raw cob rests directly on moist topsoil, capillary suction draws groundwater upward into the clay matrix, causing the base of the wall to soften, lose compressive strength, and ultimately slump under the weight of upper stories.
To prevent this, English vernaclar masons constructed massive foundation plinths—known regionally as footings, grounds, or grudge-walls. In Dorset and Hampshire, these plinths are built from knapped flint nodules and chalk; in Devon and Cornwall, from dense moorland granite boulders or local killas shale. Rising a minimum of 450 mm (and frequently 750 mm) above surrounding grade, the stone plinth elevates the vulnerable cob well clear of soil splashback, snowdrifts, and surface runoff.
The Damp-Proof Course Paradox in Historic Cob
Modern builders often attempt to install impermeable plastic damp-proof membranes (DPC) across the top of stone plinths before laying cob. In historic restoration, this practice is frequently catastrophic. A plastic sheet creates an impermeable slip plane that severs the structural friction bond between stone plinth and monolithic cob, creating a dangerous shear failure risk during earth tremors or windstorms.
Furthermore, condensation often pools atop the plastic sheet, rotting the bottom of the cob lift. Traditional cob engineering achieves damp resistance naturally through height, ventilation, and perimeter drainage: trenching a French drain filled with clean washed gravel around the foundation perimeter to drop the groundwater table below the footing level, rendering artificial membranes redundant.
The Sacrificial Principle of Non-Hydraulic Lime Renders
The exterior finish of a cob building must fulfill two seemingly contradictory functions: it must shed liquid wind-driven rain, yet remain completely permeable to internal water vapor. Applying modern Portland cement or vinyl acrylic masonry paint suffocates the wall. Cement traps rising ground moisture inside the cob; during winter freezes, this trapped moisture turns to ice, shattering the earthen core while the outer cement crust remains intact until the wall suddenly fails.
The only material compatible with cob is sacrificial lime render made from slaked quicklime (non-hydraulic lime putty, CL-90-S) or very weak natural hydraulic lime (NHL 2). Lime render is 'sacrificial' because it slowly absorbs atmospheric carbonic acid and weathering stresses over decades, protecting the precious earthen wall underneath. Highly breathable (Sd < 0.05 m), lime allows moisture inside the cob to evaporate harmlessly into the open air.
The Three-Coat Lime Render Buildup and Traditional Limewash
Applying lime render onto dry, absorbent cob requires meticulous hydration control and multi-layer application:
- Coat 1: The Scratch Coat (Harling/Dubbing): A 1:2.5 mix of coarse well-graded sharp sand and lime putty, reinforced with coarse horsehair or goat hair. Pressed firmly into the cob pores to a thickness of 8–10 mm and scored with criss-cross keys.
- Coat 2: The Floating Coat: A 1:3 mix of medium pit sand and lime putty applied 6–8 mm thick, straightened with timber featheredges to produce an even plane.
- Coat 3: The Setting Coat: A fine 1:1 mix of fine silver sand and mature lime putty floated with a wooden trowel to create a breathable, closed-surface finish.
- The Finish: Limewash: Five to seven coats of hot-churned tallow or linseed-oil limewash, which crystallizes upon carbonation into a shimmering, weather-resistant, micro-porous calcite shell.
Wall Coatings on Cob: Non-Hydraulic Lime vs Hydraulic Lime vs Portland Cement
Use this reference table to calculate exact physical dimensions, ratios, and specifications before purchasing:
| Coating Type | Vapour Permeability (Breathability) | Flexibility & Modulus of Elasticity | Compatibility with Cob | Long-Term Failure Mode |
|---|---|---|---|---|
| Non-Hydraulic Lime Putty (Fat Lime) | Exceptional (Sd < 0.03 m); fully breathable | Extremely flexible; accommodates cob movement without cracking | Master Standard; 100% historically authentic | Slow surface weathering after 25–40 years; easily recoated |
| Natural Hydraulic Lime (NHL 2) | High (Sd 0.05–0.10 m); breathable | Moderate flexibility; good frost resistance in exposed zones | Excellent; suitable for severe weather exposures | Hairline crazing if applied over dry un-misted cob |
| Natural Hydraulic Lime (NHL 3.5 / 5.0) | Low to Moderate (Sd 0.20–0.40 m) | Stiff; tends to sheer away from flexible cob substrate | Poor to Marginal; too hard and rigid for earthen walls | Separation, debonding, and trapped moisture pockets |
| Portland Cement / Sand Render | Zero breathability; impermeable plastic barrier | Extremely brittle; high shrinkage and extreme rigidity | Fatal; strictly prohibited on all cob architecture | Catastrophic; traps water, causes internal cob liquefaction |
Practical Constraints
Every successful decoration project must account for physical and environmental constraints:
Slow Carbonation Rate of Non-Hydraulic Lime
Lime putty requires weeks of frost-free, humid weather to convert back to limestone (CaCO3) Mitigation: Hang damp hessian curtains over freshly rendered walls for 14 days and avoid rendering cob after late September
Flint Stone Irregularity and Mortar Voids
Irregular knapped flint nodules leave deep cavities if not meticulously packed Mitigation: Heart the center of the plinth with smaller flint gallets and lime mortar, creating a solid rubble core without internal voids
Execution Blueprint & Craftsmanship Sequence
Execute this professional sequence to achieve flawless results without backtracking:
Trench Excavation and Rubblestone Bedding
Excavate a foundation trench 800 mm wide down to firm subsoil. Lay large granite boulders or flint nodules bedded in NHL 3.5 hydraulic lime mortar.
Plinth Elevation Above Finished Grade
Build the stone plinth to a height of at least 500 mm above ground level, tapering the top stone course slightly outward to form a natural drip lip.
Perimeter French Drain Installation
Install a perforated drainage pipe wrapped in geotextile fleece along the base of the plinth, backfilling the trench with 20-mm washed pea gravel.
Cob Surface Cleaning and Pre-Wetting
Brush cob surface to remove loose dust. Mist wall generously with clean water using fine spray nozzles until suction is thoroughly tempered.
Scratch Coat Application with Animal Hair
Trowel on a 9-mm base coat of 1:2.5 lime putty and sharp coarse aggregate blended with sterilized horsehair. Scratch diamond key patterns with a lath comb.
Carbonation Curing and Floating Coat
Allow scratch coat to carbonate under damp hessian sheets for 5 days. Apply a 6-mm floating coat of 1:3 lime putty and medium sand, leveling with straightedges.
Fine Wood Float Finish
Apply a 3-mm finish coat of fine sand and lime putty. Rub with a circular wooden float to consolidate aggregate and close shrinkage pores.
Multi-Coat Limewashing
Apply five thin coats of pure slaked limewash enriched with 1% boiled linseed oil, allowing 24 hours between coats for full atmospheric carbonation.
Common Mistakes & Countermeasures
Avoid these costly errors that compromise aesthetics, ergonomics, and budget:
Rendering cob with modern Portland cement sand mix
Applying lime render onto dry, parched cob walls
Paving concrete slabs right up against the stone plinth
Project Execution Checklist
Track your physical progress. Checkboxes persist automatically on this device:
Frequently Asked Questions
Why is animal hair added to the base coat of lime render on cob?
Animal hair (typically ox, horse, or goat hair) adds tensile strength to wet lime mortar, preventing cracking as the thick plaster shrinks during curing and bridging subtle seasonal movements in the underlying cob.
How do you repair an existing cob wall damaged by Portland cement render?
Carefully remove the cement render with light pneumatic chisels or hand tools, taking care not to gouge the softened cob behind it. Allow the damp cob to dry naturally for several summer months, stitch deep cavities with new cob bricks or trodden cob, and re-render with breathable lime putty.
Can hydraulic lime (NHL) be used on cob instead of lime putty?
Very weak natural hydraulic lime (NHL 2) is acceptable and often practical in exposed coastal locations because it sets faster in damp maritime air. However, stronger limes like NHL 3.5 or NHL 5 are too hard and brittle, creating the same moisture-trapping risks as cement.
How often does traditional limewash need to be renewed on a cob house?
In rural settings with moderate rainfall, refreshing the limewash with one or two fresh coats every 3 to 5 years keeps the building looking pristine, fills hairline weathering micro-cracks, and maintains the sacrificial weather barrier.