
Design tile-to-wood transitions by aligning subfloor layers so tile and hardwood meet 100% flush at the same finished height. Use slim brushed brass Schluter-SCHIENE L-angle profiles or create an organic interlocking puzzle transition where hexagon tiles bleed into wood planks.
At a Glance: Key Takeaways
- Zero-Lip Rule: Flush transitions eliminate awkward 1-inch tripping saddles and allow robotic vacuums to pass.
- Subfloor Height Math: 3/4" Hardwood = 3/8" Tile + 1/8" Ditra Membrane + 1/4" Thin-Set Mortar.
- Schluter L-Angle Trim: Slim 1/8-inch metal edge profiles (Brushed Brass, Matte Black) protect tile edges from chipping.
- Expansion Caulk: Fill the 1/8-inch expansion joint between tile and wood with color-matched flexible silicone caulk (never grout).
In-Depth Guides in this Directory
Explore specialized subtopic blueprints, technical dimensions, and execution checklists:
Hexagon Tile to Wood Transitions: Organic Scribing & Inlays
Master organic hexagon tile-to-wood transitions: jigsaw scribing techniques, 1/8-inch silicone expansion joints, leveling mortar, and entryway bleed layouts.
Metal Schluter Strip Profiles: Brushed Brass vs Matte Black Trims
Master metal Schluter tile transition profiles: SCHIENE vs RENO vs QUADEC profiles, brushed brass, matte black, and stainless steel finishes, and height sizing math.
Large-Format Porcelain Layouts: 24x48 Math, Lippage & Leveling
Master large-format porcelain tile layouts (24x48 and 30x30 inches): the 1/3 offset stagger rule (preventing center crown lippage), mechanical leveling clips, and medium-bed mortar.
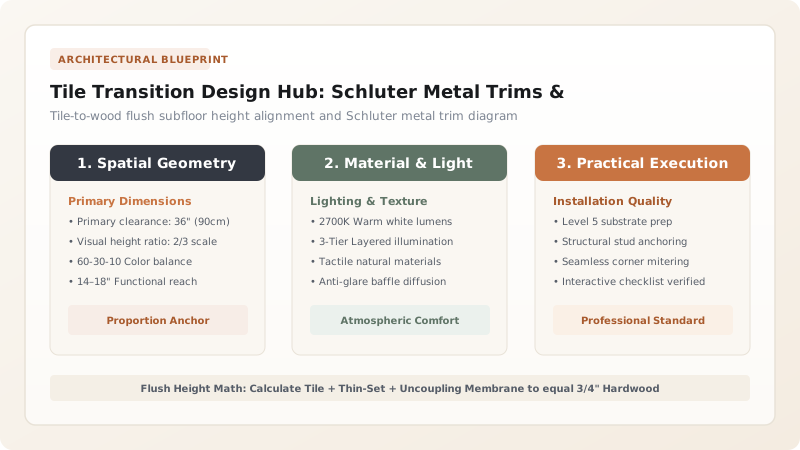
1. Subfloor Elevation Math & Zero-Threshold Engineering
In builder-grade construction, contractors carelessly install tile without calculating floor height, resulting in an ugly 1-inch wooden 'speed bump' threshold saddle between the kitchen tile and living room hardwood. Modern architectural design requires 100% flush, zero-threshold transitions.
Achieving a flush transition requires precise subfloor elevation math before setting tile: adjusting underlayment plywood thickness so the finished tile top plane aligns within 1/16-inch of the hardwood plane.

Tile-to-Hardwood Transition Profiles
Use this reference table to calculate exact physical dimensions, ratios, and specifications before purchasing:
| Transition Method | Edge Protection | Tripping Hazard | Visual Character |
|---|---|---|---|
| Schluter-SCHIENE Metal Trim (Brass) | 100% (Solid metal lip protects tile) | 0% (100% Flush transition) | Modern Luxury, Architectural Minimalist |
| Organic Hexagon-to-Wood Puzzle | High (Individually scribed wood) | 0% (Flush interlocking) | Artisanal, Statement Entryway / Kitchen |
| Color-Matched Silicone Joint | Moderate (Requires caulk bead) | 0% (Clean 1/8" expansion line) | Seamless Warm Contemporary |
| Traditional Raised Marble Saddle | High (Solid stone block) | High (3/4" raised step tripping lip) | Outdated / Historic Retrofit only |
Wood Expansion vs Rigid Grout Cracking Constraints
Every successful decoration project must account for physical and environmental constraints:
Grout Cracking and Crumbling Between Tile and Wood
Hardwood expands horizontally with humidity while tile is rigid; packing hard cement grout into the joint will crush and crumble within 6 months; strictly fill the 1/8" transition joint with 100% flexible color-matched silicone caulk.
How to Build a Flush Tile-to-Wood Transition
Execute this professional sequence to achieve flawless results without backtracking:
Calculate Total Stack Height
Measure hardwood thickness (3/4") and adjust tile subfloor to match.
Install Schluter L-Profile
Embed perforated leg of Schluter metal profile in thin-set mortar under tile edge.
Set Tile Flush with Metal
Ensure top face of tile sits exactly flush with the top metal edge.
Install Hardwood Against Profile
Lay hardwood planks leaving a 1/8-inch gap to the metal profile.
Fill Joint with Flexible Silicone
Inject color-matched 100% silicone sealant into the 1/8" expansion seam.
Common Mistakes & Countermeasures
Avoid these costly errors that compromise aesthetics, ergonomics, and budget:
Using Hard Cement Grout Between Hardwood and Tile
Project Execution Checklist
Track your physical progress. Checkboxes persist automatically on this device:
Frequently Asked Questions
Can you do an organic hexagon tile puzzle transition with pre-finished hardwood?
Yes! Scribe each hardwood board to the exact angle of the hexagon tiles using a multi-tool and jigsaw, leaving a 1/8-inch expansion gap filled with flexible color-matched silicone.


