
Execute staircase board and batten by calculating the bisected transition angle where horizontal landing rails meet the rising rake rail (typically an 18-degree miter joint for a 36-degree stair pitch). Keep all vertical battens 100% plumb (spaced 12 to 14 inches apart), beveling only their top and bottom ends to match the rake angle.
At a Glance: Key Takeaways
- The Bisected Transition Formula: Divide stair rake angle by 2 (e.g. 36° / 2 = 18°) to cut seamless horizontal-to-diagonal rail miters.
- 100% Plumb Battens: Battens must ALWAYS be vertical (plumb with gravity), NEVER perpendicular to the stair slope.
- 36-Inch Plumb Height: Top chair rail maintains a constant 36-inch vertical elevation from every tread nosing.
- Skirt Board Integration: Bottom battens terminate cleanly into a 1x4 flat skirt board cap running along the stringer.
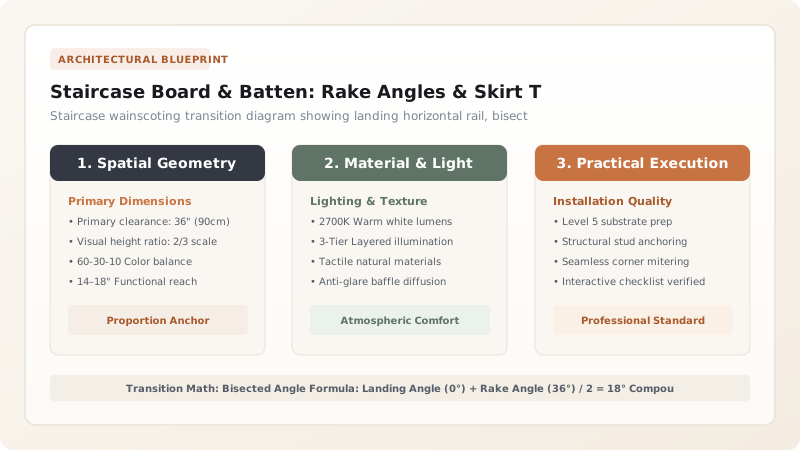
1. Trigonometric Joinery: The Bisected Angle Transition
The most challenging woodworking joint in residential trim carpentry occurs where the horizontal wainscoting of the first-floor hallway transitions into the rising diagonal rake of the staircase.
If you attempt to butt these rails together, the joint will gap open. To create a seamless, furniture-grade transition, carpenters calculate the Bisected Angle:
$$\text{Miter Angle} = \frac{180^{\circ} - (180^{\circ} - \theta)}{2} = \frac{\theta}{2}$$
For a \(36.0^{\circ}\) staircase rake, both the horizontal rail and the rising rake rail are cut at an exact \(18.0^{\circ}\) miter.

Staircase Rake Pitch vs Bisected Miter Angles
Use this reference table to calculate exact physical dimensions, ratios, and specifications before purchasing:
| Stair Rise / Run Ratio | Staircase Rake Pitch (\theta) | Landing Bisected Miter Cut | Batten Top/Bottom Bevel |
|---|---|---|---|
| 7.0" Rise / 11.0" Run (Shallow) | 32.5° Rake Angle | 16.25° Miter Cut | 32.5° Bevel Cut |
| 7.5" Rise / 10.0" Run (Standard) | 36.8° Rake Angle | 18.40° Miter Cut | 36.8° Bevel Cut |
| 8.0" Rise / 9.0" Run (Steep) | 41.6° Rake Angle | 20.80° Miter Cut | 41.6° Bevel Cut |
| Commercial 6" Rise / 12" Run | 26.6° Rake Angle | 13.30° Miter Cut | 26.6° Bevel Cut |
Stair Handrail Bracket Collision Constraints
Every successful decoration project must account for physical and environmental constraints:
Staircase Handrail Brackets Colliding with Vertical Board Battens
Building code mandates continuous handrails at 34–38 inches; if handrail brackets land half-on and half-off a 1/2-inch batten, the handrail rocks; layout batten spacing so handrail wall brackets land cleanly on flat drywall bays or center directly on a 1x4 batten.
How to Install Staircase Board and Batten
Execute this professional sequence to achieve flawless results without backtracking:
Calculate Stair Rake Angle
Use a digital angle finder on the stair stringer to measure exact rake angle (e.g. 36.5°).
Snap 36" Plumb Reference Line
Measure 36" vertically up from tread nosings and snap chalk line along the wall.
Cut Bisected Transition Miters
Cut horizontal and diagonal 1x4 top rails at 18.25° and fasten to wall studs with 2.5" finish nails.
Cut Plumb Vertical Battens
Cut 1x3 battens with 36.5° top and bottom bevels, keeping sides 100% plumb with a 4-foot level.
Fill, Caulk & Paint Satin Enamel
Fill nail holes with wood putty, caulk all seams with paintable acrylic, and apply 2 coats of satin trim enamel.
Common Mistakes & Countermeasures
Avoid these costly errors that compromise aesthetics, ergonomics, and budget:
Installing Vertical Battens Perpendicular to the Staircase Slope
Project Execution Checklist
Track your physical progress. Checkboxes persist automatically on this device:
Frequently Asked Questions
What thickness of wood should be used for staircase battens?
Use 1/2-inch thick MDF or primed pine for vertical battens, topped with a 3/4-inch thick top rail with a 1/4-inch picture ledge cap. The 1/4-inch thickness difference creates a crisp, professional shadow line.


