
Concealed-screw channel anchoring is an advanced architectural fastening method that secures monumental solid brass thresholds to structural concrete slabs without visible surface screw heads. The system employs an extruded brass sub-base featuring a recessed center channel where heavy-duty 316 stainless steel expansion anchors are secured. A precision-matched solid brass fluted spline is then hydraulically pressed or malleted into place, engaging internal barb locks to produce an unbroken, tamper-proof, and aesthetically pure threshold surface.
At a Glance: Key Takeaways
- Aesthetic Purity: Eliminates ugly countersunk screw heads, dirt traps, and uneven screw heights across the portal transition.
- Vandal & Tamper Resistance: Concealed mechanical anchoring prevents unauthorized removal or fastener loosening in high-security public buildings.
- Grade 316 Stainless Fasteners: Heavy-duty 8mm (5/16") wedge or undercut anchors providing tensile pullout resistance exceeding 12 kN per anchor point.
- Extruded Barbed Snap-In Cap: Solid C38500 brass spline with micro-serrated side teeth that press-fit into matching spring grooves in the base channel.
- EPDM Thermal & Galvanic Isolation: Continuous vulcanized rubber membrane isolating brass from wet concrete and preventing chemical alkali attack.
- Serviceable Disassembly: Engineered access notch at threshold jamb ends allows specialized extraction tools to remove the cap for future renovations.
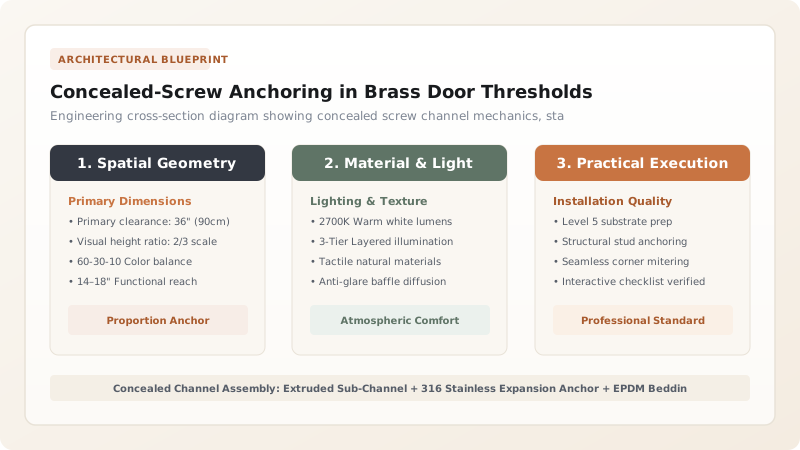
1. The Surface Screw Dilemma: Mechanical Loosening and Dirt Traps
Traditional threshold installation relies on surface countersunk holes drilled directly through the brass profile. In civic institutions and luxury hotels, this traditional method suffers from three critical engineering failures:
- Vibration-Induced Back-Out: Constant pedestrian footfalls and rolling luggage generate micro-vibrations that back out surface screws over time, creating trip hazards and door leaf collisions.
- Debris & Hygiene Traps: Deep countersunk screw pockets collect street dirt, greasy mop water, and polishing compound residue, oxidizing into unsightly black rings.
- Shear Failure on Soft Brass: Countersunk screw heads bear directly against brass countersinks. Under heavy wheel braking, the soft brass countersink deforms, elongating the hole and allowing the saddle to slip.
The concealed screw channel resolves these issues by relocating all mechanical anchors into an internal recess situated below the finished walking plane.
2. Structural Fastening: Pullout Physics in C25/30 Concrete
Monumental entrance portals experience substantial horizontal forces when heavy commercial doors slam shut against weatherstripping seals. Fasteners must transfer both shear and tensile pullout stresses into the structural concrete slab:
Where \(f_{ck}\) is the concrete compressive strength (typically \(25\text{ to }35\text{ MPa}\)), \(h_{ef}\) is the effective embedment depth (minimum \(50\text{ mm}\)), and \(k_1\) is the uncracked concrete factor. By spacing Grade 316 stainless steel wedge anchors at \(300\text{ mm}\) on center along the concealed center track, the installed threshold withstands over \(36\text{ kN}\) of cumulative uplift resistance.
3. The Snap-In Barbed Spline: Hydraulic Press-Fit and Serviceability
Once the base channel is torqued down, the channel is sealed using a solid architectural bronze cap spline. The spline incorporates continuous barbed ribs on its underside that interlock with precision detents inside the base extrusion:
- Interference Press-Fit: Engineered with a \(0.15\text{ mm}\) interference fit, requiring a rubber dead-blow mallet or hydraulic clamping tool for full insertion.
- Acoustic Damping Insert: A continuous closed-cell silicone foam core beneath the spline dampens footfall harmonics, eliminating hollow clacking noises.
- Jamb-End Extraction Relief: A miniature \(1.5\text{ mm}\) bevel is milled into the bottom edge of the spline near the door frame, allowing maintenance teams to insert a pry hook and release the cap for re-anchoring or seal replacement.
Explore weather seal options in interlocking thermal barrier gaskets and water-rated weep channels.
Threshold Fastening Engineering Comparison
Use this reference table to calculate exact physical dimensions, ratios, and specifications before purchasing:
| Fastening System | Visible Fasteners | Tensile Pullout Load | Vandal Resistance | Dirt Accumulation | Installation Complexity |
|---|---|---|---|---|---|
| Concealed Channel with Snap-In Spline | Zero (Completely Invisible) | 36 kN (Continuous Grade 316) | Exceptional (Tamper-Proof) | Zero (Continuous Smooth Profile) | Moderate-High (Requires Precision) |
| Exposed Countersunk Screws | 8 to 12 Visible Screw Heads | 18 kN (Limited by Countersink) | Low (Easily Unscrewed) | High (Traps Dirt in Sockets) | Low (Standard Installation) |
| Direct Polyurethane Adhesive Only | Zero | 8 kN (Adhesive Bond Only) | Moderate | Zero | Low (Prone to Creep Under Heat) |
| Through-Bolted with Threaded Studs | Visible Nuts or Stud Tops | 45 kN (Monolithic) | High | Moderate | High (Requires Access Below Slab) |
Practical Constraints
Every successful decoration project must account for physical and environmental constraints:
Concrete Slab Rebar and Conduit Avoidance
Drilling 50mm deep anchor holes into an entrance slab risks severing radiant heating loops, security access conduits, or post-tensioned structural cables. The slab must be scanned with ground-penetrating radar (GPR) prior to hammer drilling to map safe fastener coordinates.
Spline Removal Without Bending the Brass Profile
Attempting to pry up a snap-in brass spline with a screwdriver will gouge the soft brass and warp the extrusion beyond salvage. Technicians must use specialized suction lifters or slide-hammer hooks engaged in the engineered end-relief notches.
Execution Blueprint & Craftsmanship Sequence
Execute this professional sequence to achieve flawless results without backtracking:
Slab GPR Scanning & Anchor Layout
Scan the concrete threshold rebate with GPR to locate embedded rebar and conduits. Mark anchor hole centers at 300mm intervals along the threshold center line, avoiding obstructions.
Precision Hammer Drilling & Hole Evacuation
Drill 10mm diameter holes to a depth of 65mm using a carbide-tipped rotary hammer drill. Vacuum all concrete dust from the holes using a high-efficiency particulate air (HEPA) vacuum with a narrow crevice tube.
Membrane Placement & Sub-Base Anchor Torquing
Lay a 1.5mm continuous EPDM rubber membrane along the rebate. Seat the brass base channel over the holes and drive 316 stainless steel wedge anchors. Torque each anchor to 25 N·m.
Acoustic Core Insertion & Spline Press-Fitting
Lay a continuous neoprene damping cord inside the anchor channel over the torqued bolt heads. Align the solid brass fluted cover spline over the channel. Tap the spline home using a dead-blow mallet over a hardwood caulking block until the barbed teeth fully engage.
Final Edge Sealing & Wax Polishing
Inject color-matched neutral-cure silicone sealant along the outer perimeter bevels against the flooring. Clean the finished brass surface with solvent and buff with microcrystalline paste wax.
Common Mistakes & Countermeasures
Avoid these costly errors that compromise aesthetics, ergonomics, and budget:
Hammering the Brass Spline Directly with a Steel Hammer
Failing to Evacuate Concrete Dust from Anchor Holes
Project Execution Checklist
Track your physical progress. Checkboxes persist automatically on this device:
Frequently Asked Questions
How do you service or replace the anchors if the spline is permanently snapped in?
The spline is engineered with an extraction relief notch at each jamb end. By inserting a specialized bronze removal tool into this notch, maintenance technicians can lever the end upward and unzip the barbed spline from the channel without bending the profile.
Can concealed screw brass thresholds be used over wood framing subfloors?
Yes. Instead of concrete expansion anchors, the concealed channel accepts heavy-gauge Grade 316 stainless steel timber lags or structural Spax screws driven into double-layered subfloor blocking.


