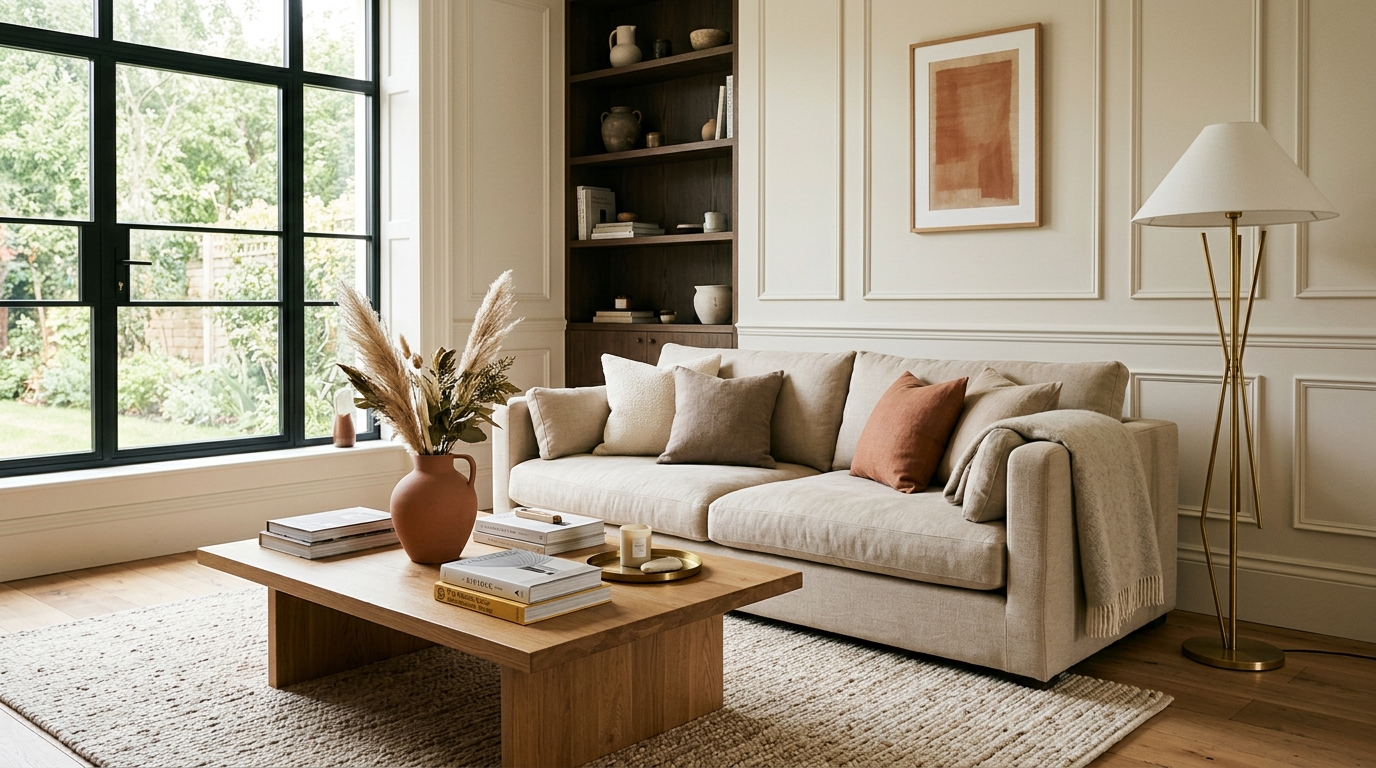
To decorate a living room wall, follow the 57-inch museum rule (center of artwork 57–60 inches from the floor) or the 2/3 furniture rule (art width spanning 60% to 75% of sofa width, with a 6 to 8-inch gap above the sofa back). Choose between one large statement canvas, a symmetrical gallery grid (2–3" spacing), picture rail molding, or vertical wood slat paneling.
At a Glance: Key Takeaways
- Hang standalone wall art with its vertical center exactly 57–60 inches from the finished floor level.
- Scale artwork above sofas or consoles to 60%–75% (two-thirds) of the furniture's total width.
- Maintain a tight 6 to 8-inch gap between the bottom of the frame and the top of the sofa back.
- Maintain uniform 2 to 3-inch spacing between all frames in a gallery wall grid.
1. The 57-Inch Museum Standard & The 2/3 Width Rule
Wall decoration fails when proportions are ignored. Two mathematical formulas used by curators eliminate guesswork:
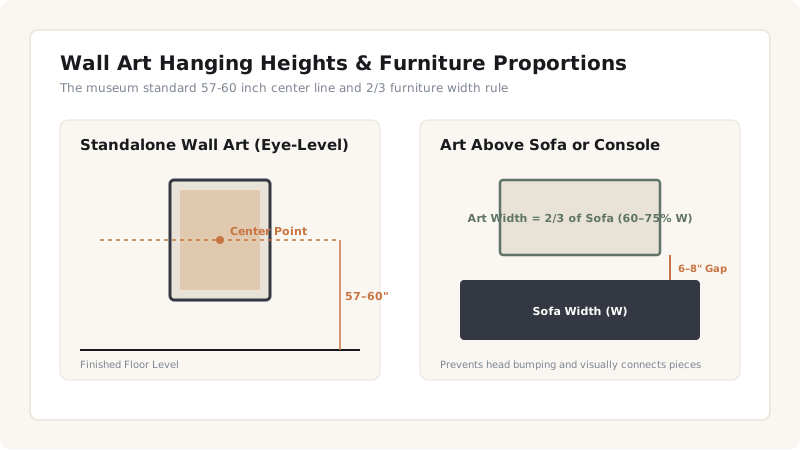
- The 57-Inch Museum Centerline: On an open, standalone wall, the vertical midpoint of your artwork (single piece or gallery grouping) should be exactly 57 to 60 inches from the finished floor level. This represents average human standing eye level.
- The 2/3 Furniture Proportion: When hanging art above a sofa, credenza, or mantle, the art must span 60% to 75% (two-thirds) of the furniture's width. A 30-inch frame above an 84-inch sofa looks stranded and undersized; choose a 54 to 60-inch wide piece (or pair of 28-inch frames).
- The 6–8 Inch Gap: Leave strictly 6 to 8 inches (15 to 20 cm) between the bottom of the frame and the top edge of the sofa back. This creates a visually unified composition and prevents occupants' heads from hitting the frame when leaning back.
2. Gallery Wall Layouts: Symmetrical Grid vs. Organic Salon
Depending on your personal style, choose between two distinct gallery methodologies:
- The Symmetrical Grid (Clean & Architectural): Use identical frames and matboards (e.g., 6 or 9 matching 16x20 inch black or brass frames) arranged in a precise grid with strictly 2 to 3 inches of spacing between all frames. Ideal for black-and-white architectural photography or botanical prints.
- The Organic Salon Hang (Eclectic & Dynamic): Mix varying frame sizes, wood patinas, and art mediums. Start by placing the largest anchor piece slightly off-center at eye level, then spiral smaller pieces outward, maintaining consistent 2 to 3-inch margins between adjacent frames.
- The Kraft Paper Template Method: Trace every frame onto brown kraft paper, cut out the templates, and tape them to the wall with painter's tape to perfect the layout before hammering a single nail.
3. Architectural Molding, Picture Ledges & Lighting
Beyond framed prints, architectural wall treatments add permanent tactile luxury:
- Picture Frame Wall Molding (Box Wainscoting): Apply lightweight polyurethane or wood trim molding in rectangular boxes on drywall, painted in the same color as the wall. This gives flat drywall custom classical elegance.
- Floating Picture Ledges: Install shallow 3.5-inch deep picture ledges overlapping each other. Layer framed art, vintage mirrors, and ceramic plates loosely on the ledge, allowing you to swap art seasonally without drilling new holes.
- Picture Lights: Crown your main wall art with a brass or matte black 2700K LED picture light (CRI >95) mounted 6 inches above the frame.
Living Room Wall Decor Strategy Guide
Use this reference table to calculate exact physical dimensions, ratios, and specifications before purchasing:
| Wall Treatment | Best Wall Size | Visual Character | Installation Effort | Flexibility |
|---|---|---|---|---|
| Single Oversized Canvas (40x60") | Medium-Large walls | Clean, dramatic, gallery luxury | Low (1-2 hangers) | High |
| Symmetrical 6-Frame Grid | Above 84" sofas | Formal, structured, architectural | Medium (Laser level required) | Medium |
| Picture Frame Wall Molding | Entire living room perimeter | Bespoke, timeless, high-end | High (Miter saw & nail gun) | Permanent |
| Floating Picture Ledges | Long narrow walls | Casual, layered, ever-changing | Low-Medium (Level & studs) | Maximum (Zero new holes) |
| Vertical Wood Slat Paneling | Behind TV or media credenza | Acoustic damping & organic warmth | Moderate (Adhesive & pins) | Semi-Permanent |
Wall Decoration Constraints
Every successful decoration project must account for physical and environmental constraints:
Heavy Art Drywall Anchors
Frames over 15 lbs require heavy-duty metal toggle bolts or direct wood stud anchoring; never use plastic expansion plugs in hollow drywall for heavy glass frames.
Direct Sunlight UV Damage
Do not hang valuable original watercolors or fine art photographs on walls receiving direct south-facing sunlight; use UV-filtering museum acrylic glass to prevent fading.
Vibrating Shared Walls
In apartment buildings with shared party walls, place rubber bumper pads on the back lower corners of all frames to prevent rattling when neighboring doors close.
10-Step Wall Art Hanging Blueprint
Execute this professional sequence to achieve flawless results without backtracking:
Measure Furniture and Wall Widths
Calculate total sofa width and determine the 60%–75% ideal art span width.
Calculate 57-Inch Eye-Level Centerline
Measure 57 inches up from the floor to locate the vertical center of the arrangement.
Trace Frames onto Kraft Paper Templates
Cut paper templates for every frame and mark wire/hanger locations on the paper.
Tape Templates to Wall with Painter's Tape
Arrange paper templates on the wall, testing spacing (2–3 inches between frames).
Verify 6–8 Inch Gap Above Sofa
Ensure the bottom edge of lowest templates sits 6 to 8 inches above the sofa back.
Check Horizontal Alignment with a Laser Level
Use a laser level or torpedo level to ensure crisp, straight horizontal rows.
Hammer Picture Nails Directly Through Templates
Drive nails through the pre-marked template points directly into the wall.
Tear Away Paper and Hang Frames
Remove paper templates and mount frames securely on the hardware.
Attach Rubber Bumpers to Frame Corners
Stick clear silicone bumpers on lower back corners to keep frames level and protect paint.
Install Over-Art 2700K Picture Lighting
Add a dedicated picture light above the central frame for evening focal drama.
Common Mistakes & Countermeasures
Avoid these costly errors that compromise aesthetics, ergonomics, and budget:
The 'Floating Stamp' (Tiny Frame on Massive Wall)
Hanging Art Too Close to the Ceiling
Inconsistent Gaps in Gallery Walls
Project Execution Checklist
Track your physical progress. Checkboxes persist automatically on this device:
Frequently Asked Questions
How high should I hang art above a fireplace mantle?
Hang artwork 4 to 6 inches above the fireplace mantle. The width of the frame should be approximately two-thirds the width of the mantle shelf.
Should all frames in a gallery wall match?
For a formal, symmetrical grid, matching frames and identical matboards create an elegant architectural feel. For an eclectic salon hang, mixing 2 to 3 complementary frame finishes (e.g., black wood, antique brass, and natural oak) adds curated character.
How do I make cheap art prints look like expensive gallery pieces?
Place prints inside oversized frames with custom 3 to 4-inch wide archival white matboards, and choose non-glare museum acrylic glass.