
Install fluted tambour wood surfacing by bonding individual solid wood or engineered MDF slats (1/2" to 3/4" half-round or flat-ribbed profiles) to a heavy woven fabric or PET acoustic felt backing sheet. Wrap seamlessly around tight-radius curved walls (down to a 4" radius) using high-tack elastomeric contact adhesive.
At a Glance: Key Takeaways
- Flexible Canvas / PET Acoustic Backing: Allows rigid hardwood slats to bend effortlessly around curved architectural features.
- Half-Round & Flat-Rib Profiles (1/2" to 3/4"): Half-round convex slats scatter ambient acoustic reflections and cast soft shadows.
- Wrapping Tight 4" (100mm) Radii: Seamlessly wraps cylindrical structural columns, curved kitchen islands, and arched banquettes.
- Acoustic NRC Rating (0.75+ with PET Felt): Dampens harsh flutter echoes in high-ceiling modern open-concept rooms.
- High-Tack Hybrid Polymer Adhesive: Instantly grabs curved drywall without mechanical screws or unsightly surface nail holes.
In-Depth Guides in this Directory
Explore specialized subtopic blueprints, technical dimensions, and execution checklists:
Tambour Profiles: Solid Hardwood vs Engineered MDF
Master fluted tambour wood slat engineering: solid American white oak vs real wood veneered MDF slats, half-round vs flat-rib geometry, dimensional stability, and finishing durability.
Curved Tambour: Tight 4" Radii & Column Cladding
Master flexible wood tambour installation: calculating minimum bending radii (down to 4"), wrapping structural cylindrical columns, cladding curved kitchen islands, and strap clamping.
Tambour Orientations: Vertical vs Horizontal Accent Walls
Master fluted tambour wall orientation architecture: vertical slats (height elongation) vs horizontal slats (width expansion), shadow reveal lighting, and J-trim transitions.
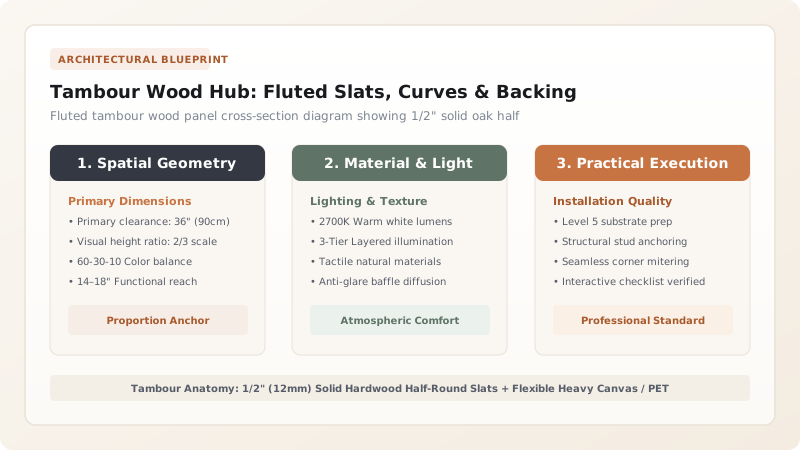
1. Architectural Profiles: Solid Hardwood vs PET Acoustic Felt Backings
Modern contemporary architecture embraces Fluted Tambour Wood Surfacing to soften boxy, sterile drywall rooms with rhythmic organic texture and tactile warmth.
While traditional tambour used cloth backing for roll-top desks, modern architectural tambour mounts solid white oak or walnut slats to 9mm Recycled PET Acoustic Felt (NRC 0.80). This converts accent walls into powerful sound-dampening acoustic absorption panels. Compare profiles in solid vs engineered tambour slat profiles and explore warm minimalist styling.

2. Wrapping Tight Curves & Scribing Vertical Accent Walls
The greatest advantage of tambour is its ability to wrap continuous, fluid curves where standard plywood and drywall cannot bend.
Installers clad Curved Kitchen Island Peninsulas and Round Concrete Columns (down to a 4" / 100mm radius) by applying spray contact adhesive or hybrid polymer troweled adhesive. Review bending limits in wrapping tight radius columns and contrast with horizontal vs vertical tambour layouts.
Tambour Slat Profiles & Material Types
Use this reference table to calculate exact physical dimensions, ratios, and specifications before purchasing:
| Tambour Slat Profile | Slat Width & Thickness | Minimum Bending Radius | Acoustic NRC Rating |
|---|---|---|---|
| Solid White Oak Half-Round (Optimal) | 1/2" Wide × 1/4" Thick (Canvas) | 4.0 Inches (100mm) | NRC 0.45 (Diffusion) |
| Acoustic Felt Flat-Rib Slat | 1.0" Wide × 1/2" Thick (PET Felt) | 8.0 Inches (200mm) | NRC 0.85 (High Absorption) |
| Engineered Walnut Triangle Slat | 3/4" Wide × 3/8" Thick | 5.0 Inches (125mm) | NRC 0.50 (Geometric) |
| Raw MDF Paintable Slat | 1/2" Wide × 3/8" Thick | 3.5 Inches (90mm) | NRC 0.40 (Custom paint) |
Adhesive Telegraphing Seam Gapping Constraints
Every successful decoration project must account for physical and environmental constraints:
Tambour Slats Splaying Open Around Curves Exposing Ugly White Backing Fabric
Bending tambour around tight curves stretches the canvas backing, exposing the white fabric between slats; specify black-dyed woven canvas or black PET acoustic felt backing so open gaps look like clean, dark architectural shadow lines.
How to Install Fluted Tambour Wall Panels
Execute this professional sequence to achieve flawless results without backtracking:
Prep and Prime Substrate with Black Primer
Paint the substrate wall with matte black primer so background drywall remains invisible between slats.
Measure and Cut Tambour Sheets to Height
Cut tambour sheets with fine-tooth 80-tooth crosscut blade on a tracksaw taped with blue painter's tape.
Apply Hybrid Polymer Adhesive to Wall
Trowel Wakol MS 260 or Liquid Nails Fuze-It adhesive over wall with a 3/16" V-notched trowel.
Press Tambour Sheet and Roll with J-Roller
Hang tambour sheet plumb, pressing firmly into adhesive bed using a rubber J-roller to eliminate air pockets.
Interlock Slat Seams Between Sheets
Overlap the hidden canvas lip of adjacent sheets to create a seamless, continuous ribbed wall.
Install Top and Bottom Scribing Trim
Cap top with matching solid hardwood J-trim or recessed shadow reveal bead.
Common Mistakes & Countermeasures
Avoid these costly errors that compromise aesthetics, ergonomics, and budget:
Cutting Tambour Across Slats with a Coarse Hand Saw
Project Execution Checklist
Track your physical progress. Checkboxes persist automatically on this device:
Frequently Asked Questions
Can fluted tambour panels be stained or painted after installation?
Yes! Raw unfinished oak and walnut tambour sheets can be stained, whitewashed, or coated in hardwax oil. Pre-finished polyurethane sheets are also available for rapid installation.


