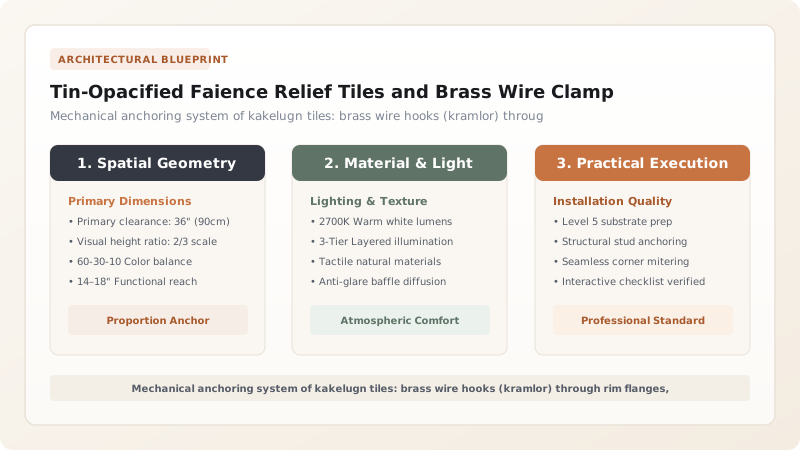
Tin-opacified faience relief tiles (kakel) and brass wire clamp anchoring form the exterior thermal skin of the Swedish kakelugn. Crafted with hollow-backed rims packed with clay and ceramic shards, tiles are linked horizontally and vertically using hand-bent wire loops (kramlor). This floating, non-rigid assembly absorbs severe internal thermal expansion without cracking delicate ceramic glazes.
At a Glance: Key Takeaways
- Ceramic Body: Porous buff/red earthenware clay pressed in carved plaster molds
- Glaze Chemistry: Tin-opacified stanniferous faience glaze (8–10% SnO2) over lead/boron frit
- Reverse Architecture: Hollow box rim (Kakelram) forming a 30–45 mm packing cavity
- Wire Clamps: 1.0–1.2 mm annealed brass or soft iron wire hooks (Kramlor) and pins (Dubb)
- Cavity Packing Matrix: Fat potter’s clay, fine sand, and crushed bisque tile shards (Skärvor)
The Ceramic Envelope: Rörstrand, Marieberg, and Faience Mastery
The visual majesty of the Swedish kakelugn was made possible by the golden age of Swedish ceramic manufacture. In the 18th century, royal porcelain manufactories such as Rörstrand (founded in 1726) and Marieberg (founded in 1758) competed fiercely to produce the finest stanniferous earthenware tiles (kakel) for royal palaces and aristocratic manors across Scandinavia.
Crafted from fine-grained alluvial clays, these tiles were not flat architectural plaques; they were complex three-dimensional sculptures. Master craftsmen pressed damp clay into carved plaster of Paris molds, reproducing the delicate ornamental language of the era: fluted classical columns, scrolling acanthus frills, draped laurel wreaths, and crowned medallions. After a low-temperature bisque firing, tiles were coated in a rich tin-opacified glaze formulated from borosilicate fluxes and eight to ten percent pure stannic oxide (SnO₂). When fired to 1020°C, the glaze melted into an immaculate, milky-white enamel that resisted thermal shock, reflecting candlelight with a luminous porcelain glow.
Rear Architecture: The Box Rim and the Thermal Chamber
Examining the reverse side of a historic kakelugn tile reveals a structural architecture invisible to the casual admirer. Rather than having a flat back, each tile is cast with a continuous, prominent perimeter flange known as the Kakelram (tile box rim), projecting thirty to forty-five millimeters backward from the tile face.
This hollow box design serves a vital thermodynamic purpose. When building the stove, the master stove-maker (kakelugnsmakare) does not leave this cavity empty; nor does he fill it with rigid modern cement. Instead, the hollow is meticulously packed with a dense paste of wet fat potter’s clay, fine quartz sand, and crushed pieces of broken bisque tiles, celebrated in Swedish craft tradition as skärvor. The ceramic shards absorb the moisture of the clay, eliminating evaporative shrinkage and creating a dense, monolithic brick of thermal mass bonded directly to the back of the tile face.
Wire Kramlor: The Science of Floating Tension
The most ingenious mechanical innovation of the kakelugn tile system is its method of assembly. How does one build a three-meter-tall ceramic tower that undergoes violent internal thermal expansion without using a single metal screw or rigid mortar joint? The answer lies in Kramlor—hand-bent wire clamps.
While the clay tiles were still leather-hard before firing, the potter pierced small lateral holes through the side flanges of the box rims. During stove assembly, the stove-maker used soft-annealed brass or mild iron wire, bending the ends with round-nosed pliers into opposing hooks. These wire clamps were inserted through the holes of adjacent tiles, linking them horizontally into a continuous ring. Additional wire ties were looped around vertical iron pins (*dubb*) anchored into the masonry core. By twisting the wires with pliers, the artisan drew the tiles into perfect planar tension. This floating wire skeleton holds the ceramic skin securely in place while allowing every individual tile to flex, shift, and expand imperceptibly as the stove heats up, completely preventing stress fractures in the brittle ceramic glaze.
Thermal Decoupling: Protecting the Exterior Skin
Crucially, the exterior tile skin of a kakelugn is never rigidly bonded to the internal firebrick flues. A master kakelugnsmakare maintains an intentional structural decoupling zone—a narrow buffer space filled with dry sand or loose clay—between the fiery core and the decorative ceramic envelope.
When a roaring fire burns in the hearth, the internal firebrick flues can expand by several millimeters, reaching temperatures that would instantly craze and ruin fine faience enamel. Because the tile skin is decoupled and held by flexible wire clamps, this intense internal expansion is absorbed safely without exerting mechanical outward pressure on the exterior tiles. The heat travels slowly through the masonry via gentle conduction, warming the packed clay and tile shards over several hours. The outer ceramic skin never exceeds a safe, gentle 50°C—hot enough to heat a cavernous room for a full day, yet safe to the human touch.
Kakelugn Tile Formats, Glaze Types & Wire Hardware Specifications
Use this reference table to calculate exact physical dimensions, ratios, and specifications before purchasing:
| Tile Typology | Dimensions & Geometry | Glaze / Decorative Style | Wire Hardware Spec | Stove Position |
|---|---|---|---|---|
| Drum Field Tile (Slätt kakel) | 220 x 280 mm curved convex | Milky white or Gustavian pearl grey | Dual horizontal brass kramlor | Main cylindrical stove barrel |
| Cornice Crown Tile (Gesims) | Complex molded projecting ogee | Acanthus leaves and egg-and-dart relief | Heavy vertical tie-back wire to flue | Top architectural crowning cornice |
| Base Plinth Tile (Fotkakel) | Reinforced 300 mm straight slab | High-impact chip-resistant enamel | Double wire ties anchored to hearth plinth | Ground-level base plinth |
| Chinoiserie Painted Tile | Rectangular 200 x 250 mm flat | Hand-painted in-glaze cobalt blue landscapes | Fine brass wire hooks with clay packing | Central decorative parlor viewing panel |
Practical Constraints
Every successful decoration project must account for physical and environmental constraints:
High Thermal Expansion Differential Between Firebrick Core and Tile Skin
Internal firebricks reach 400°C while exterior tiles reach 50°C, causing severe differential expansion. Mitigation: Leave an unbonded 15 mm air gap between internal flues and tile packing, bridged only by wire ties.
Clay Mortar Shrinkage and Cavity Voids during Dehydration
Drying clay shrinks, leaving hollow voids behind tiles that reduce radiant heat conductivity. Mitigation: Incorporate 40% crushed fired bisque shards (skärvor) into clay packing to eliminate shrinkage.
Execution Blueprint & Craftsmanship Sequence
Execute this professional sequence to achieve flawless results without backtracking:
Mold Pressing and Rim Flange Forming
Press pugged earthenware clay into two-part plaster molds, forming the decorative relief front and raised 40 mm rear perimeter rim flanges.
Pin Hole Piercing and Leather-Hard Dressing
Pierce 4 mm lateral holes through opposing flanges with a brass needle while leather-hard, sponging rim edges smooth before slow drying.
Double Firing and Tin Glost Application
Bisque fire tiles to 980°C, dip in tin-opacified glaze slurry, and fire to 1020°C to achieve a lustrous, crazing-resistant white enamel.
Fabricating the Brass Kramla Clamps
Cut 1.2 mm annealed brass wire into 100 mm lengths, bending both ends into opposing sharp 90-degree hooks with round-nose pliers.
Dry Course Setting and Radius Registration
Assemble a full circular course of tiles on the stove base, using wooden shims to verify true cylindrical curvature and horizontal level.
Wire Clamp Hooking and Tensioning
Insert brass kramla hooks through mating holes in adjacent tile flanges, twisting the central wire loop with pliers to draw tiles into snug alignment.
Cavity Packing with Clay and Skärvor Shards
Trowel wet fat clay mortar into the hollow back of each tile, embedding broken earthenware shards until the cavity is packed solid.
Joint Pointing and Surface Burnishing
Point external tile seams with fine white whiting-lime putty, wiping tiles clean with damp cloth to reveal pristine white ceramic faces.
Common Mistakes & Countermeasures
Avoid these costly errors that compromise aesthetics, ergonomics, and budget:
Filling hollow tile backs with rigid Portland cement or gypsum plaster
Using stiff, brittle un-annealed wire for kramla clamps
Setting tiles with zero expansion gap between adjacent ceramic glaze edges
Project Execution Checklist
Track your physical progress. Checkboxes persist automatically on this device:
Frequently Asked Questions
Why do Swedish kakel tiles have a raised box rim on the reverse side?
The raised box rim (kakelram) creates a three-dimensional chamber on the rear of each tile. By packing this void with clay mortar and broken ceramic shards (skärvor), the master stove-maker creates a heavy, heat-retaining thermal block behind each tile. This ensures that the delicate glazed tile is supported by a solid mass that stores warmth and slowly conducts it outward.
What are "kramlor" and how do they function in stove building?
"Kramlor" are hand-bent wire clamps crafted from soft annealed brass or iron. They hook into pre-drilled holes in the ceramic rims of adjacent tiles, tying the tiles together horizontally and linking them back into the internal masonry core. Because the wire can flex slightly under thermal stress, it allows the stove to expand when hot and contract when cool without cracking the tiles.
Why is broken ceramic (skärvor) added to the clay backing?
Pure clay mortar shrinks by 5% to 8% as its water evaporates, which would cause the backing to pull away from the tile face. Fired ceramic shards have already undergone firing shrinkage and are dimensionally inert. Adding shards to the clay eliminates shrinkage, prevents voids, and matches the thermal expansion of the tile itself.